
Incorrect fuel injection timing can significantly impact the performance of your Perkins 800 series industry engine. It is crucial to ensure that the fuel injection timing is accurate for optimal engine function. In this article, we will guide you through the steps to check and adjust the fuel injection timing for your Perkins 800 series engine.
Before we begin, please note that the fuel injection timing values may vary depending on the specific model and power output of your engine. Refer to the manufacturer’s specifications or consult a professional if you are unsure about the correct timing values for your engine.
Related Contents:
Perkins EST 2023A & 2022A & 2019A Software Free Download
Perkins SPI2 2018A EPC+Service Manual Free Download
Perkins Communication Adapter 3
Here is a step-by-step guide to checking the fuel injection timing:
Fuel injection timing (55 kW) ……………………. 3° BTC
Fuel injection timing (62 kW) ……………………. 6° BTC
Fuel injection timing (69 kW) ……………………. 5° BTC
1.Remove the valve mechanism cover. Rotate the crankshaft in the normal direction of the engine until the inlet valve of the No. 4 cylinder has just opened and the exhaust valve of the No. 4 cylinder has not completely closed.
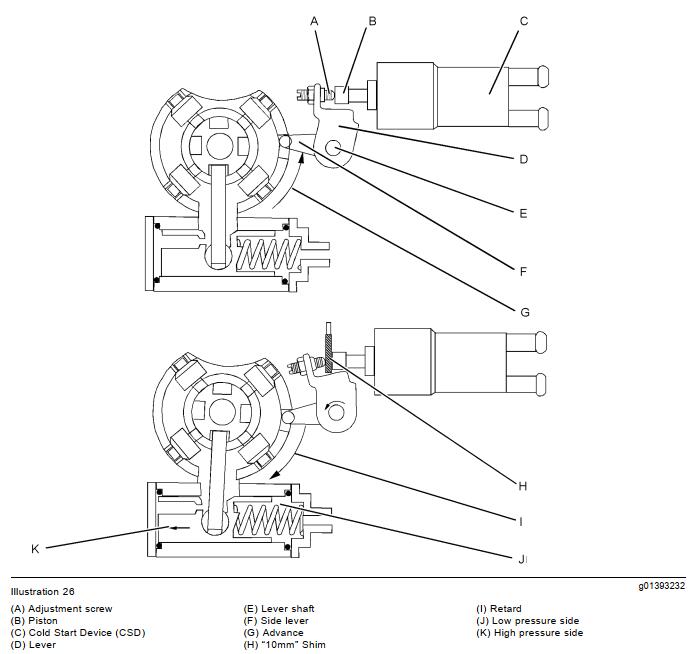
2.The 62 kW engine is installed with a Water Cold Start Device (CSD). In order to ensure that the fuel injection pump timing is correct, follow the procedure below. See 2.a and 2.b.
a.Install a 10 mm shim (H) between the Lever shaft (A) and the piston (B) on the CSD (C).
b.Time the fuel injection pump to 6° BTC.
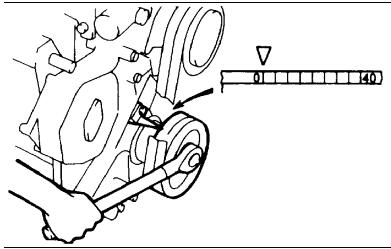
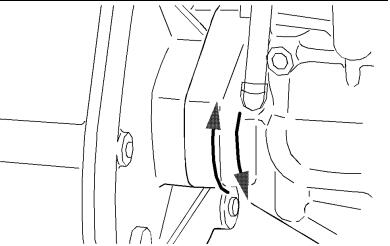
3.Align the TC mark on the crankshaft pulley with the pointer on the timing case.
4.Align the TC mark on the crankshaft pulley with the pointer on the timing case. This step ensures that the engine is in the correct position for measuring the fuel injection timing.
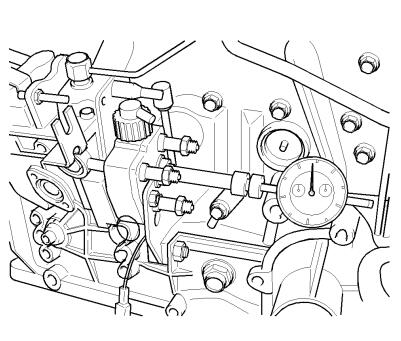
5.Rotate the crankshaft in the opposite direction of the engine until the reading on the dial gauge stabilizes at the bottom of the lift of the plunger in the pump. Set the dial indicator to zero.
6.Rotate the crankshaft in the opposite direction of the engine until the dial gauge stabilizes at the bottom of the lift of the plunger in the pump. Set the dial indicator to zero at this position.
7.Rotate the crankshaft in the normal direction of the engine until the specified timing mark (e.g., 3° or 6°) on the crankshaft pulley aligns with the pointer on the timing case.
8.To adjust the timing of the fuel injection pump,loosen the flange nuts and move the pump in order to achieve a reading of 0.5 mm (0.0197 inch).
9.With the cam lift at 0.5 mm (0.0197 inch), secure the pump in position.
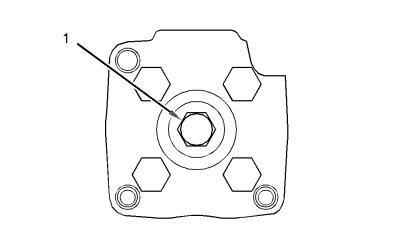
10.Remove the tooling from the rear of the fuel injection pump. Install the plug (1) into the rear of the fuel injection pump and tighten to 1.4 to 2.0 N·m (12.3910 to 17.7015 lb in).
11.Install the valve mechanism cover.
12. Finally, reinstall the valve mechanism cover and eliminate any air from the fuel system.
By following these steps, you can accurately check and adjust the fuel injection timing for your Perkins 800 series engine. It is essential to maintain the correct timing for optimal engine performance and efficiency. If you encounter any difficulties or are unsure about the process, it is recommended to seek assistance from a professional or refer to the manufacturer’s guidelines.
More trouble repair case for Perkins,pls refer to:Perkins Trouble Repair
Leave a Reply