
This is an instruction on how to program 2015-2020 Ford Lincoln all keys lost alarm active situations with Xtool X100 Pad3.
Tools You Need
XTOOL X100 PAD3(X100 PAD ELITE)
Main cable & OBD2-16 connector
Ford AKL Alarm Bypass Cable
Wi-Fi connection
How to Connect?
1. Connect the main cable (with OBD2 connector plugged) to the female OBD2 socket of the Ford cable, and connect the tablet(or VCI box, if it has one) to the other side of the main cable.
2. Connect the male OBD2 socket of the Ford cable to the OBD port of the vehicle.
3. Take the battery clip off from the car’s battery and connect the 2 battery clips(with the “Battery +/-” tag on it) to the battery.
4. There is also a battery clip(red cable with “Battery Clip +” tag on it) on the cable. Connect it to the positive battery clip on the car.
How It Works?
Ford AKL Alarm Bypass Cable can:
1. Allows you to perform Ford smart key all keys lost via XTOOL devices with a VCI box(H6Pros, A80Pros, X100MAXs, etc.)
2. Optimize the process on Ford smart key all keys lost via XTOOL devices without a VCI box(X100 PAD series, H6 Elites, D7/D8, etc.)
3. Controls vehicle battery on/off with a switch on your hand and save your time from the repeating battery reconnecting process.
Operation Process
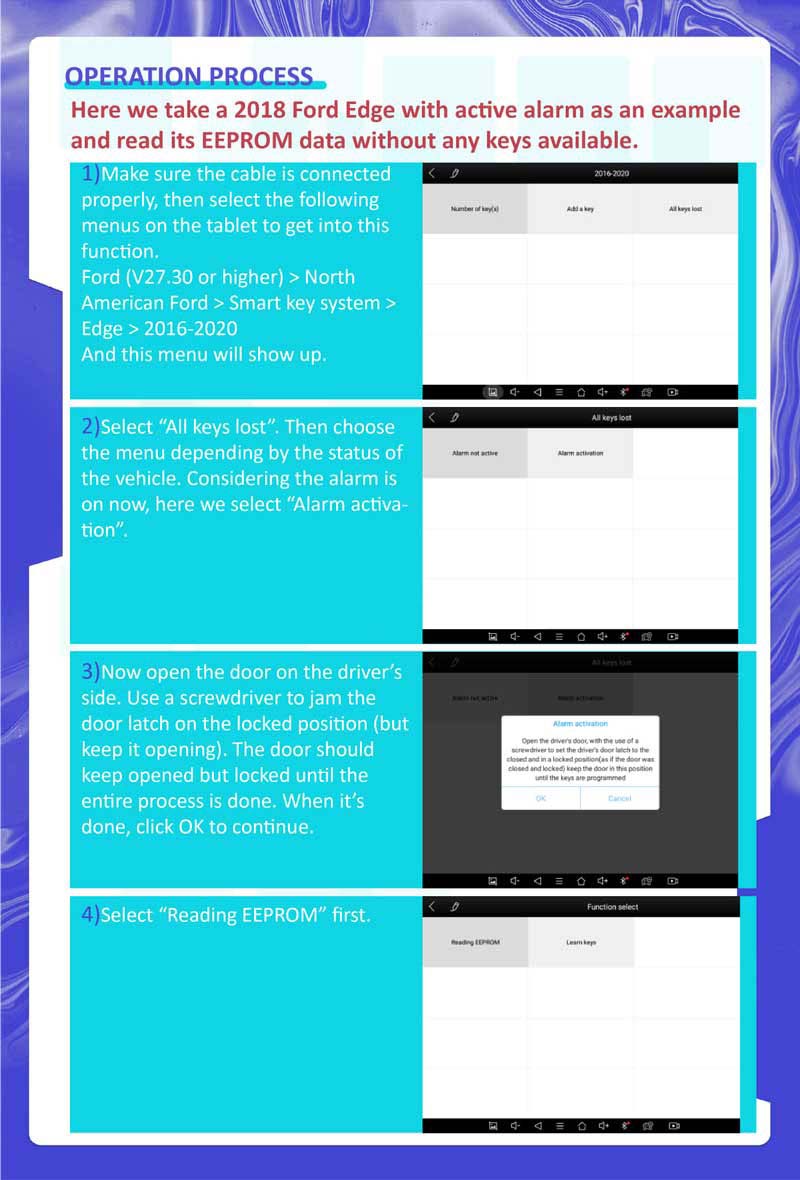
Here we take a 2018 Ford Edge with active alarm as an example and read its EEPROM data without any keys available.
1. Make sure the cable is connected properly, then select the following menus on the tablet to get into this function.
Ford (V27.30 or higher) > North American Ford > Smart key system > Edge > 2016-2020
And this menu will show up.
2. Select “All keys lost”. Then choose the menu depending by the status of the vehicle. Considering the alarm is on now, here we select “Alarm activation”.
3. Now open the door on the driver’s side. Use a screwdriver to jam the door latch on the locked position(but keep it opening). The door should keep opened but locked until the entire process is done. When it’s done, click “OK” to continue.
4. Select “Reading EEPROM” first.
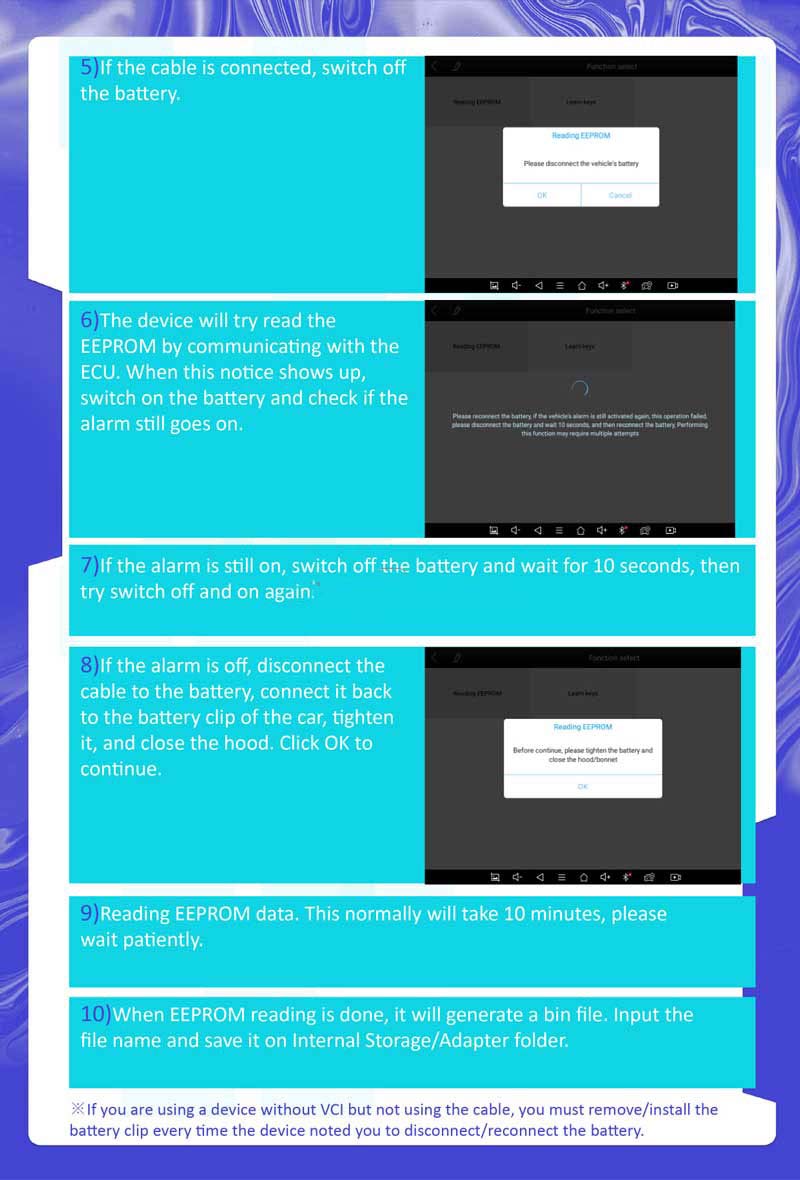
5. If the cable is connected, switch off the battery.
6. The device will try to read the EEPROM by communicating with the ECU. When this notice shows up, switch on the battery and check it the alarm still goes on.
7. If the alarm is still on, switch off the battery and wait for 10s, then try switching off and on again.
8. If the alarm is off, disconnect the cable to the battery, connect it back to the battery clip of the car, tighten it, and close the hood. Click “OK” to continue.
9. Reading EEPROM data. This normally will take 10 minutes, please wait patiently.
10. When the EEPROM reading is done, it will generate a bin file. Input the file name and save it on the Internet Storage/ Adapter folder.
* if you’re using a device without VCI but not using the cable, you must remove/install the battery clip every time the device noted you to disconnect/ reconnect the battery.
More questions welcome to contact us.
Leave a Reply