
SERIES:CX8000 Elevation – CX7000 Elevation series – CX Harvest Suite Ultra Cab – CX8000 series Tier IV
MODELS AFFECTED:CX7.80,CX7.90,CX8.70,CX8.80,CX8.85,CX8.90,CX7080 Elevation,CX7090 Elevation,CX8070 Elevation,CX8080 Elevation,CX8090 Elevation,CX8040,CX8050,CX8070 , CX8080,CX8090
The information in the Service Bulletin will prevent the grain leakage from the front side of the grain pan on units that have a self-leveling cleaning shoe.
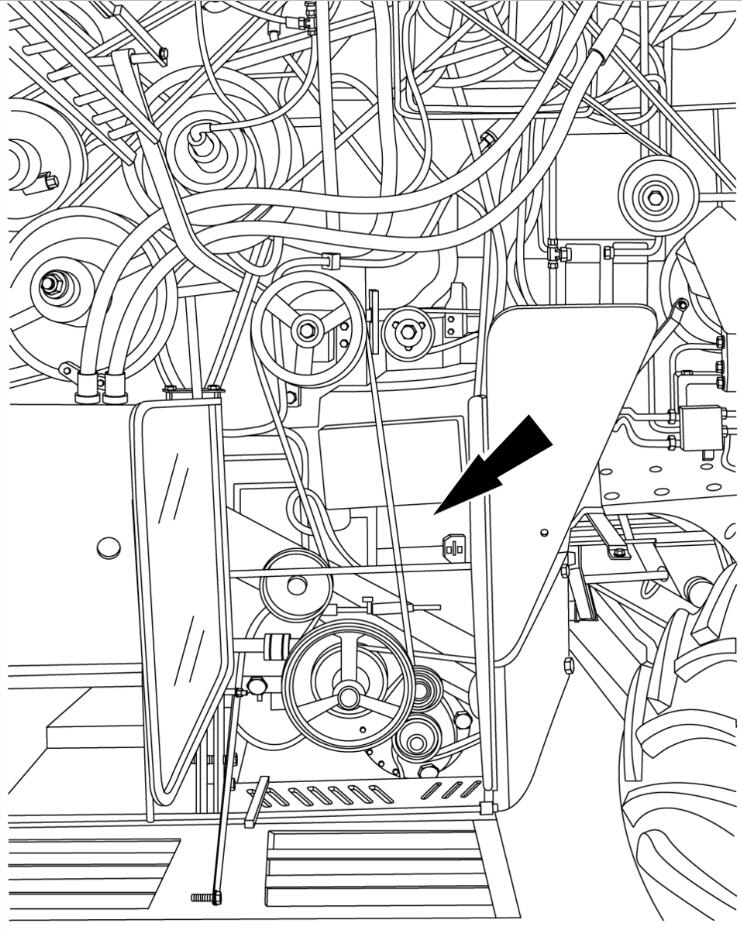
On some units, it is possible that NEW HOLLAND incorrectly adjusted the grain pan seal on the front side in the factory. As a result, grain leakage occurs from the front side of the grain pan. The grains leak onto the ground, the traction beam, and the top of the transmission.
Related Contents:
2023 CNH EST 9.8 9.2 New Holland Diagnostic Software Free Download
CNH DPA5 Diagnostic Kit
CNH eTimGo Offline
To correct the issue, you must:
Check the grain pan seal.
Correctly adjust the grain pan seal on the front side.
ACTION
PRODUCTION
The correct adjustment is effective from the product identification number: 1965 onwards.
SERVICE
Unit preparation
NOTE: The four reference points to the unit are the left-hand side, the right-hand side, the front of the unit, and the back of the unit. These reference points apply to someone that faces the direction of travel from a standing position that is behind the unit.
WARNING
Avoid injury!
Before you start any work on the unit, prepare the unit according to the following instructions.
Failure to comply could result in death or serious injury.
W1403B
Park the unit on a hard, level surface.
Apply the parking brake.
Completely lower the straw elevator.
Shut down the engine.
Remove the ignition key.
Secure the unit with wheel chocks.
Flip the battery disconnect switch to the OFF position.
Follow any specific instructions that pertain to the unit inside of the service instructions as necessary.
Service instruction
1.Open the stone strap and the pivot plate.
2.Clean the debris.
3.Turn the cleaning shoe manually until the grain pan is in the fully forward position.
4.Check the distance (a).
If the distance (a) is less than 2 mm (0.1 in), proceed to step 5.
If the distance (a) is more than 3 mm (0.12 in), proceed to step 8.
NOTE: The distance (a) is between the start of the curved section (1) on the front face of the grain pan and the tip (2) of the grain pan seal.
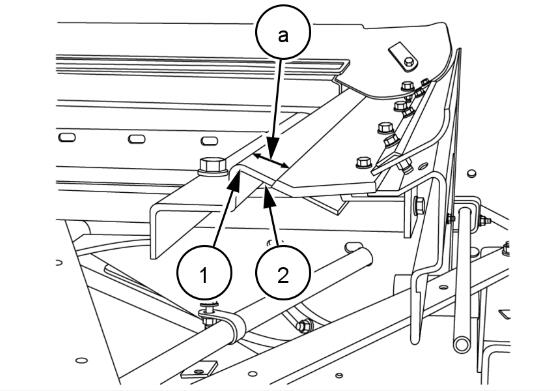
5.Loosen the bolts (3).
6.Slide the brackets forward until the distance (a) on both sides of the grain pan is 2 mm (0.1 in).
7.Tighten the bolts (3).
8.Turn the cleaning shoe manually until the grain pan is in the fully rearward position.

9.Check the distance (b).
NOTE: The distance (b) is between the tip (4) of the grain pan front face and the tip (5) of the grain pan seal.
10.If the overlap (b) is more than 15 mm (0.6 in), the adjustment is correct. Proceed to step 15.
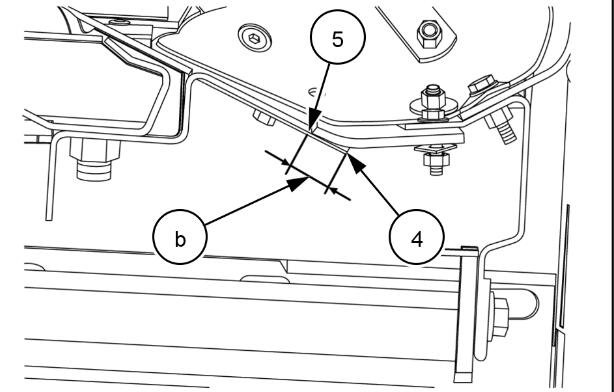
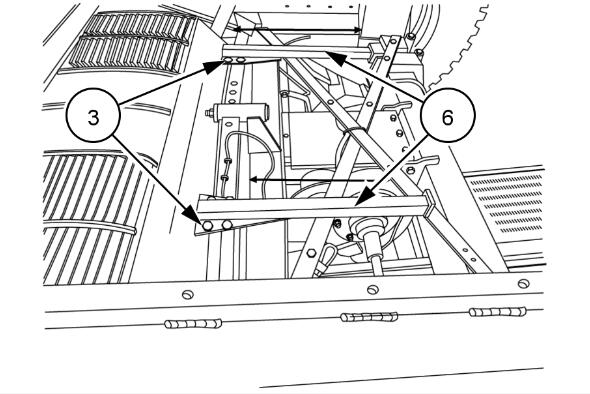
11.If the overlap (b) is less than 15 mm (0.6 in), loosen the bolts (3).
12.Slide both brackets (6) toward the rear until you reach a distance (b) of 15 mm (0.6 in) on both sides of the grain pan.
13.Tighten the bolts (3).
14.Return to step 5 to verify the distance (a).
15.Turn the cleaning shoe manually until the grain pan is in the fully rearward position.
16.Measure the distance (c).
NOTE: The distance (c) is between the tip (7) of the grain pan front face and the indicator on the location (8).
17.If the distance (c) is 18 +/- 1 mm (0.7 +/- 0.04 in), and equal on both sides of the grain pan, no further adjustment is necessary.
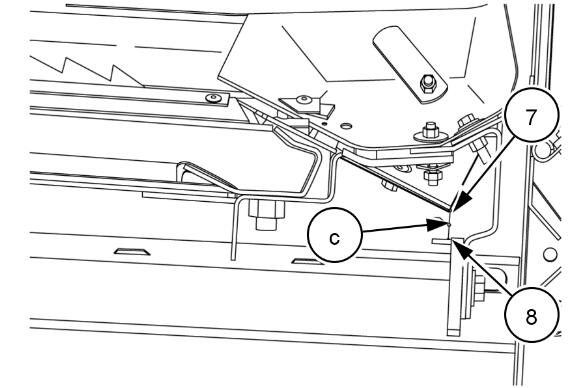
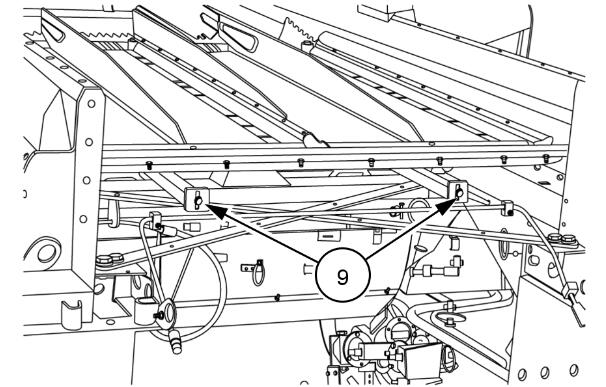
18.If the distance (c) is not equal to 18 +/- 1 mm (0.7 +/- 0.04 in), loosen the bolts (9).
19.Adjust the grain pan seal until the distance (c) is equal to 18 +/- 1 mm (0.7 +/- 0.04 in) on both sides of the grain pan.
20.Tighten the bolts (9).
More repair cases for New Holland machine,please refer to:New Holland Trouble Repair
Leave a Reply