
Mini VCI (Vehicle Communication Interface) and Techstream software are essential tools for diagnostics and programming in Toyota and Lexus vehicles. In this article, we will provide you with a step-by-step guide on how to install Mini VCI Techstream on Windows 10/11 64-bit.
Note: Before starting, make sure you have administrative privileges on your computer.
Mini J2534 VCI Cable Setup
Download Drivers:
Mini J2534 VCI Driver Here
https://mega.nz/file/hbsHGDiQ#f-NUMq1luM0V9t0bUE0MoYrys225RV7-v9QSW2-tNLI
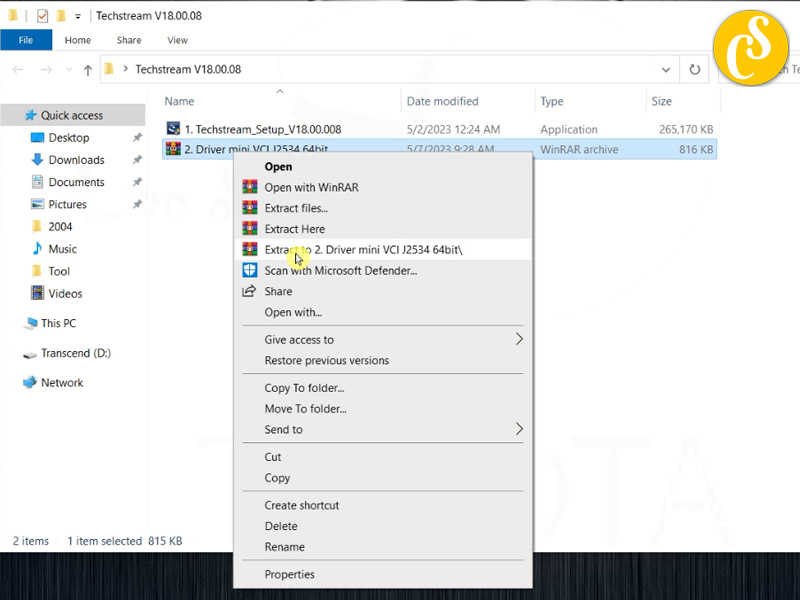
Extract Drivers:

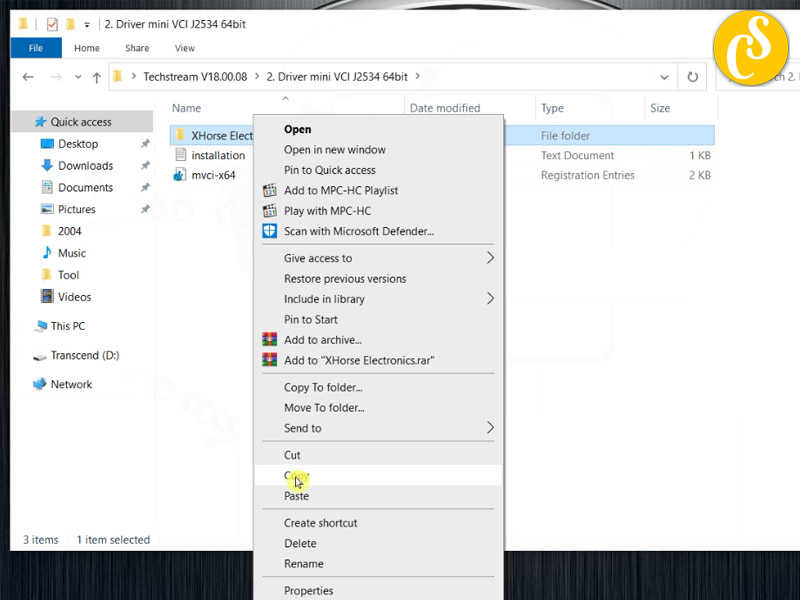
Copy Xhorse Electronics folder
Then Paste to C:\Program Files (x86)
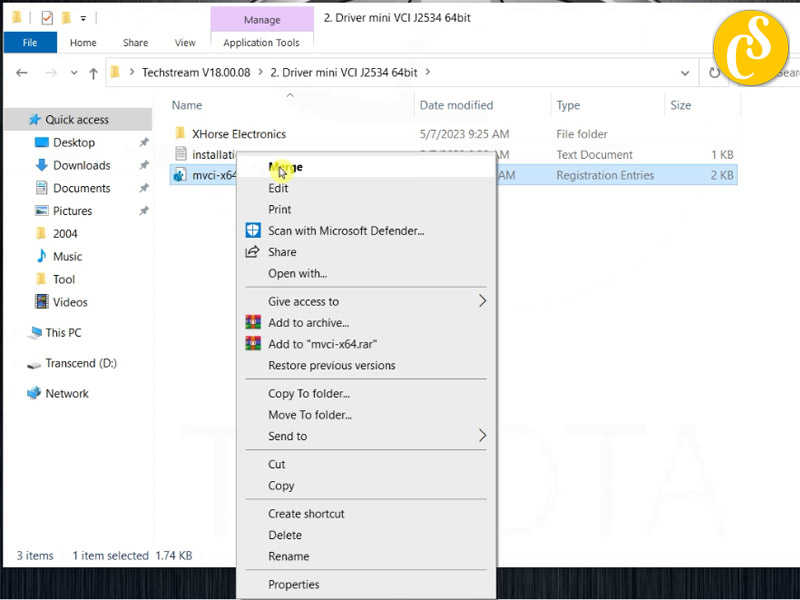
Right-Click mvcix64 select Merge

Connect Mini VCI Cable
Connect the Mini VCI cable to your vehicle’s OBD-II port and then connect it to your computer’s USB port.
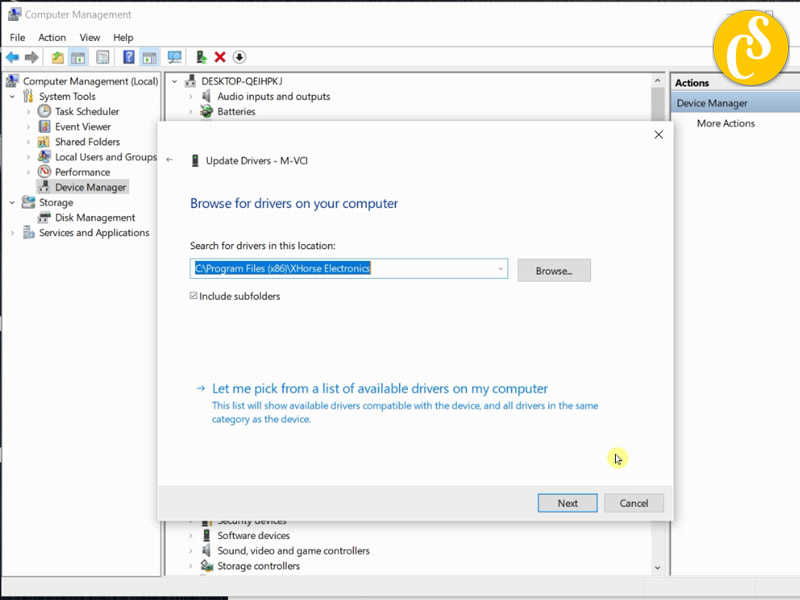
Check Device Manager:
Press Win + X and select “Device Manager” from the menu.
Look for the Mini VCI cable under “Ports (COM & LPT)” or “Universal Serial Bus controllers.”
If there’s a yellow triangle icon, it indicates an issue with the driver. Right-click and choose “Update driver” to C:\Program Files (x86)\XHorse Electronics.
Techstream Software Installation
Read more: Download and install Techstream V18.00.008
Download Techstream:
Visit the Toyota Techstream software download site or the official Techstream website to obtain the software.
Install Techstream:
Run the Techstream installer and follow the on-screen instructions.
When prompted, choose the destination folder for the installation.
Select Cable Type:
During the installation, you may be prompted to select the cable type. Choose “MINI VCI” or the appropriate option for your cable.
Activate Software:
After the installation, you may need to activate the Techstream software.
Get Activation Code 5000 days:
Activation Code Here
Launch Techstream:
Once installed and activated, launch the Techstream software.
Connect the Mini VCI cable to your vehicle and turn the ignition on.
Configure Connection:
In Techstream, go to “Setup” > “VIM Select” and choose “XHorse – MINI VCI” or the corresponding option.
Connect to Vehicle:
Go to “Connect to Vehicle” and follow the prompts to establish a connection with your vehicle.
Perform Diagnostics
Once connected, you can perform various diagnostics and programming functions using the Techstream software.
Important: Always use the software and hardware responsibly,and ensure that you are aware of any potential risks associated with vehicle diagnostics and programming. Incorrect use may lead to vehicle malfunctions. If you are unsure or unfamiliar with the process, consider seeking professional assistance.
Leave a Reply