
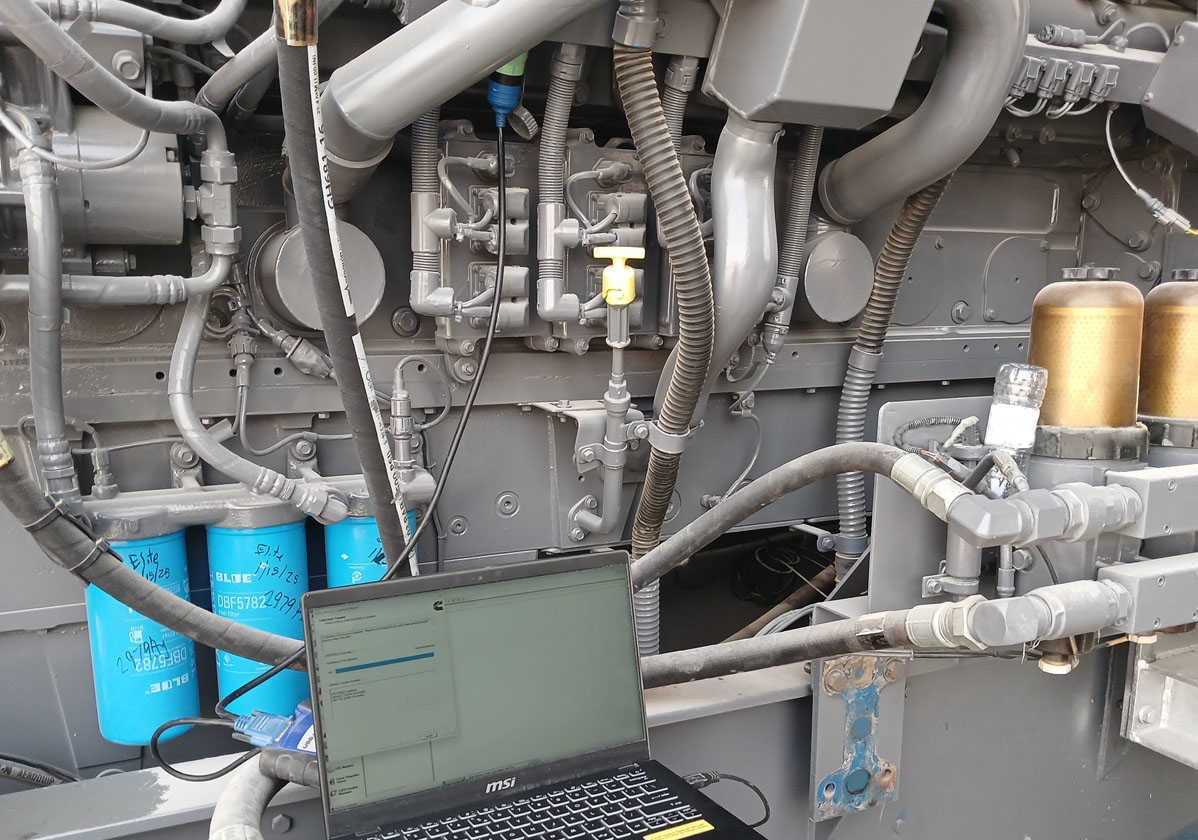
The Cummins QSK60 engine and QSKTA50-CE engines often require calibration updates across multiple ECMs. This guide walks you through checking the latest ECM code and performing a multi-ECM calibration download using Cummins INSITE.
QSKTA50-CE / QSK60 Overview
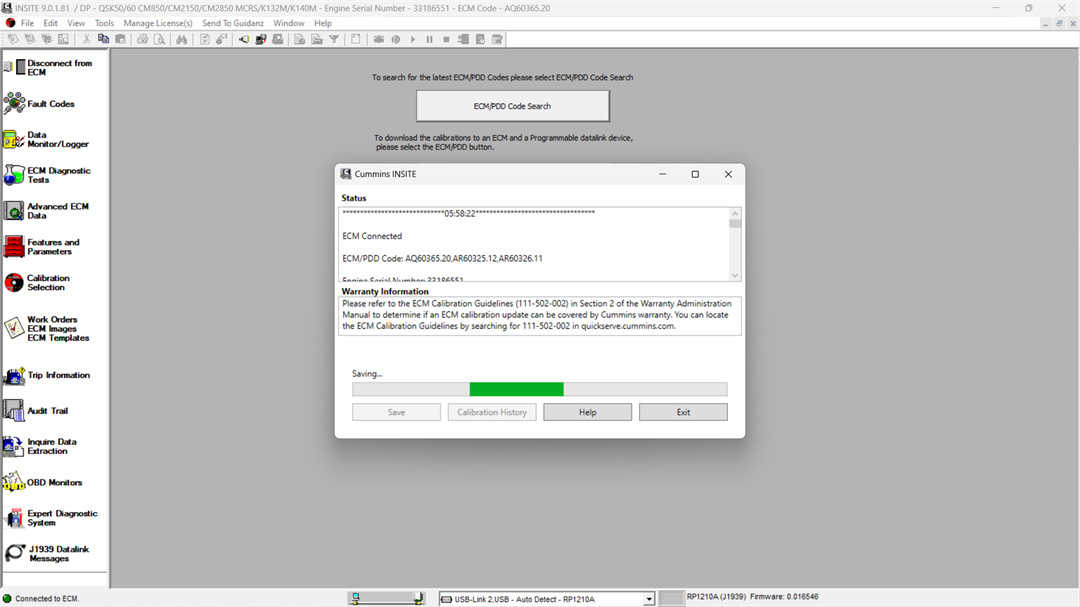
Step 1: Check for the Latest ECM Code
- Connect to the ECM using INSITE™.
- On the Viewbar, click Calibration Selection to access calibration tools.
- Select ECM/PDD Code Search (Web/Online).
- Once the search is complete, click Save.
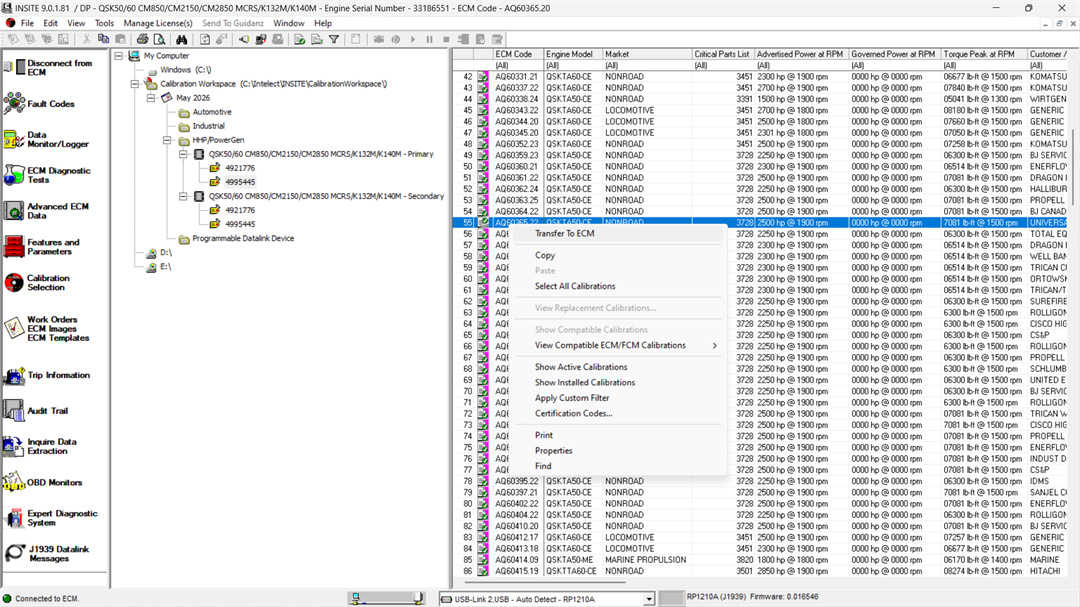
Step 2: Download Calibration to ECM
- In the ECM/PDD list, locate and highlight the desired calibration.
- Double-click the calibration (e.g., ECM Code: AQ60365.20) or right-click and select Transfer to ECM.
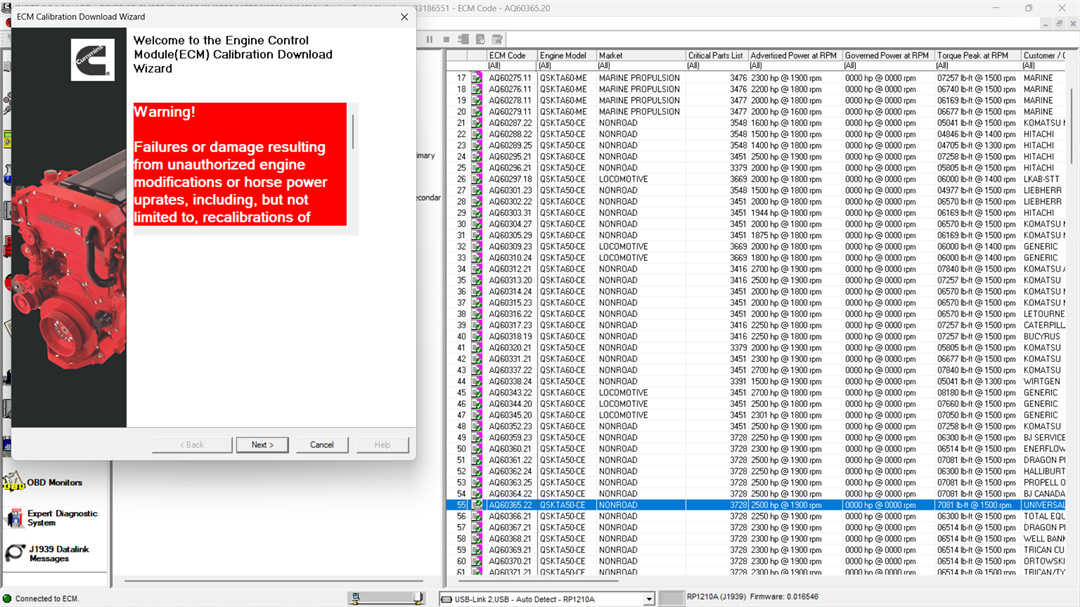
- Carefully read the Warning message and click Next to proceed.
Step 3: Configure Multiple ECM Download (3 ECMs)
- Select:
Calibrate Engine Control System (Single Key-Off)
→ Use this option when calibrating multiple ECMs or the entire system.
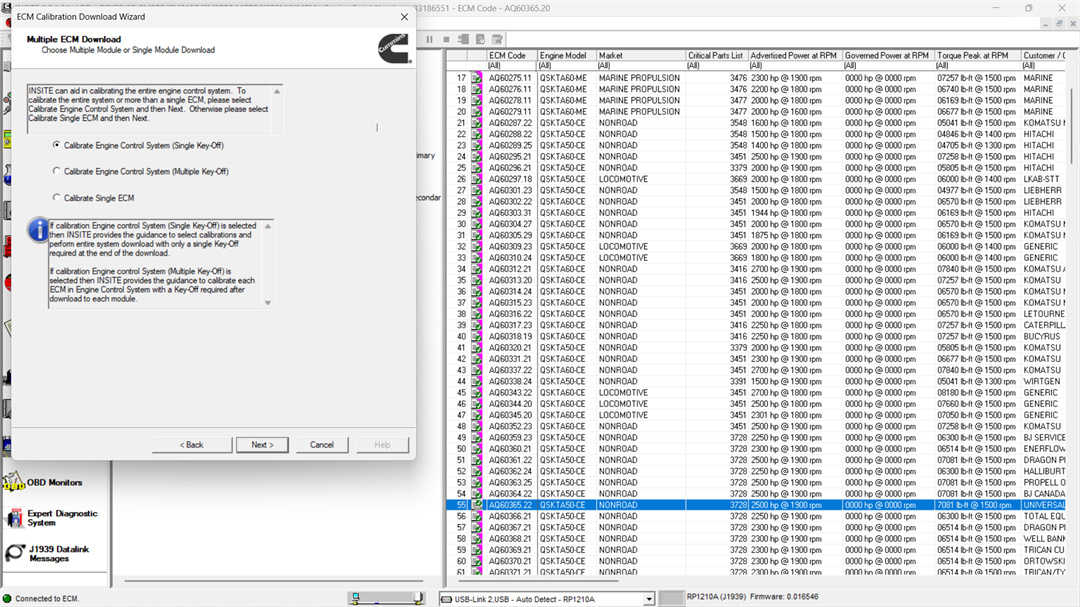
- Click Next to open the Adjustable Parameter Recovery File window.
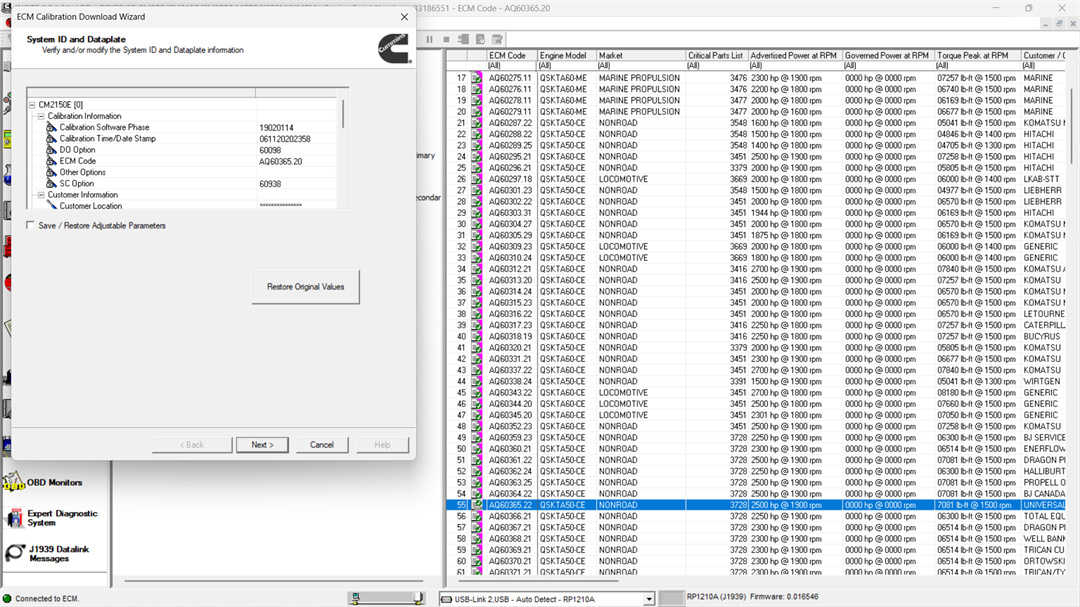
- In the System ID and Dataplate Information window:
- Verify or modify details for the Primary ECM (AQ60365.20).
- Editable fields can be changed by double-clicking the value column.
Optional Settings:
- Enable Save/Restore Adjustable Parameters to preserve settings after calibration.
- If not selected, parameters will reset to default values.
- Note:
- Default = OFF for industrial engines
- Default = ON for automotive applications
- To undo changes, click Restore Original Values or select Next.
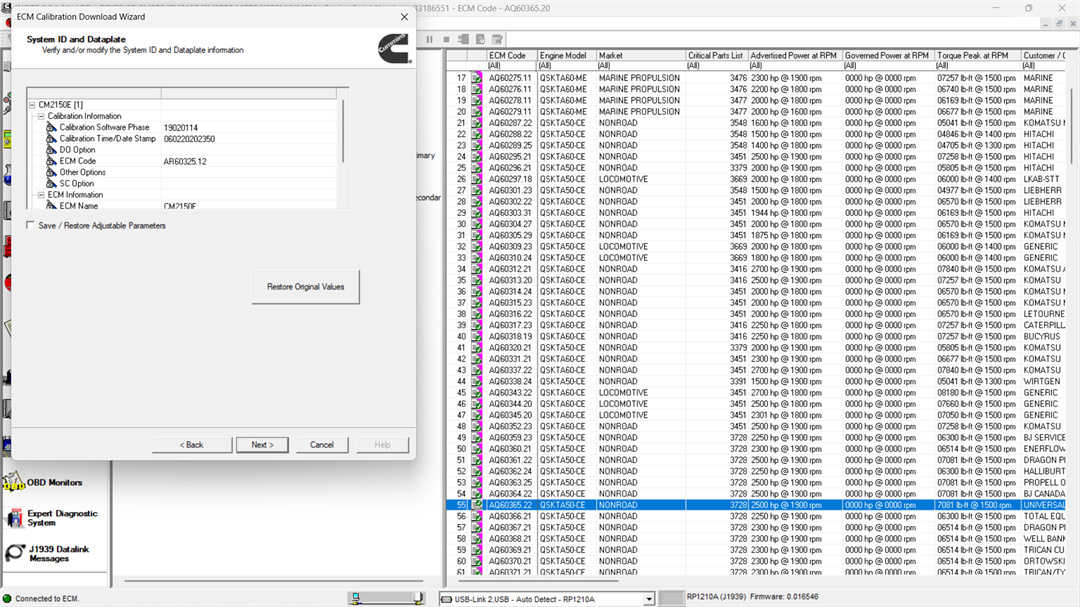
Step 4: Select Secondary ECM Calibrations
- Secondary ECM 1
- Select calibration (e.g., AR60325.15) → Click Next
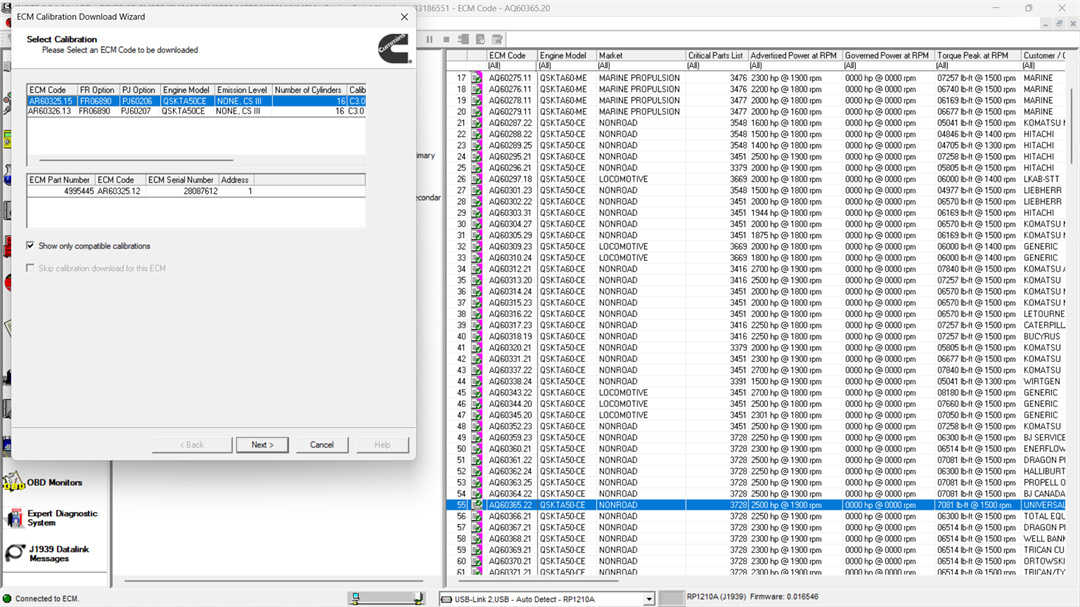
- Verify/update System ID (e.g., AR60325.12) → Click Next
- Secondary ECM 2
- Select calibration (e.g., AR60326.13) → Click Next
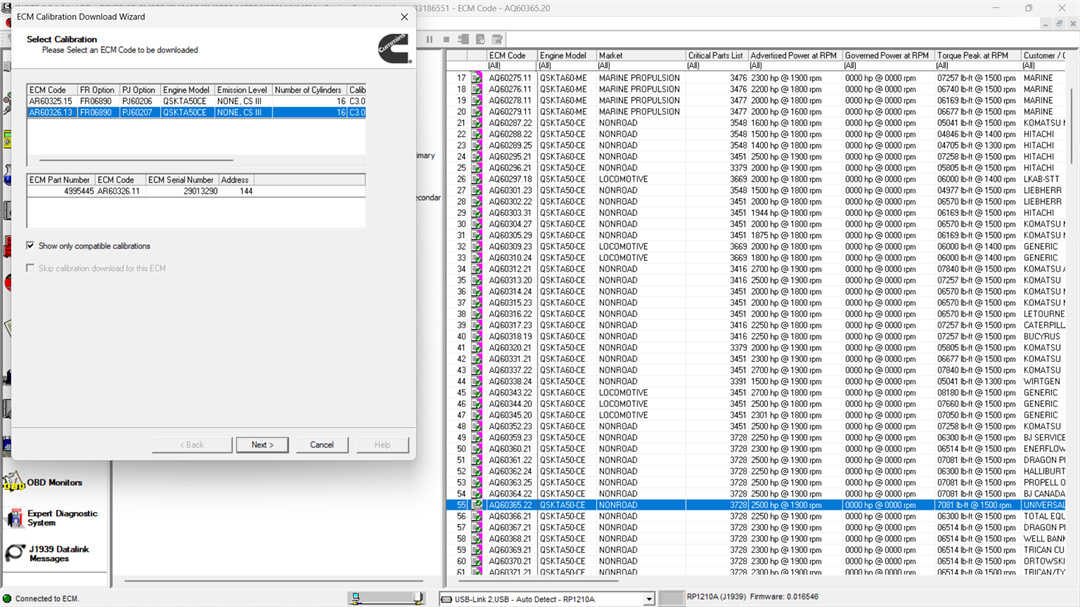
- Verify/update System ID (e.g., AR60326.11) → Click Next
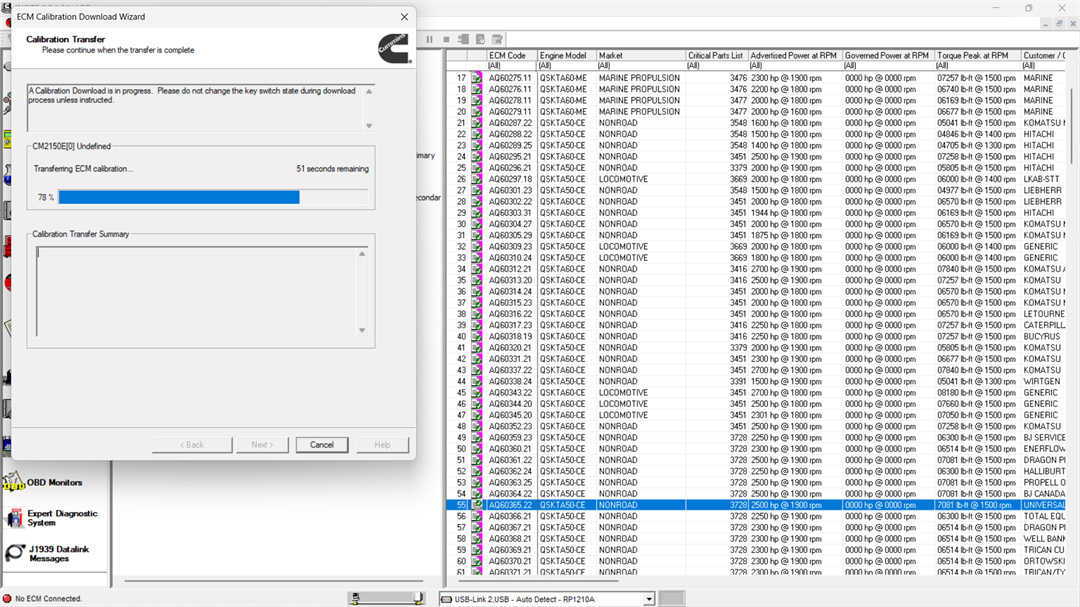
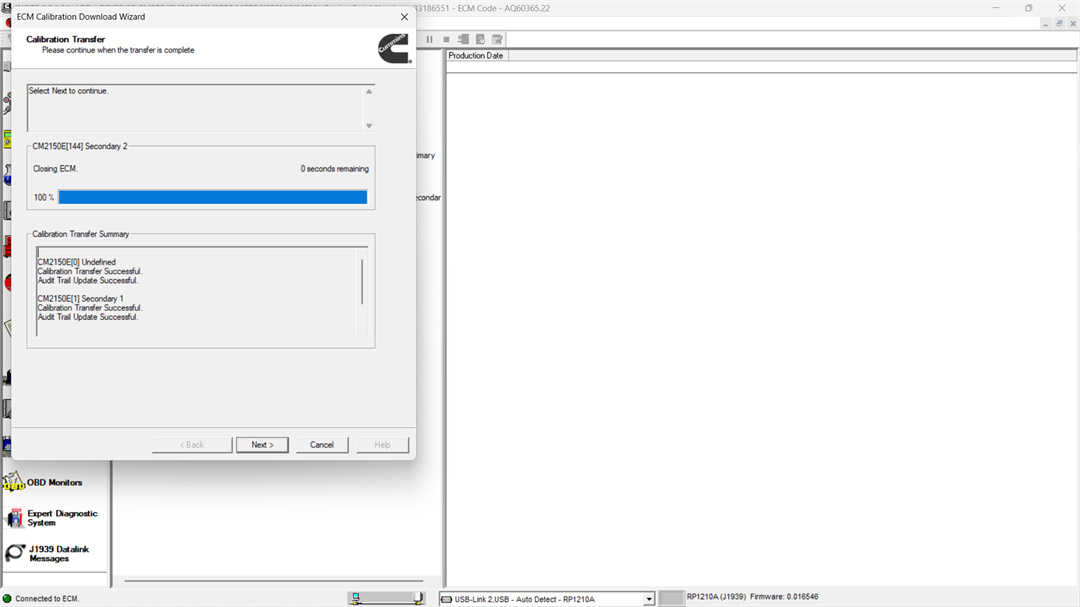
Step 5: Confirm and Start Calibration
- Review the Summary page and click Next.

- When the Adjustment Confirmation appears, click OK.

- INSITE™ will begin transferring calibrations:
- Follow on-screen prompts carefully
- Do not turn off the key switch unless instructed
Step 6: Key Cycle Procedure
- After calibration download:
- Turn the key switch OFF
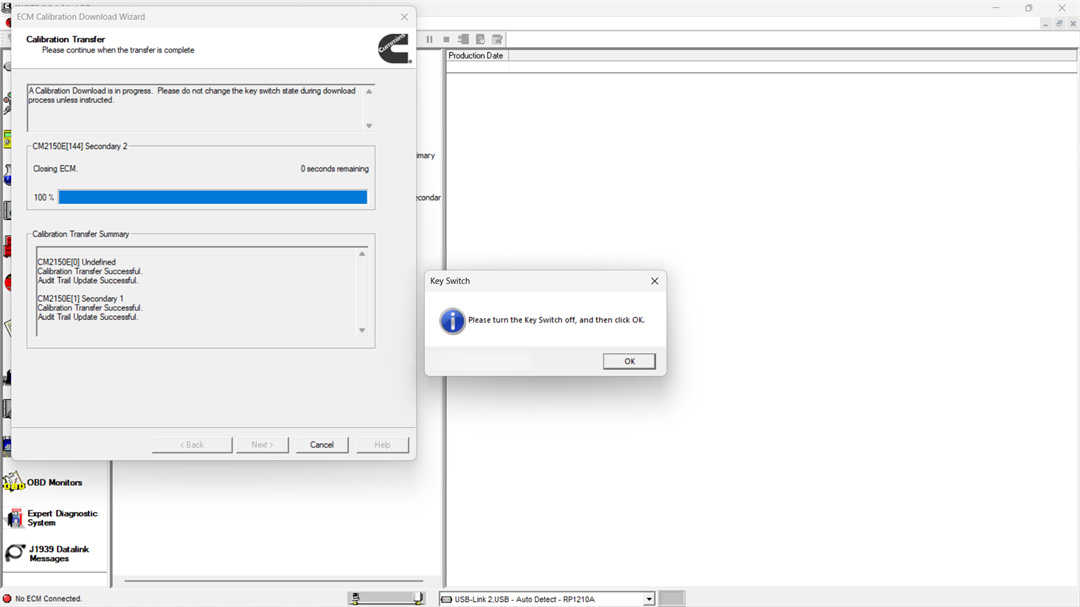
- Wait 30 seconds
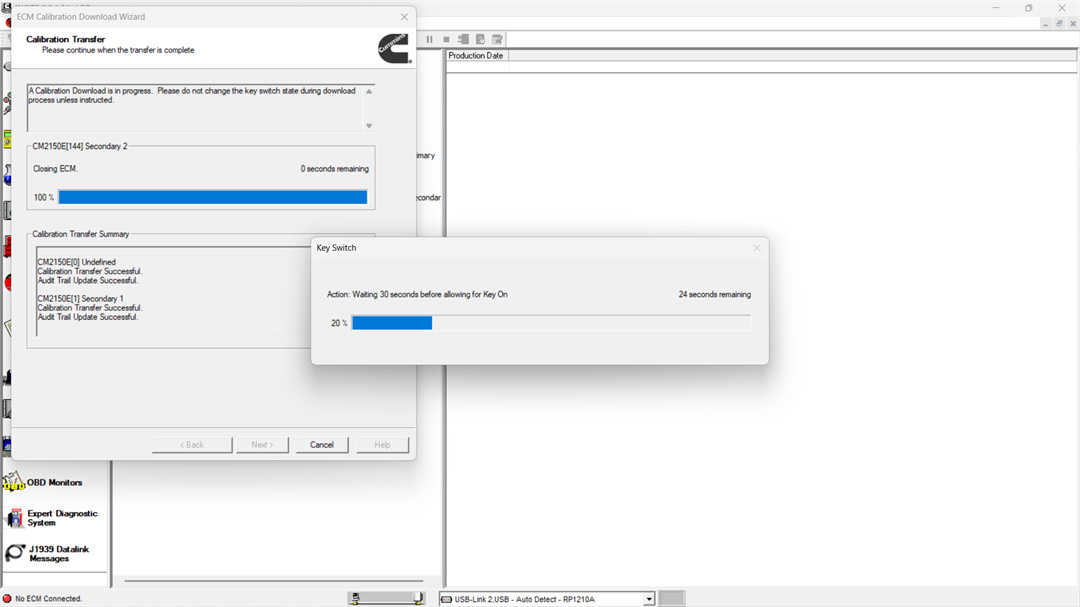
- Turn the key switch ON, then click OK

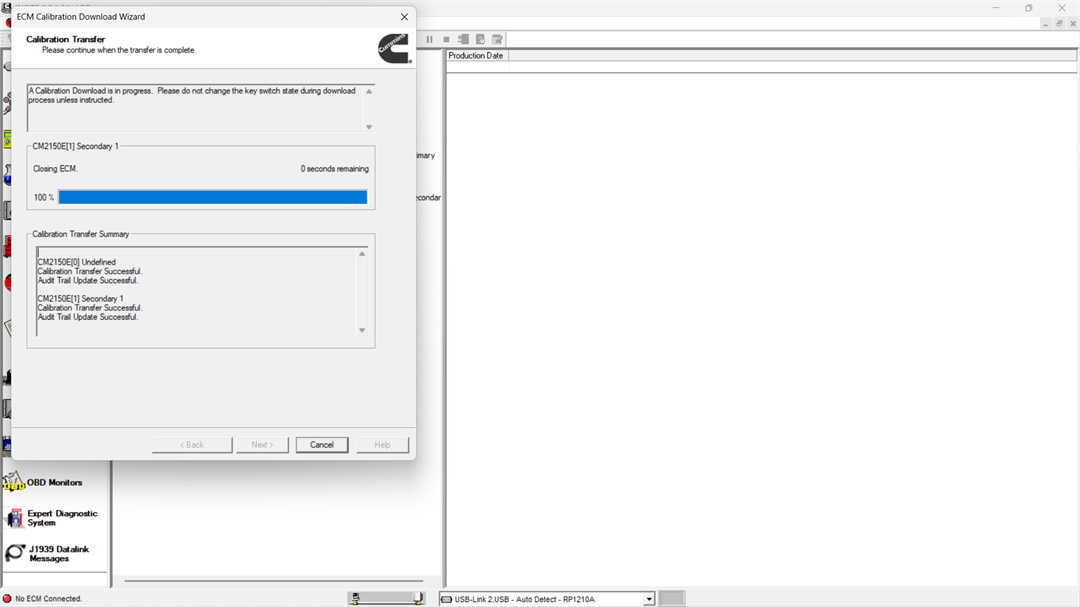
- Confirm status: Calibration Transfer Successful
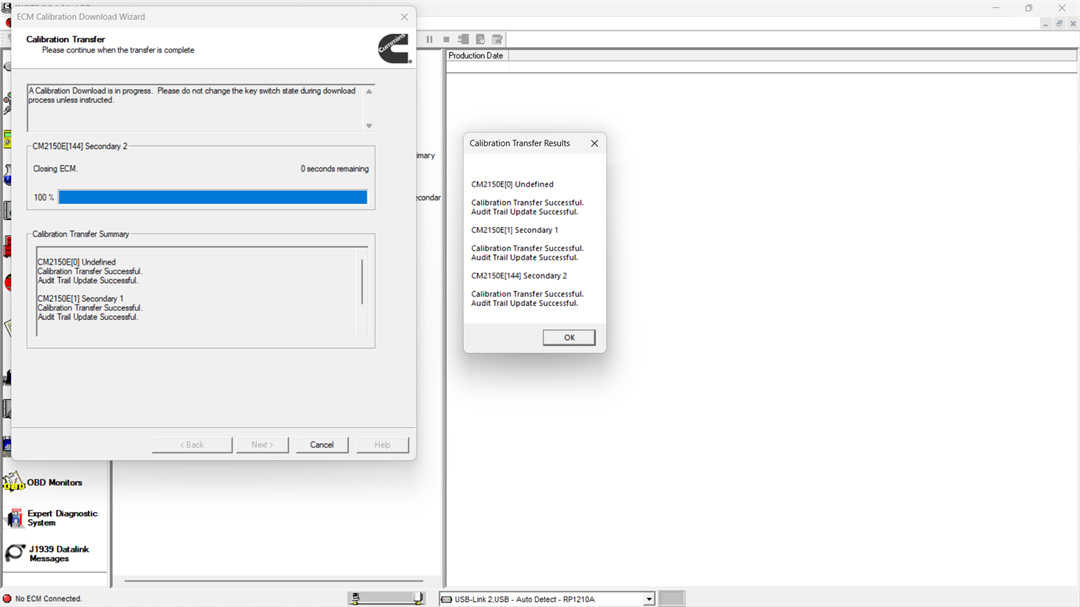
Step 7: Review Results
- The Calibration Transfer Results window will display:
- Transfer status
- Save/Restore results (if selected)
If some parameters are not restored:
- They will appear in a separate list
- You can save, print, or manually adjust them via Features and Parameters
- Click Next to continue.
Step 8: Complete the Process
- Click Finish to exit the ECM Calibration Download Wizard.
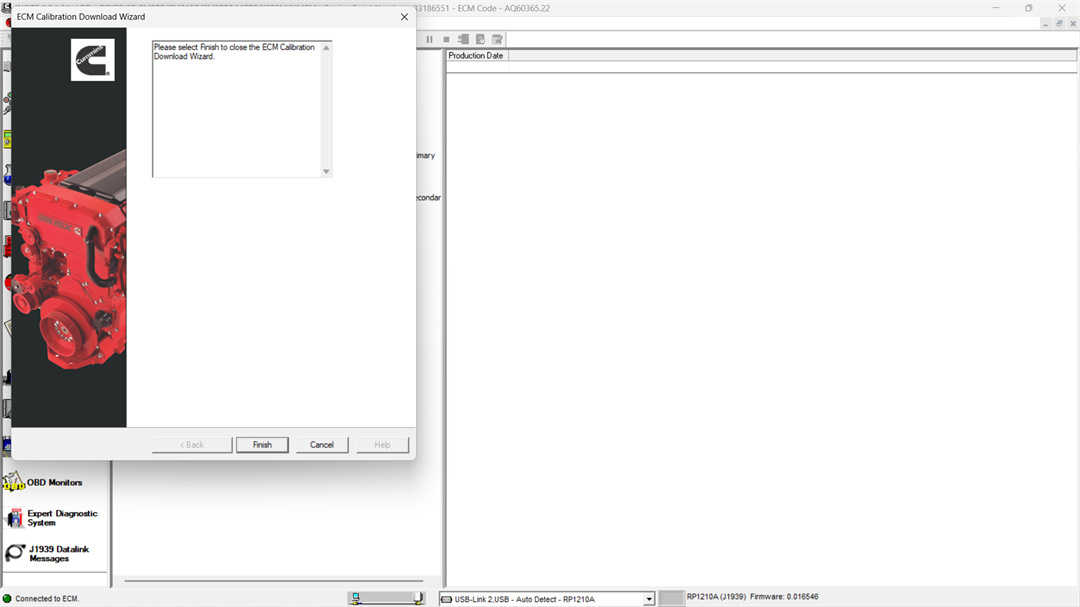
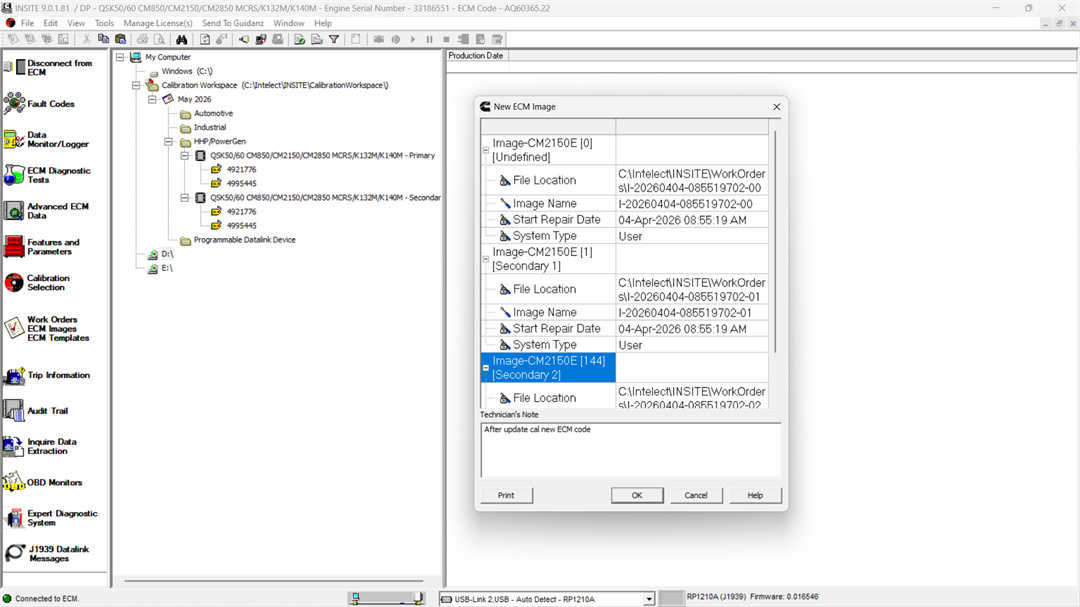
→ A new work order or ECM image may be created automatically.
Leave a Reply