
Launch X431 ECU TCU Programmer is a powerful tool that allows users to read, write, and process ECU (Engine Control Unit) and TCU (Transmission Control Unit) data. This article will guide you on how to effectively use the Launch X431 ECU TCU Programmer and its accompanying PC software.
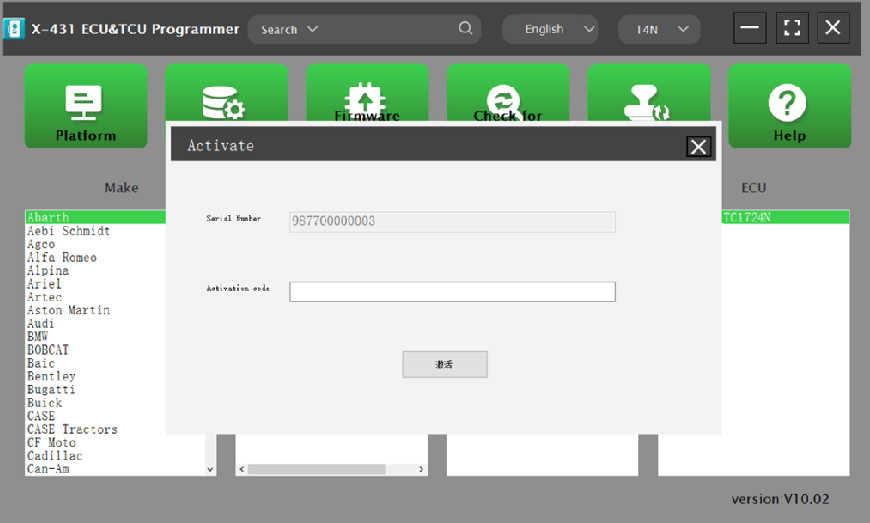
To begin, connect the X431 ECU & TCU Programmer to your computer using the provided cable. Once connected, click to enter the software. The serial number will be automatically recognized from the X-431 ECU & TCU Programmer, and you will need to obtain the activation the envelope bar of the device.
Click [Activate] to activate (only activate once, no need to activate again later), as shown in Figure 1. Without connection, you cannot access the software, as shown in Figure 2.
I. ECU Date Reading and Writing:
1. Obtain the related ECU.
Method (1) :
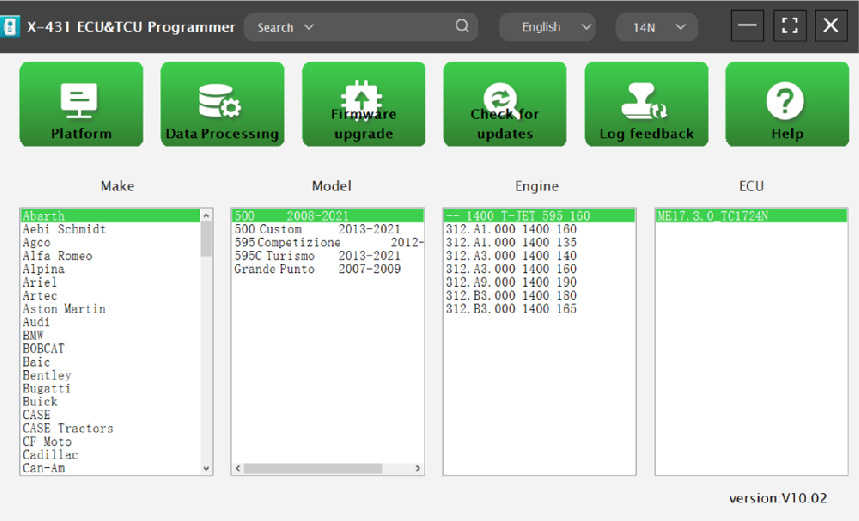
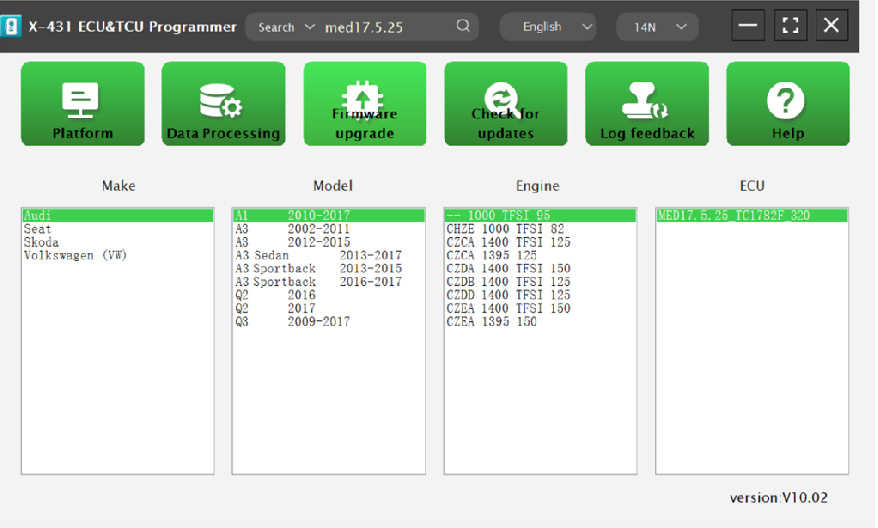
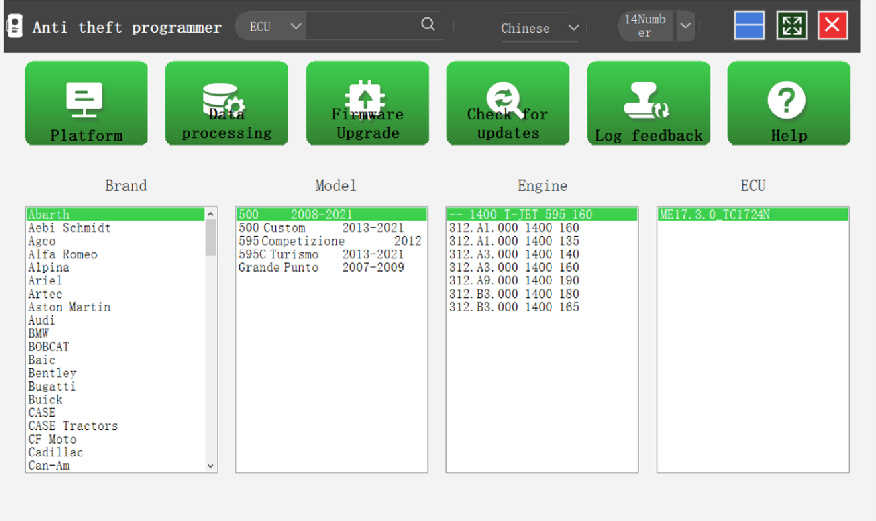
Obtain the desired ECU type through brand > model > engine > ECU in turn, as shown in Figure 3.
Method (2) :
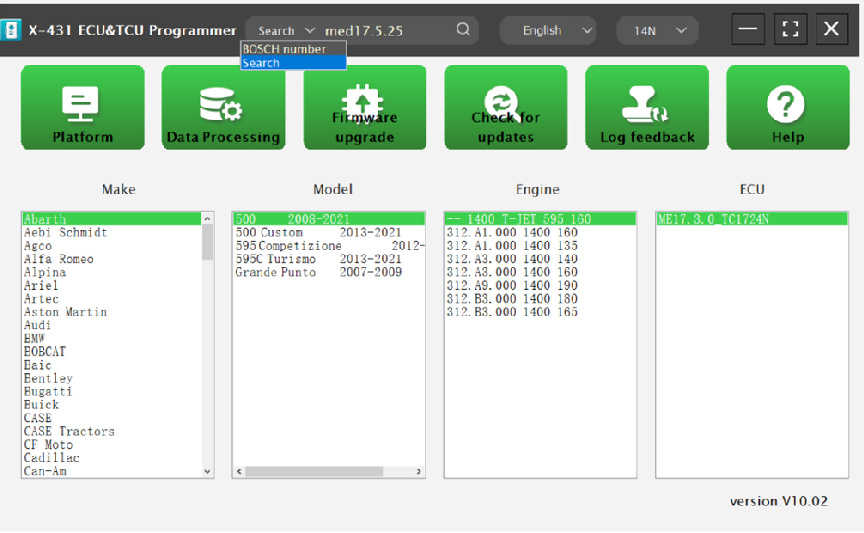
Query the desired ECU by entering a value in the search box. The search categories include Bosch number and Search, as shown in Figure 4. For example, search for the MED17.5.25 engine by Search, as shown in Figure 5.
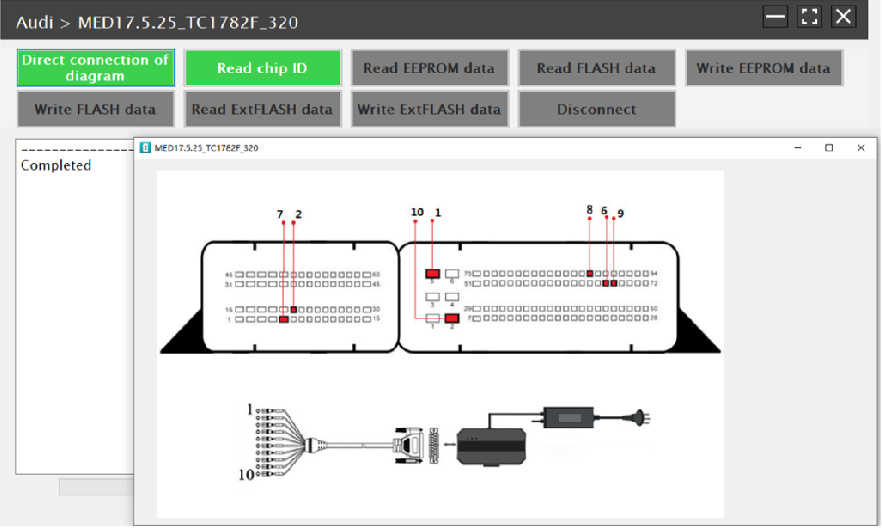
2.Click [Direct Connection Diagram] to obtain the ECU connection diagram, as shown in Figure 6.
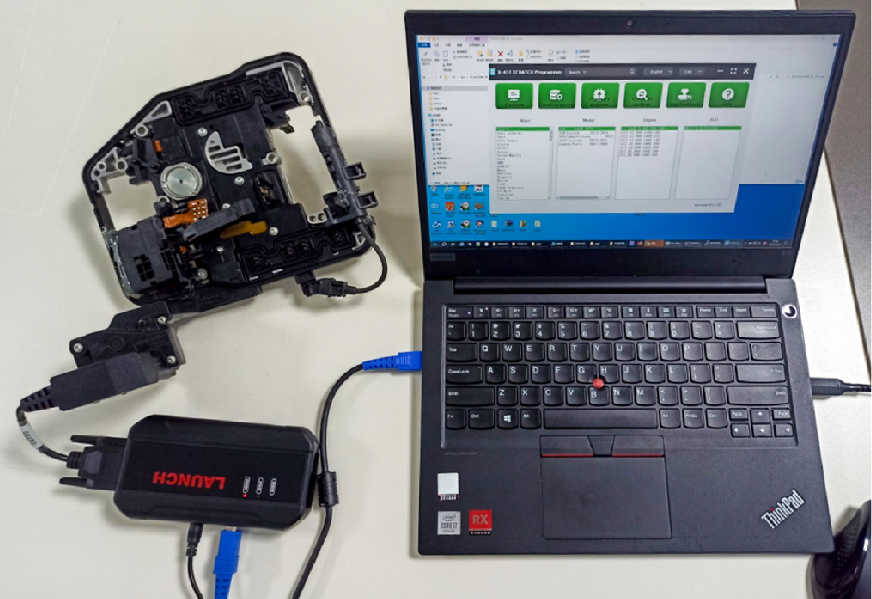
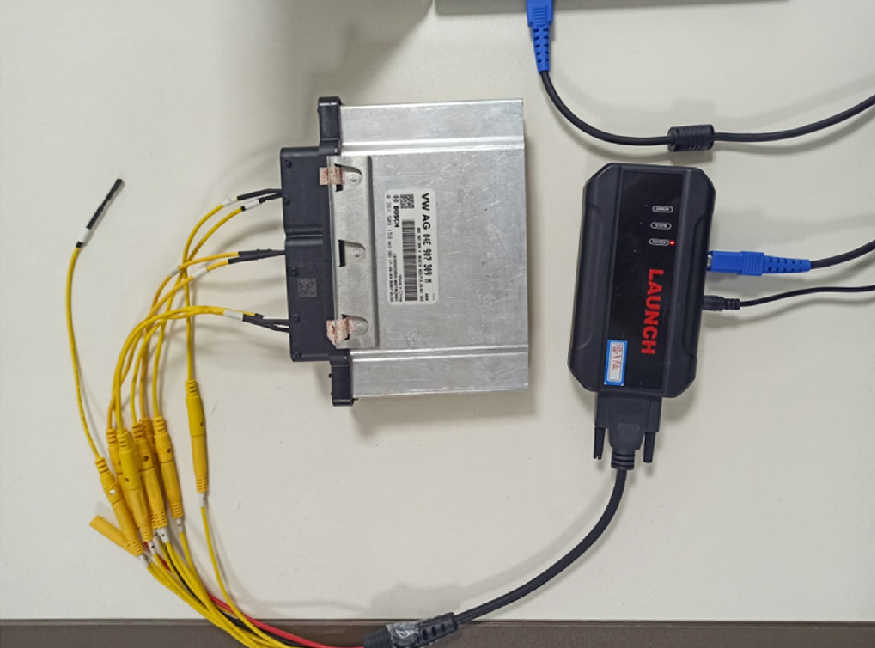
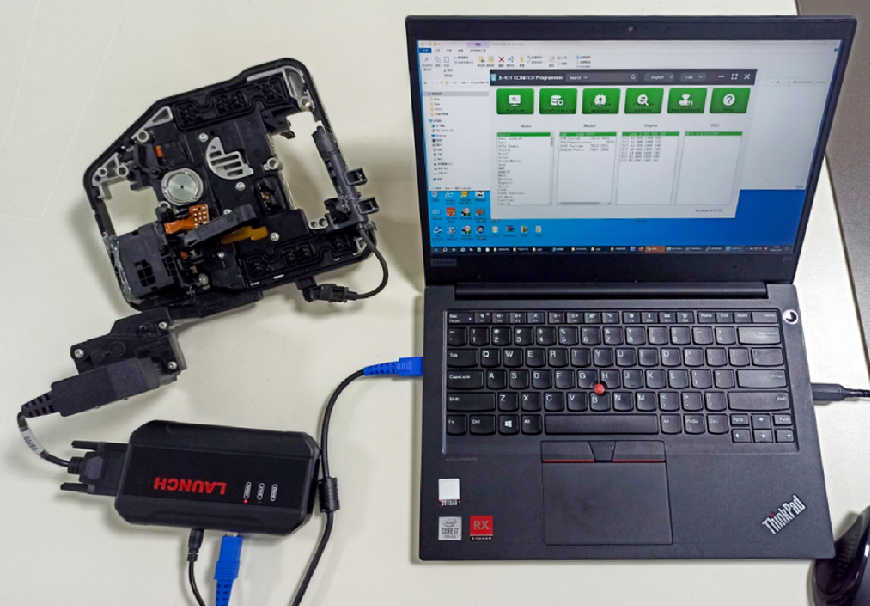
3. Connection:
Connect the ECU and PCBOX according to the information provided in the connection diagram. The physical connection diagram of MED17 .5 .25 (using the BENCH mode line)is shown in Figure 7, and the physical connection diagram using the gearbox adapter is shown in Figure 8.
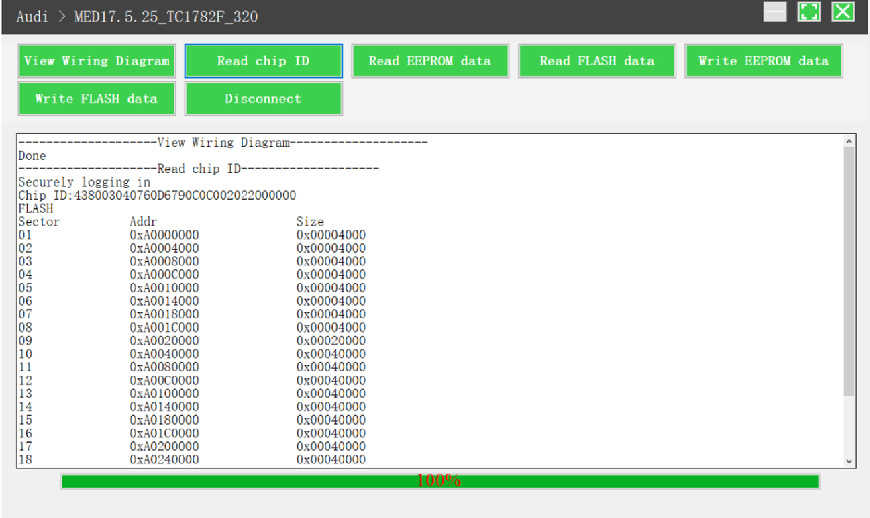
4. Read the chip ID, as shown in Figure 9.
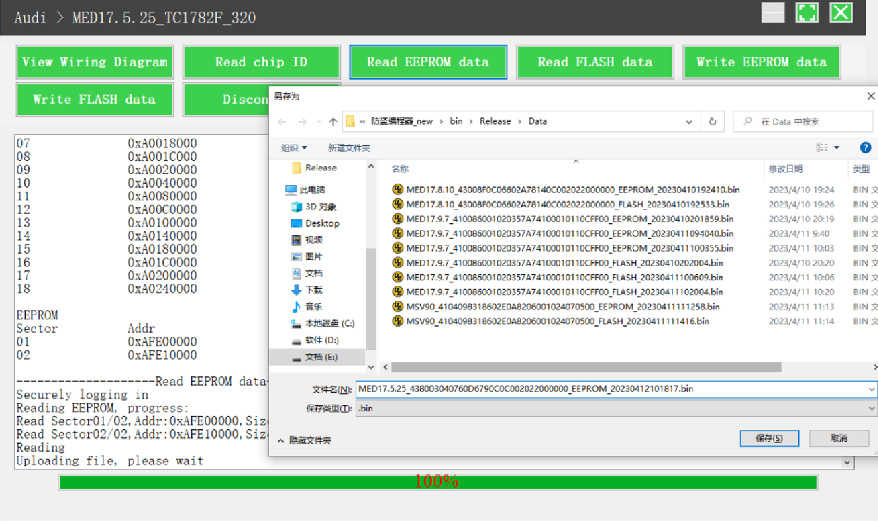
5. Back up the EEPROM data and save it, as shown in Figure 10 (the figure shows the save page of the read date).
6. Back up the Flash date and save it, as shown in Figure 11 (the figure shows the process of reading FLASH date).

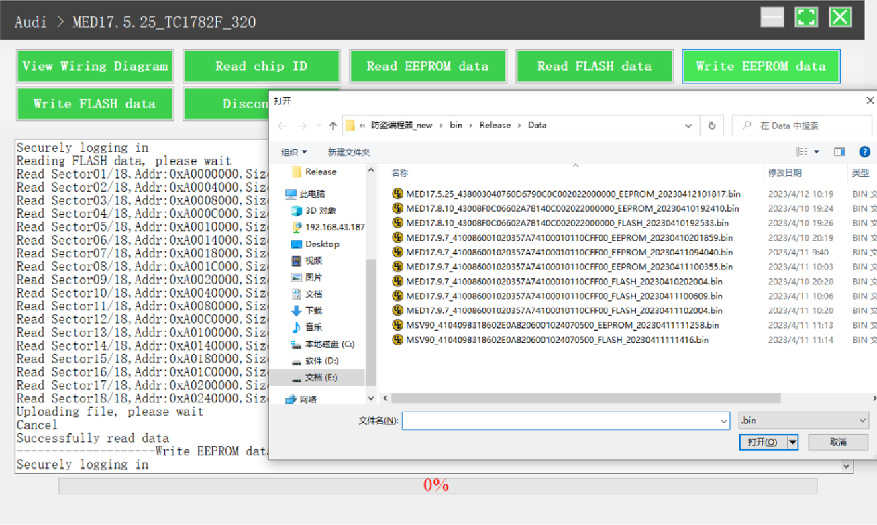
7. Restore EEPROM / FLASH date, as shown in Figure 12 (the figure shows the file selection page).
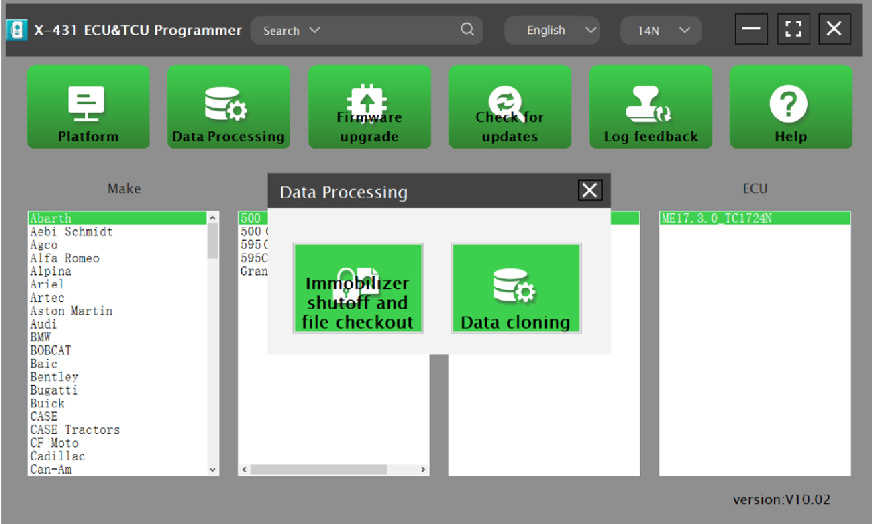
II. Date Processing
1. Click the [Date Processing] button on the main page, as shown in Figure 13, and select [IMMO Off and File Verification] ([DTC Shield] is not currently supported), as shown in Figure 14.
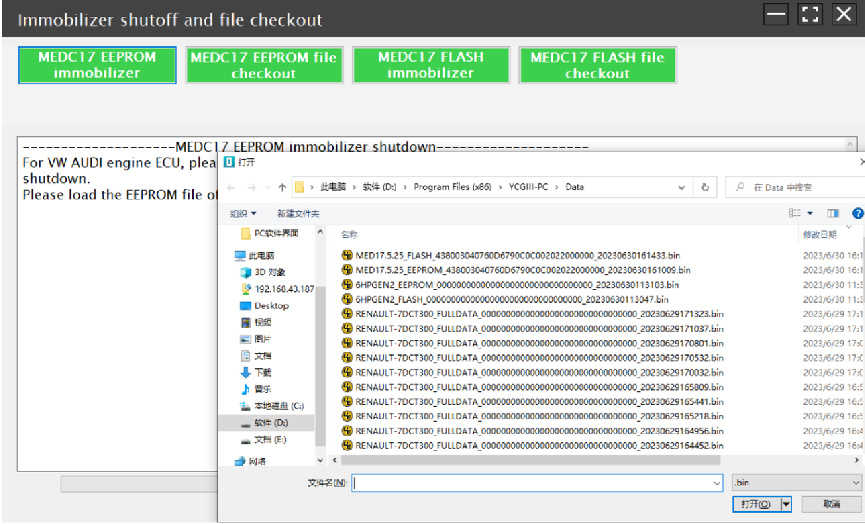
2. File verification and IMMO OFF (process: select file>connect network to obtain>save file), as shown in Figure 15.

Leave a Reply