
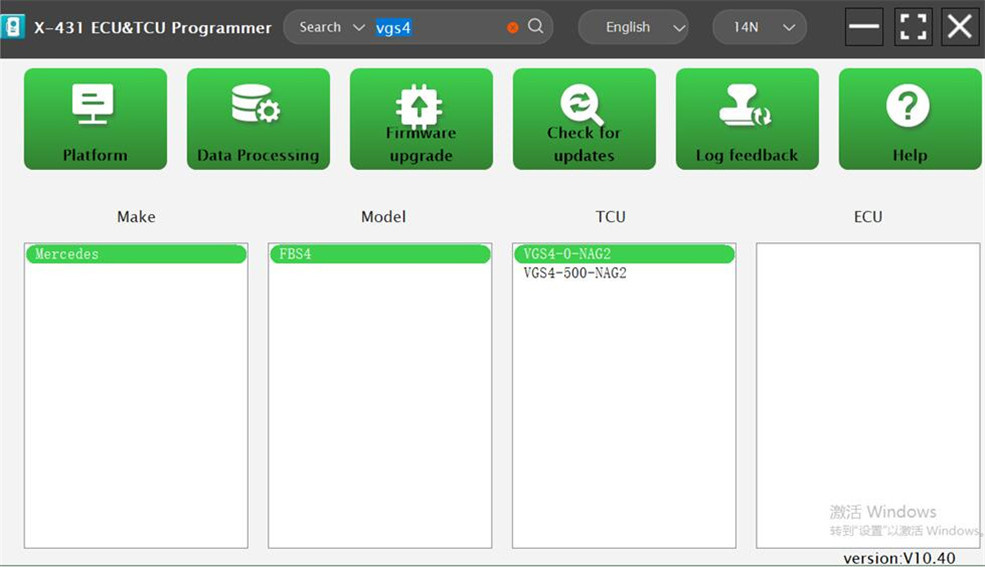
The Launch X431 tool has received a significant upgrade with the V10.40 software update, released on January 13, 2025. This update enhances ECU and TCU cloning capabilities, enabling users to read, write, personalize, and erase Mercedes-Benz transmission TCU models, such as VGS4-0-NAG2 and VGS4-500-NAG2. These features are accessible via boot mode, making Launch X431 an essential tool for replacing or reprogramming used transmission computers.
Compatible Devices
The new TCU erasing and programming features are available on the following Launch devices:
- Launch X431 ECU and TCU Programmer
- X431 X-PROG3 with PC Adapter
- Launch X431 Scanner (via SmartLink C and X-PROG3, USB connection)
Step-by-Step Guide: Erasing & Personalizing a 4th Gen Benz 7-Speed TCU
Follow these detailed instructions to erase and program a Mercedes-Benz 4th generation 7-speed TCU using the Launch X431 ECU Programmer.
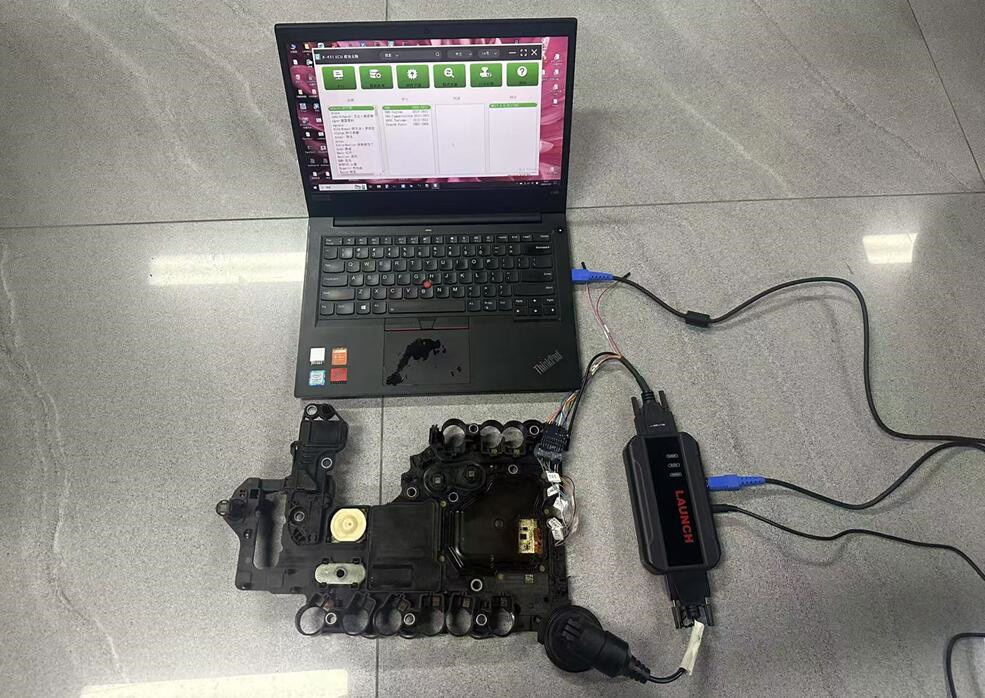
Step 1: Connect the X431 ECU Programmer to a PC
- Launch the PC software and enter the ECU model (e.g., B.VGS4).
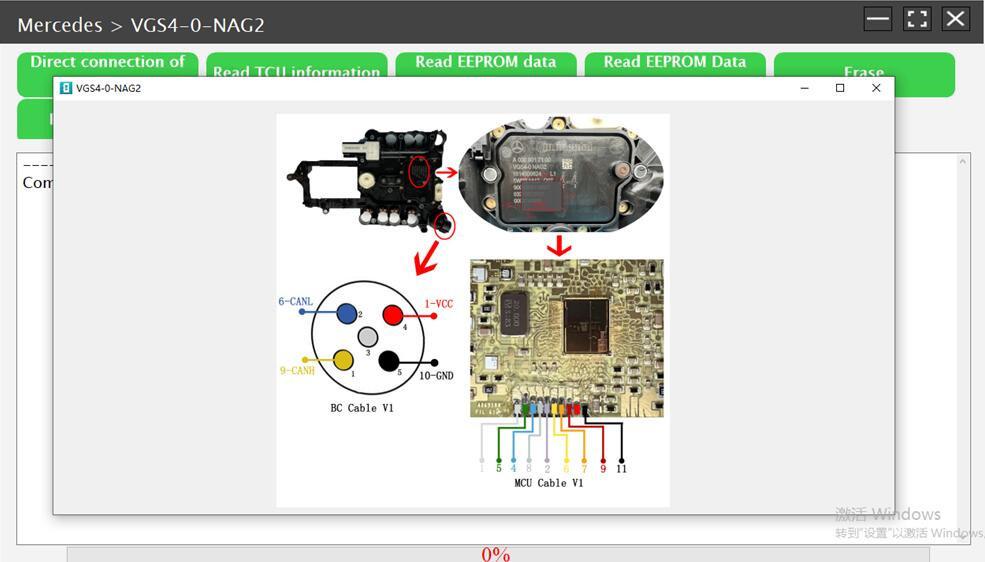
Step 2: Access the Direct Connection Wiring Diagram
- Follow the on-screen instructions and click “OK” to proceed.
Step 3: Select the Wiring Mode
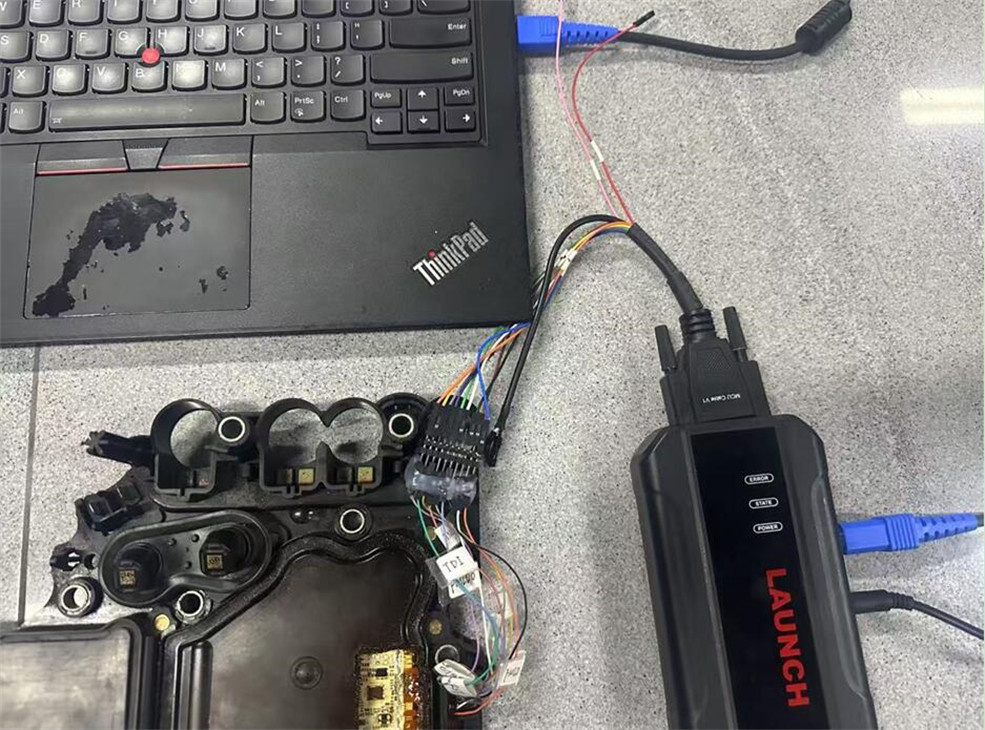
- The system displays two wiring modes: BENCH and BOOT.
- Use BENCH mode to read data from the original TCU.
- To erase and program a used TCU, ensure BENCH and BOOT modes are connected simultaneously.
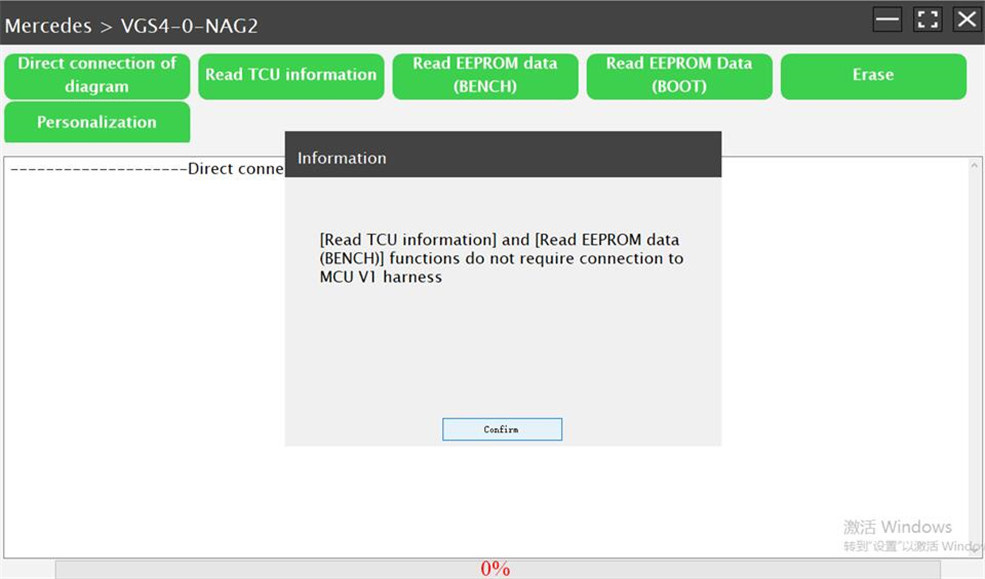
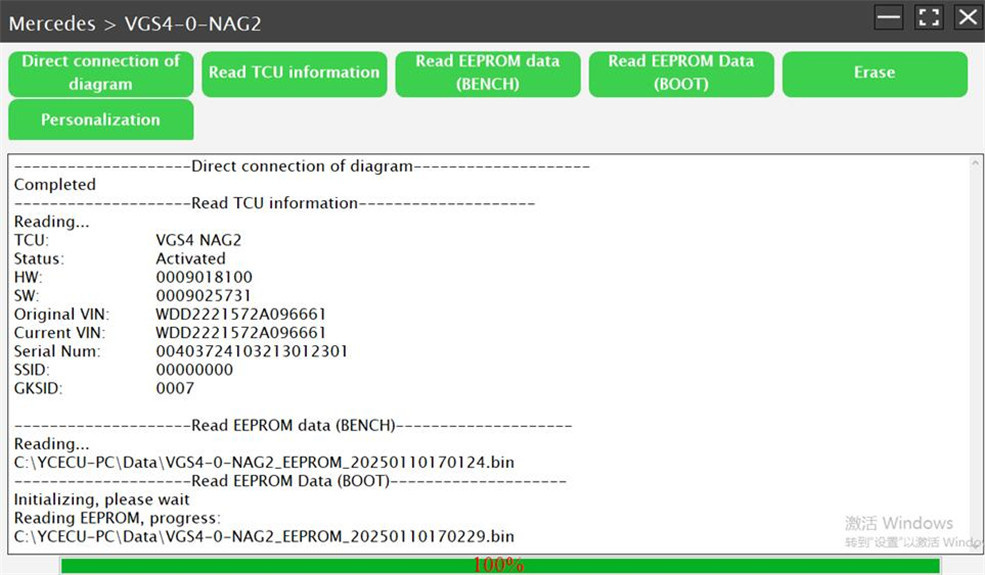
Step 4: Read TCU Information
- Once connected, select “Read TCU Information” to extract the current data.
Step 5: Read EEPROM Data
- In BENCH mode, select “Read EEPROM Data (BENCH)” to retrieve memory data.
- If reading fails in BENCH mode, switch to BOOT mode and try again.
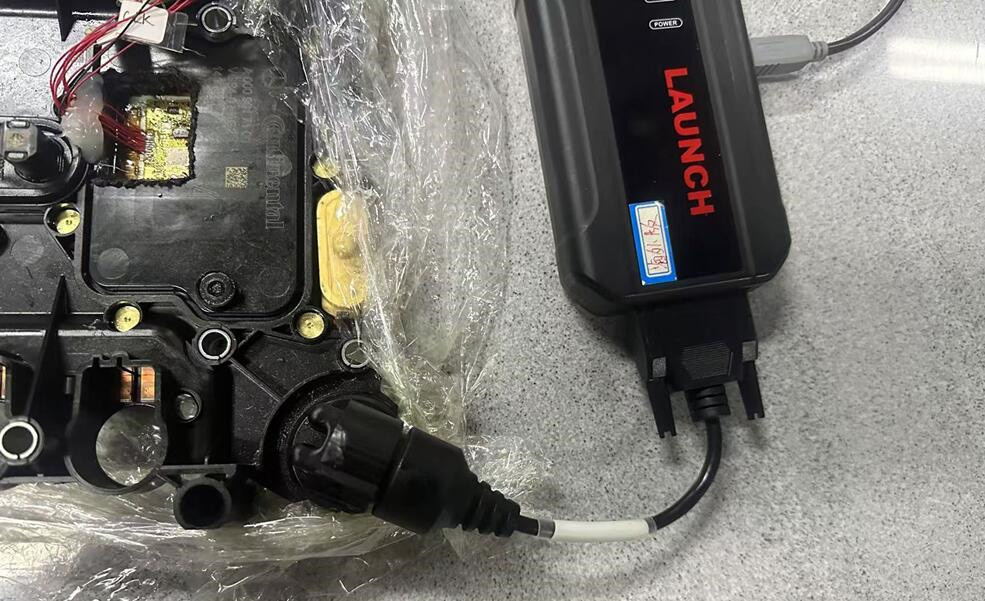
Step 6: Connect the External TCU
- After extracting the original TCU data, disconnect the original TCU and connect the X431 ECU Programmer to the external TCU.
- Ensure both BENCH and BOOT modes are properly connected.
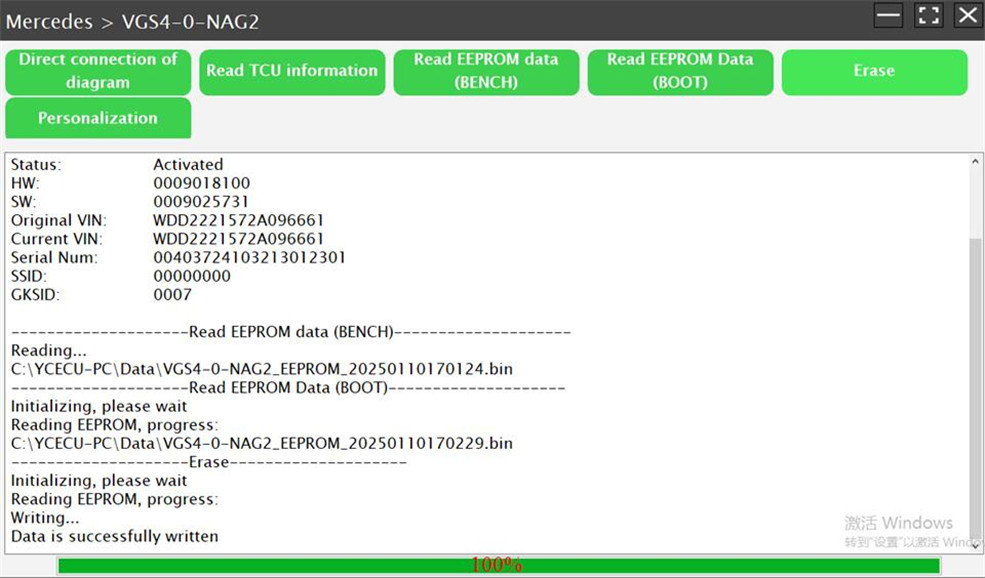
Step 7: Erase the External TCU
- Click “Erase” to clear all existing data from the external TCU.
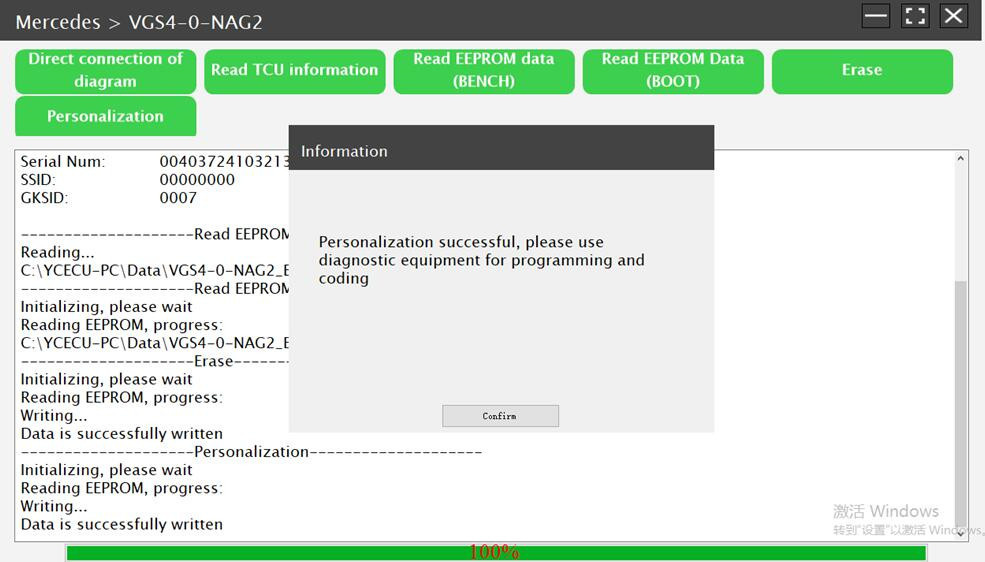
Step 8: Personalize the TCU
- Click “Personalize” and select the original vehicle’s EEPROM data for writing.
- Confirm the process by clicking “OK” upon successful personalization.
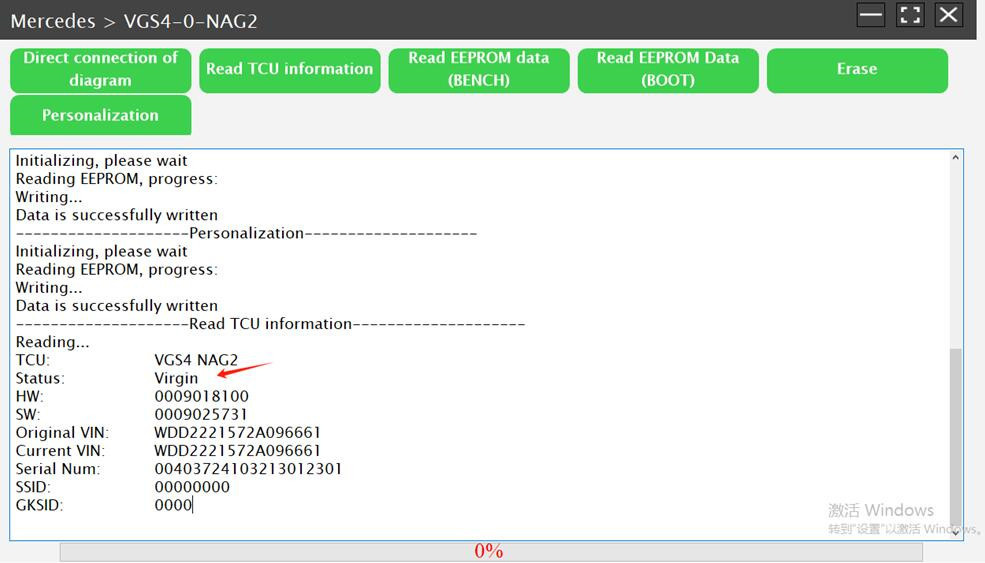
Step 9: Verify Data Erasure
- Select “Read TCU Information” again to confirm that the previous data has been successfully erased.
Step 10: Install & Complete Programming
- Reinstall the TCU into the vehicle.
- Finalize the programming and coding to complete the integration.
Conclusion
The V10.40 software update for the Launch X431 tool delivers a powerful solution for ECU and TCU operations, including cloning, erasing, and personalizing transmission control units. By following these steps, technicians can efficiently erase and program a Benz 4th Gen 7-Speed TCU, allowing seamless integration of a used transmission computer into a vehicle.
Leave a Reply