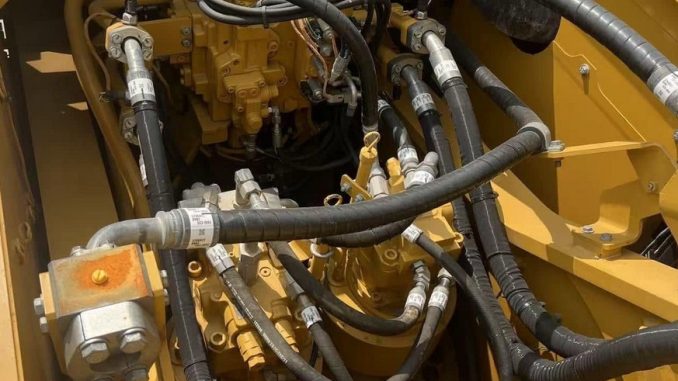
Caterpillar C9 code 64-2 means the Engine Control Module (ECM) temporarily lost the secondary engine speed/timing signal. Common causes include a faulty or improperly installed speed/timing sensor, damaged wiring, poor connector contact, or an ECM circuit issue.
A C9 may continue running if one valid speed/timing signal remains. However, if both signals are lost, the ECM can stop fuel injection, causing an engine shutdown or a crank-no-start condition.
This guide explains how to diagnose Caterpillar C9 code 64-2 using CAT ET 2026A and a Cat Communication Adapter 3.
Quick Answer: What Does Caterpillar C9 Code 64-2 Mean?
| Item | Details |
| Fault Code | 64-2 |
| Description | Secondary Engine Speed Loss of Signal |
| System | Engine speed/timing |
| Main Causes | Sensor, installation, wiring, connectors, ECM |
| Engine May Still Run? | Yes, if the other speed/timing signal remains valid |
| Possible No-Start? | Yes, if both signals are lost |
| Diagnostic Software | CAT ET 2026A |
| Interface | Cat Communication Adapter 3 |
Important: Caterpillar C9 engines were produced in different configurations. Always verify sensor specifications, wiring diagrams, replacement procedures, and part numbers by engine serial number.
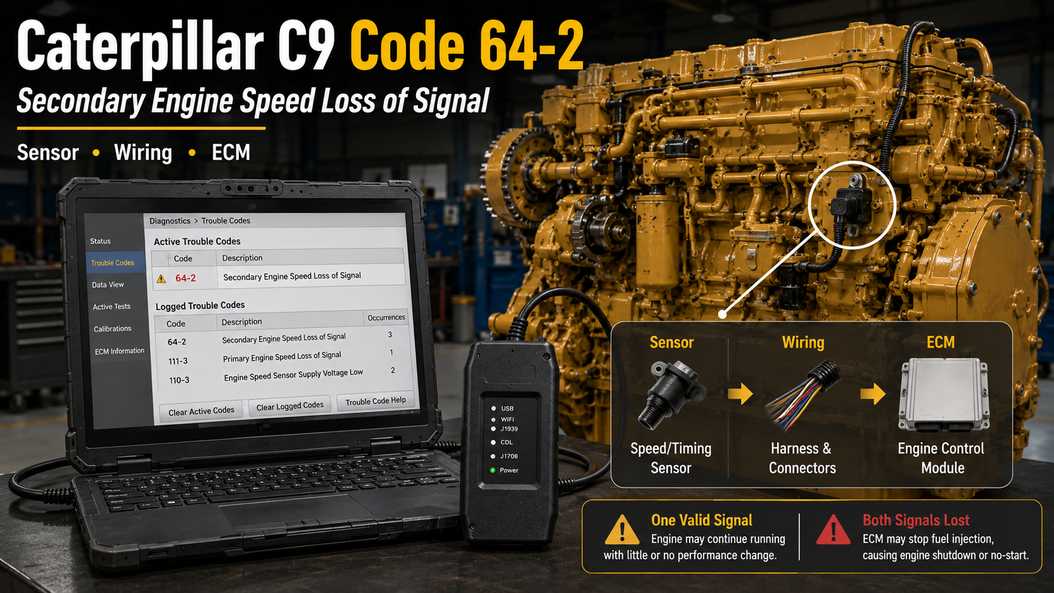
Tools Needed
Prepare:
- CAT ET 2026A
- Cat Communication Adapter 3
- Caterpillar diagnostic cable
- Digital multimeter
- Correct wiring diagram
- Caterpillar SIS/service information
CAT ET helps determine whether code 64-2 is active or logged and whether related speed/timing codes are also present.
When Does Code 64-2 Occur?
For the C9 configuration covered by this procedure, the ECM can log code 64-2 when:
- The secondary engine speed/timing signal is lost and returns within about one second.
- The engine has been running for more than three seconds.
- Engine speed did not pass through the 350–500 RPM range.
- Battery voltage remained above 9 VDC for at least two seconds before the signal loss.
Because the signal can disappear only briefly, code 64-2 often points to an intermittent electrical or sensor problem rather than a completely failed component.
Common examples include:
- Loose terminals
- Corroded connectors
- Harness damage
- Incorrect sensor installation
- Internal sensor failure
- Poor ECM connection
How the C9 Speed/Timing System Works
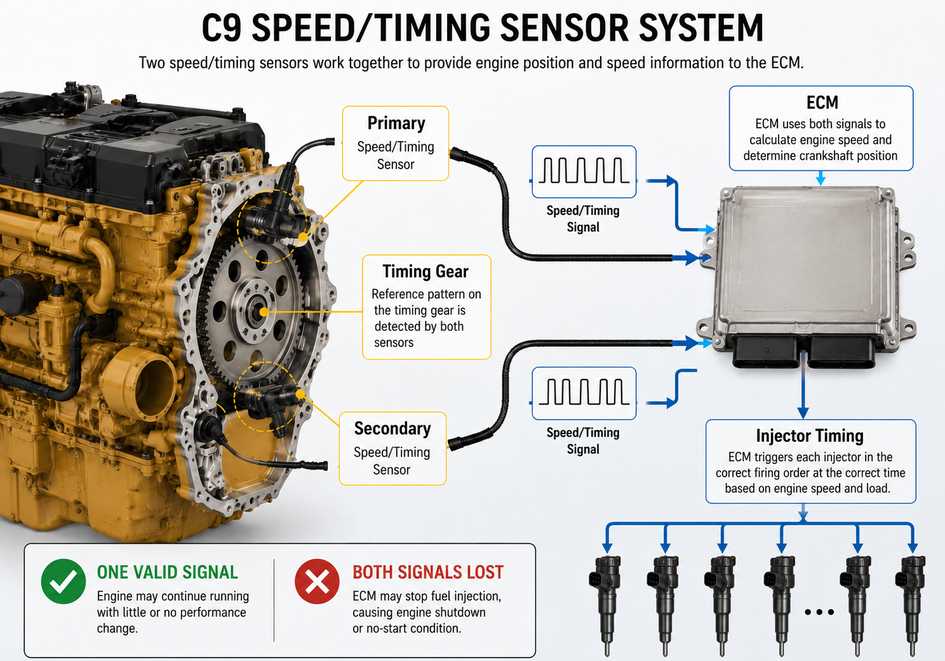
The engine speed/timing sensors provide the ECM with information needed to determine:
- Engine RPM
- Engine position
- Crankshaft position
- Injection sequence
- Injection timing
The ECM reads a timing reference pattern as the engine rotates. Once the ECM establishes engine position, it can trigger the injectors in the correct firing order and calculate injection timing and duration.
If One Sensor Signal Is Lost
If one valid engine speed/timing signal remains, the engine may continue running with little or no noticeable performance change.
This means a machine can appear to operate normally while code 64-2 is still active or logged.
If Both Sensor Signals Are Lost
If both signals disappear while the engine is running, the ECM may terminate fuel injection and shut down the engine.
If both signals are unavailable during cranking, the engine may crank but fail to start.
Common Symptoms
Caterpillar C9 code 64-2 may be associated with:
- Check Engine warning
- Logged code with no obvious symptoms
- Extended cranking
- Intermittent hard starting
- Engine cutting out
- Unexpected shutdown
- Crank-no-start condition
- Unstable or missing RPM signal
- Additional engine speed/timing codes
Most Likely Causes of C9 Code 64-2
1. Poor Sensor or ECM Connection
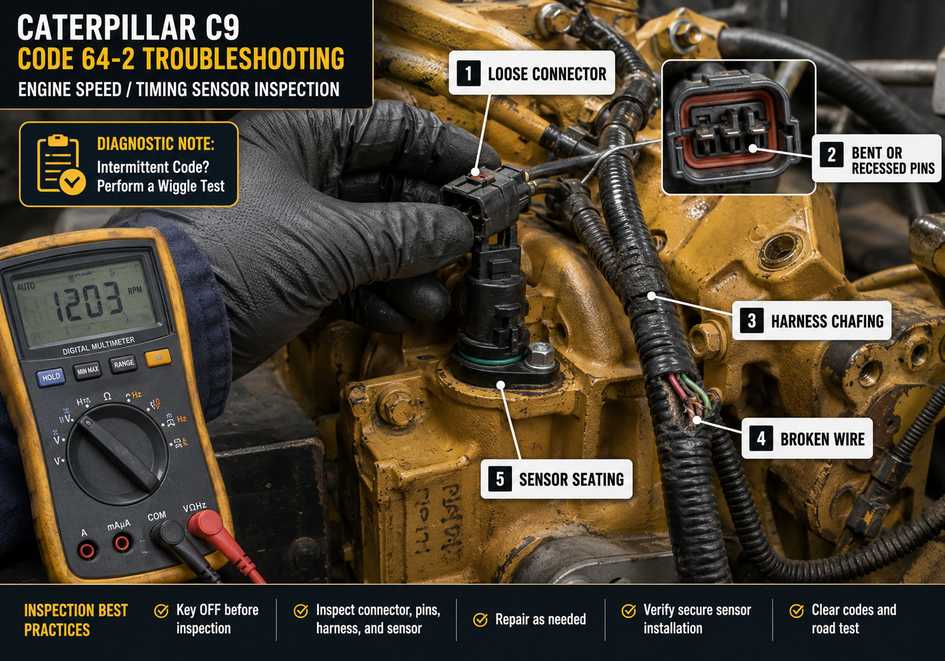
Inspect connectors for:
- Loose terminals
- Bent or pushed-back pins
- Corrosion
- Moisture
- Oil contamination
- Damaged connector locks
- Poor terminal contact
A connector problem is especially likely when the code is intermittent.
2. Speed/Timing Sensor Problem
The secondary speed/timing sensor may be:
- Defective
- Internally intermittent
- Damaged
- Improperly installed
- Not fully seated
If the fault started after sensor replacement or engine repair, check installation before replacing more parts.
3. Wiring Harness Damage
Inspect the harness between the sensor and ECM for:
- Chafing
- Broken conductors
- Pinched wires
- Heat damage
- Loose terminals
- Shorts to ground
- Poor previous repairs
Pay close attention to wiring near brackets or areas exposed to engine vibration.
4. ECM Failure
ECM failure is possible, but consider it only after testing the sensor, wiring, connectors, ECM power, and grounds.
How to Diagnose Caterpillar C9 Code 64-2
Step 1: Connect CAT ET
Connect the Cat Communication Adapter 3 to the machine and service laptop.
Turn the key ON, open CAT ET, and confirm stable communication with the engine ECM.
Step 2: Check Active and Logged Codes
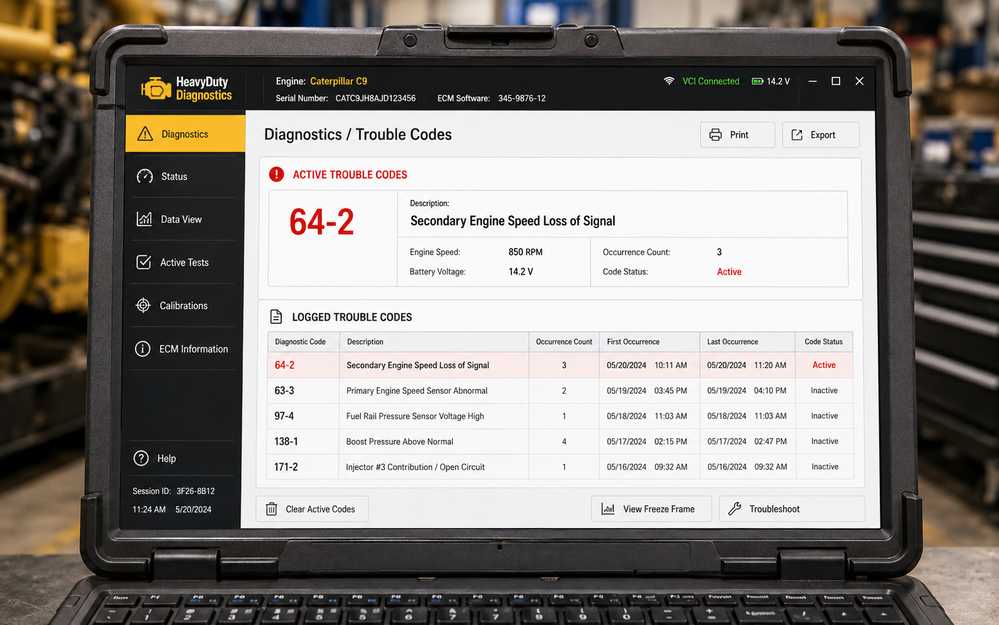
Record:
- Active codes
- Logged codes
- Occurrence counts
- Related primary or secondary speed/timing codes
Do not diagnose code 64-2 in isolation.
If primary and secondary speed/timing faults occur together, the engine may be losing both synchronization signals.
Step 3: Check Whether the Fault Is Active or Intermittent
If code 64-2 remains active, inspect:
- Sensor connector
- Sensor installation
- Sensor condition
- Wiring continuity
- ECM connector
If it is only logged, concentrate on intermittent connector or harness problems.
A wiggle test can help. Carefully move the wiring while monitoring CAT ET for changes in code status or engine RPM signal.
Step 4: Inspect the Secondary Speed/Timing Sensor
With the key OFF, inspect:
- Connector
- Terminals
- Sensor body
- Sensor seating
- Mounting
- O-ring
- Nearby wiring
Look for anything that could cause vibration-related signal loss.
Step 5: Inspect and Test the Harness
Use the correct wiring diagram and digital multimeter to check for:
- Open circuits
- Excessive resistance
- Short to ground
- Short to another circuit
- Poor terminal contact
Move the harness while testing. A changing meter reading may indicate an internal wire break.
Step 6: Check the ECM Connector
Inspect the ECM connector for:
- Corroded terminals
- Loose or recessed pins
- Moisture
- Damaged seals
- Poor terminal tension
Also confirm stable ECM power and grounds.
Step 7: Test or Replace the Sensor
If wiring and connectors are good but the fault remains, follow the engine-specific Caterpillar procedure to test the speed/timing sensor.
Do not use a generic resistance specification for every C9 engine.
For the C9 arrangement covered by the original service information, the two magnetic sensors are identified as non-interchangeable and are replaced as a pair. Verify this requirement using the exact engine serial number before ordering parts.
Step 8: Consider the ECM Last
Only investigate ECM failure after confirming:
- Correct sensor installation
- Sensor testing within specification
- Good wiring continuity
- No circuit shorts
- Good connectors
- Correct ECM power and grounds
Does Sensor Replacement Require Timing Calibration?
For the C9 configuration covered by the original procedure, replacing the speed/timing sensor set does not require timing calibration.
ECM replacement may involve different configuration or calibration procedures.
Always confirm the correct process using the engine serial number and Caterpillar service information.
Fast Diagnostic Workflow
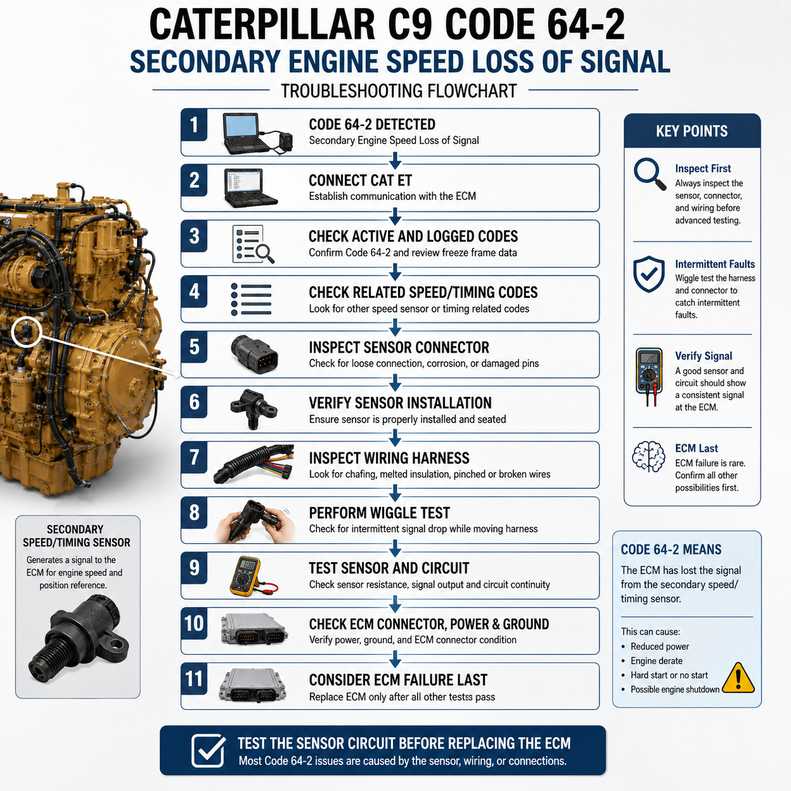
Code 64-2 detected
↓
Connect CAT ET
↓
Check active and logged codes.
↓
Check for related speed/timing faults.
↓
Inspect sensor connector
↓
Verify sensor installation
↓
Inspect wiring harness
↓
Perform wiggle test
↓
Test wiring and sensor
↓
Check ECM connector, power, and grounds.
↓
Consider ECM failure last.
Caterpillar C9 Code 64-2 FAQ
Can a Caterpillar C9 run with code 64-2?
Yes. If one valid speed/timing signal remains available, the engine may continue running.
However, you should still repair the problem because losing both signals can cause a shutdown or no-start condition.
Can code 64-2 cause a crank-no-start?
Yes, if both required speed/timing signals are unavailable during cranking.
If only the secondary signal is lost and another valid signal remains, the engine may still start.
What should I check first?
Start with CAT ET fault information, then inspect the sensor connector, sensor installation, wiring harness, and ECM connector.
Can wiring cause code 64-2?
Yes. A loose terminal, damaged conductor, corrosion, or intermittent open circuit can temporarily interrupt the secondary engine speed/timing signal.
Should I replace the ECM first?
No. Test the sensor circuit, connectors, wiring, ECM power, and grounds before considering ECM replacement.
Final Checklist
Before returning the machine to service, confirm:
- CAT ET communicates normally.
- Code 64-2 is no longer active.
- No related speed/timing code remains active.
- Sensor installation is correct.
- Sensor and ECM connectors are secure.
- Wiring is free from damage.
- Circuit tests meet engine-specific specifications.
- ECM power and grounds are stable.
- Engine RPM is detected during cranking.
- The engine starts and runs normally.
- The fault does not return during a wiggle or operating test.
Conclusion
Caterpillar C9 code 64-2 indicates a temporary loss of the secondary engine speed/timing signal.
The most likely causes are a sensor problem, incorrect sensor installation, a connector fault, a damaged wiring harness, or an ECM connection issue.
A C9 may continue running with one valid speed/timing signal, but losing both signals can stop fuel injection, resulting in an engine shutdown or crank-no-start condition.
For the most efficient repair, connect CAT ET with a Cat Communication Adapter 3, review all related codes, inspect the speed/timing sensor circuit, and verify the correct Caterpillar specifications before replacing components.
Test the sensor circuit before replacing the ECM.
Leave a Reply