
This guide provides detailed instructions on how to replace the touch screen, display screen, and mainboard on the OBDSTAR DC706 programmer.
Important Note
Do screen and mainboard replacement only when you are told to.
Example scenario: The device fails to power on (black screen) even when fully charged.
Replacement Procedure
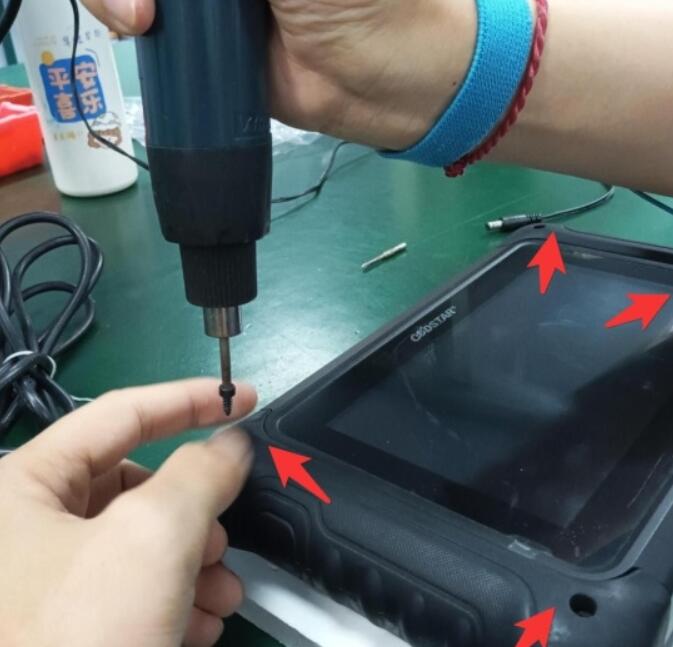
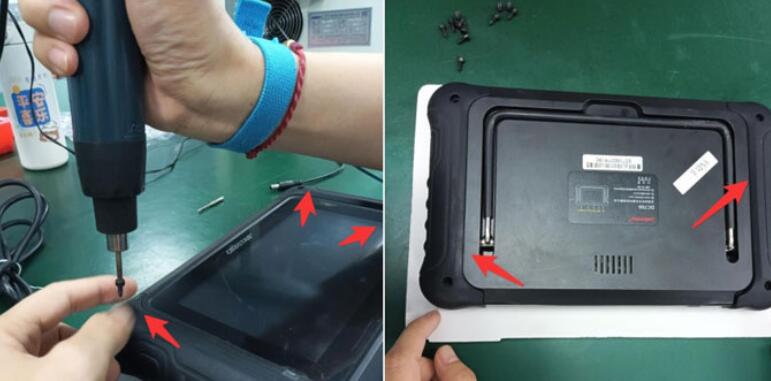
Step 1: Remove Outer Screws
Use an electric screwdriver (or standard screwdriver) to remove the four screws securing the rubber sleeve.
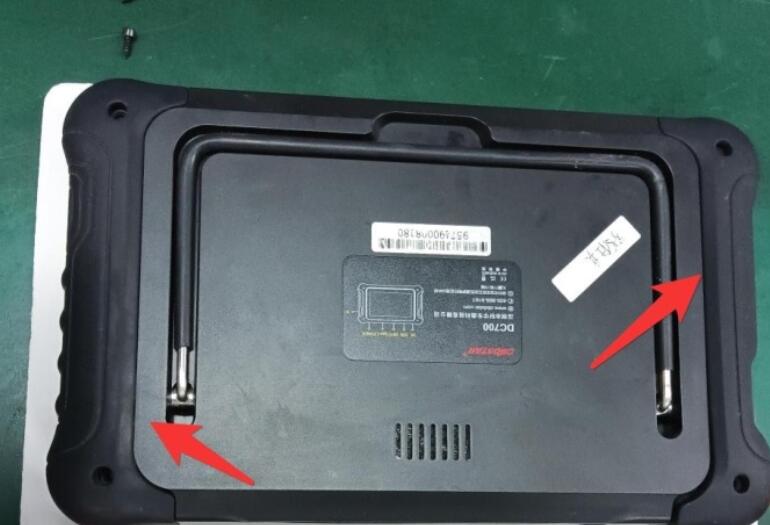
Step 2: Remove Rubber Sleeves
Take off the left and right rubber sleeves from the host.
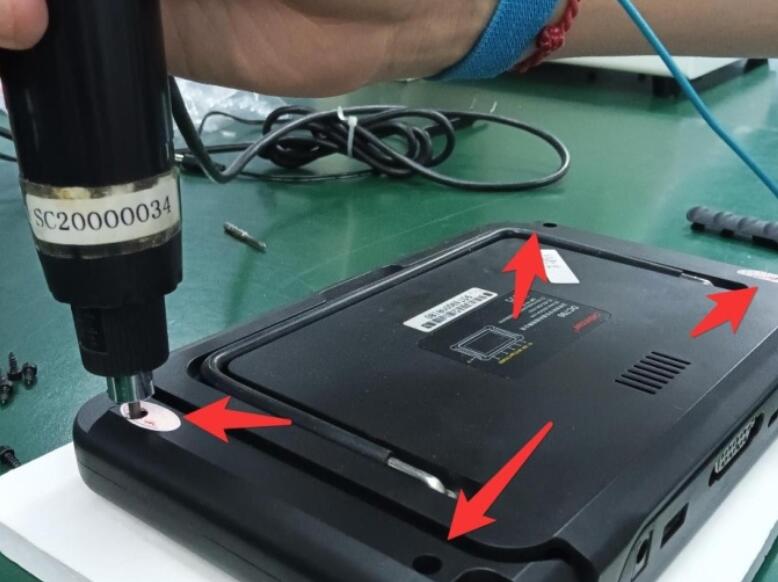
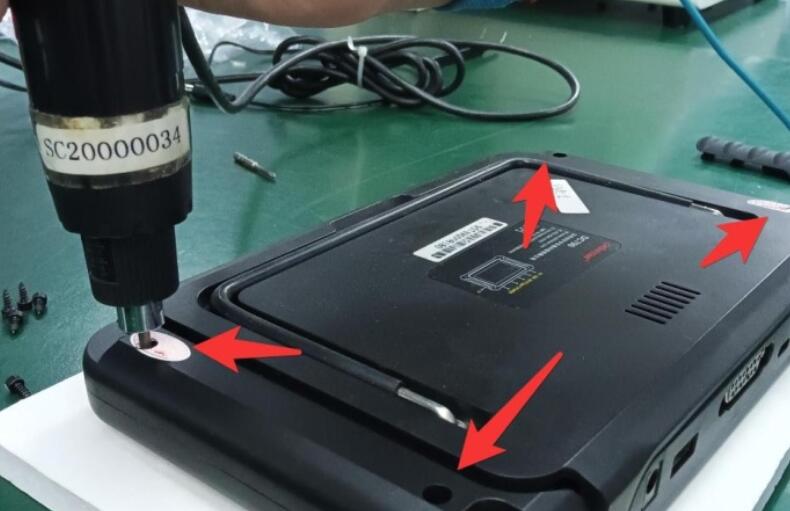
Step 3: Remove the Shell Screws
Use the screwdriver to remove the four screws securing the main shell.
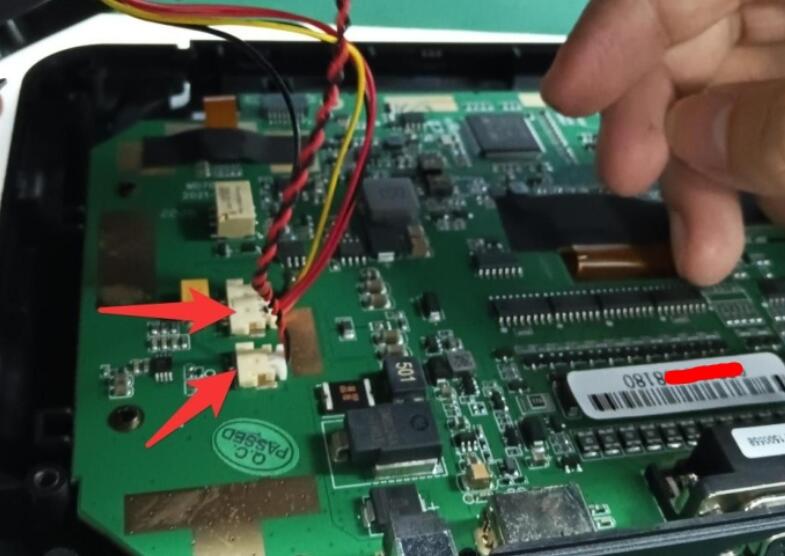
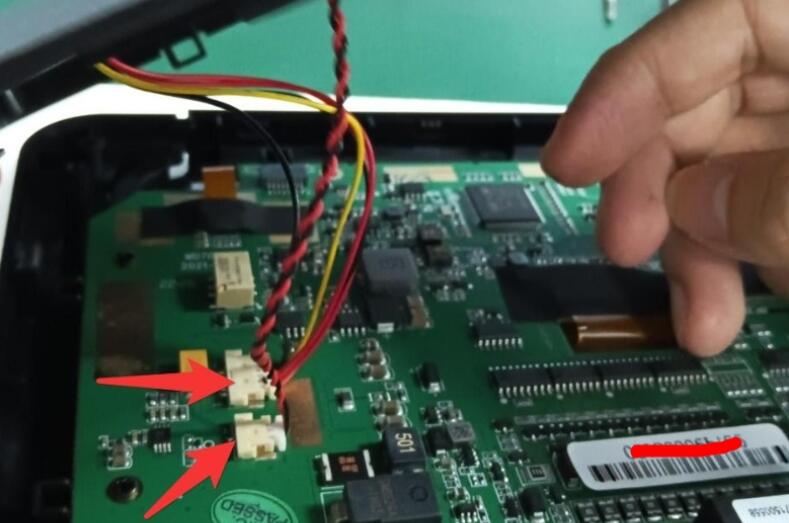
Step 4: Disconnect Wiring Ports
Gently pull out the two wiring ports indicated by the arrows.
Step 5: Remove Motherboard Screws
Unscrew the motherboard and remove the acetate cloth covering the cable interface.
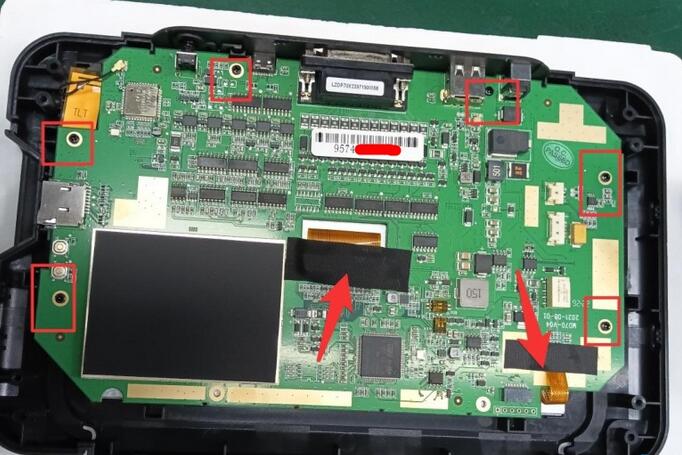
Step 6: Disconnect Screen and Antenna
Peel off the display cable indicated by the arrow and remove the WiFi antenna.
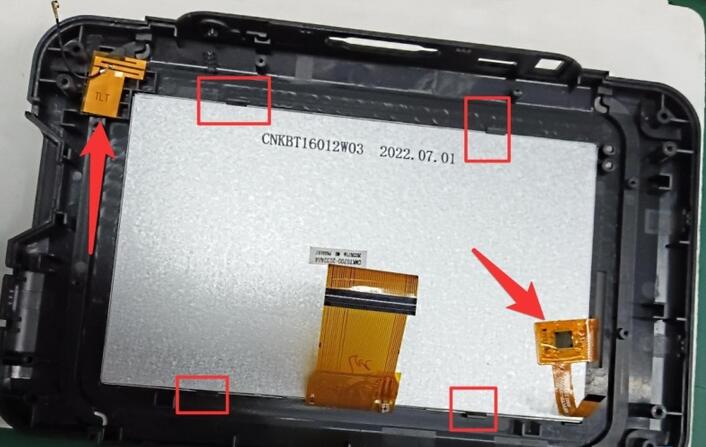
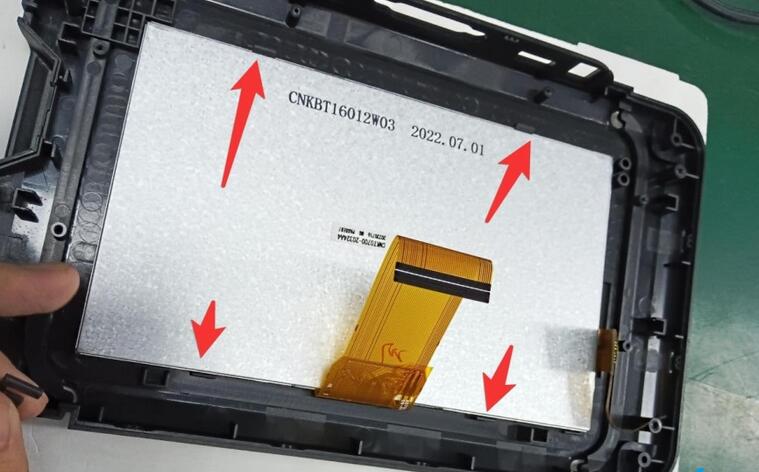
Step 7: Assemble New Screen
Install the new touch screen (pre-assembled with the upper case) and display screen as shown.
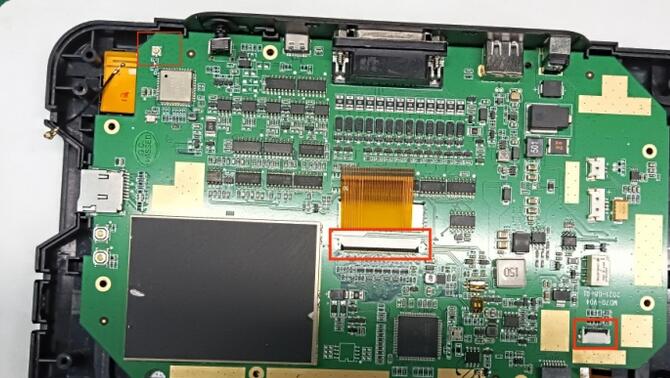
Step 8: Install Motherboard
Align the new motherboard with the card slots in the shell and lay it flat. Reconnect the cable and WiFi antenna within the red frame, apply the acetate cloth for fixation, and secure the motherboard with screws.

Step 9: Reconnect Power and Speaker Wires
Insert the power cord and speaker wire into the motherboard (as indicated), then attach the back shell to the front shell.
Step 10: Secure the Shell
Tighten the screws at the indicated positions to secure the housing.
Step 11: Reinstall Rubber Sleeves
Reattach the left and right rubber sleeves to the host and install the fixing screws.
Notes
- If the device cannot boot or behaves abnormally after replacing the Android mainboard, contact after-sales support and provide your device serial number.
- If the display appears abnormal after screen replacement, contact after-sales support with your device serial number.
- When replacing the VCI mainboard, contact your dealer to synchronize your account information and provide the serial numbers of both old and new VCI boards.
By following these steps carefully, you can safely replace the screen and mainboard of your OBDSTAR DC706 and restore it to full working condition.
Leave a Reply