
Overview
This guide provides step-by-step instructions for removing and installing the water temperature regulator housing on a Perkins 800 Series engine.
Related Contents:
Perkins EST 2024A & 2023A & 2019A Software Free Download
Perkins SPI2 2018A EPC+Service Manual Free Download
Perkins EST Interface EST Diagnostic Adapter 2024A With WIFI
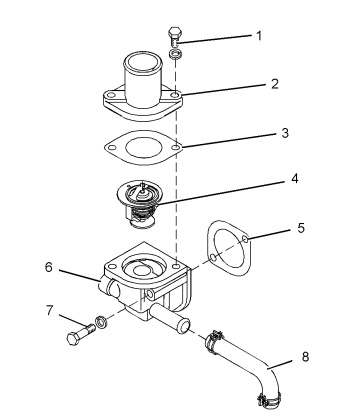
Removal Procedure
- Drain Coolant:
- Drain the coolant from the cooling system into an appropriate container for storage or disposal.
- Refer to the Operation and Maintenance Manual under Cooling System Coolant – Change for proper procedures.
- Remove Outlet Connection:
- Remove bolts (1) and detach the outlet connection (2).
- Remove Water Temperature Regulator:
- Take out joint (3) and remove the water temperature regulator (4).
- Note the orientation of the regulator for correct reinstallation.
- Disconnect Hose:
- Loosen the hose clamp and disconnect hose (8) from the water temperature regulator housing (6).
- Remove Regulator Housing:
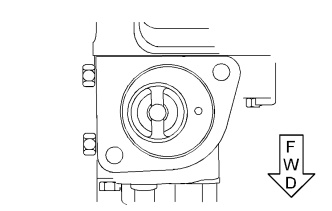
- Remove bolts (7) and detach the water temperature regulator housing (6) from the cylinder head.
- Remove Joint:
- Take out joint (5).
Installation Procedure
- Inspect the Regulator:
- Check the water temperature regulator for wear, damage, and proper operation.
- Refer to Systems Operation, Testing and Adjusting – Water Temperature Regulator Test for further details.
- Replace the regulator if necessary.
- Prepare Mating Surfaces:
- Ensure that the mating surfaces of the outlet connection, regulator housing, and cylinder head are clean and undamaged.
- Attach the Regulator Housing:
- Position bolts (7) and install a new joint (5) onto the water temperature regulator housing (6).
- Position the housing onto the cylinder head and tighten bolts (7) to 18 N·m (13 lb ft).
- Install Water Temperature Regulator:
- Place the water temperature regulator (4) into the regulator housing (6), ensuring it is in the correct orientation.
- Reassemble Components:
- Install a new joint (3) and attach the outlet connection (2) to the regulator housing (6).
- Secure bolts (1) and tighten them to 18 N·m (13 lb ft).
- Reconnect Hose:
- Attach hose (8) to the regulator housing (6) and tighten the hose clamps securely.
- Refill Coolant:
- Fill the cooling system with coolant to the correct level.
- Follow the Operation and Maintenance Manual – Cooling System Coolant Change for proper refilling instructions.
By following these steps, you can successfully remove and install the water temperature regulator housing on a Perkins 800 Series engine.
More trouble repair case for Perkins,pls refer to:Perkins Trouble Repair
Leave a Reply