
This guide provides step-by-step instructions for removing the preconcave on CLAAS LEXION 480 combine harvesters.
Related Contents:
CLAAS CDS 7.5 Diagnostic Software 2021 2020 Free Download
CLAAS 4 CAN Diagnostic Interface
Claas WebTIC Offline Repair & Service 2024 2015 Free Download
Procedure: Removing the Preconcave
1. Lower the Concave
- Adjust the concave to its lowest position.
2. Remove the Feed Rake Conveyor
- Refer to page 3.1.1 for detailed instructions.
3. Secure the Machine
- Place stands under the front axle for safety and stability.
- Ensure the front axle is securely supported.
4. Remove the Front Wheels
- Detach both front wheels to provide access.
5. Remove Guards and Covers
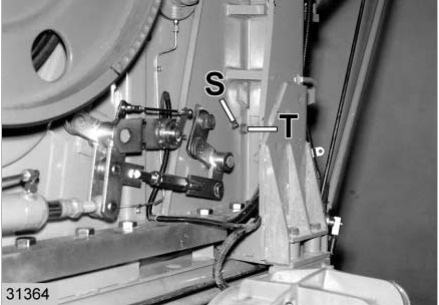
- Remove the guard (S) and mudguards (K) from the right-hand side.
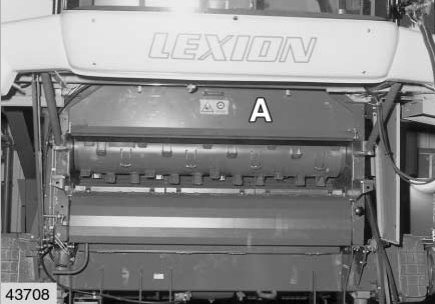
- Remove the drum inspection cover (A).
6. Remove Fasteners and Plugs
- Unscrew and remove the hex bolts (T) on both sides of the machine.
- Remove the screw plug (S) on both sides.
- If equipped with the maize option, remove the feed plate for the stone trap.
7. Remove the Feed Plate and Stone Trap
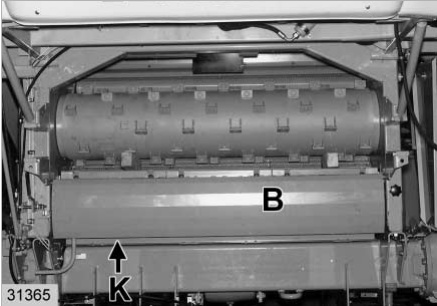
- Remove the feed plate (B) and cover (K).
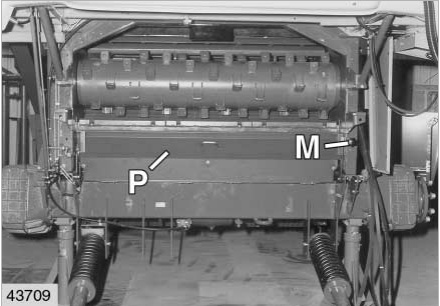
- Unscrew the turn lock nut (M) and fold down the stone trap (P).
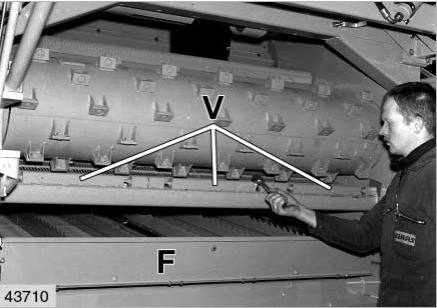
8. Detach the Preconcave Segments
- Unscrew the hex bolts securing the preconcave segments (V).
- Raise and remove the segments.
9. Access the Preparation Floor
- Unscrew and fold open the cover (F) on the preparation floor.
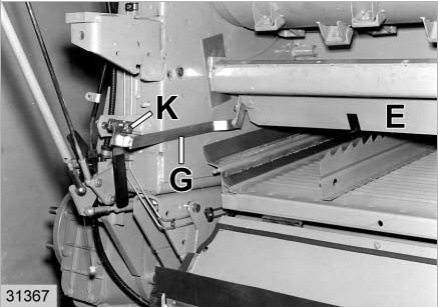
10. Remove the Brace and Disawner Plates
- Unscrew hex bolt (K) to remove brace (G).
- Lift and remove both disawner plates (E) from the front of the machine.
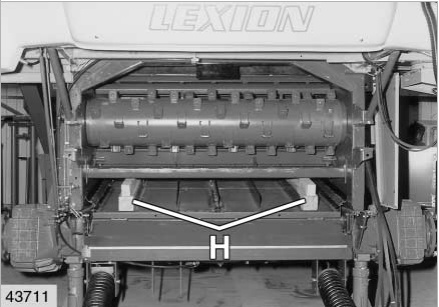
11. Support the Preconcave
- Use 170mm high squared timber (H) to support the underside of the preconcave.
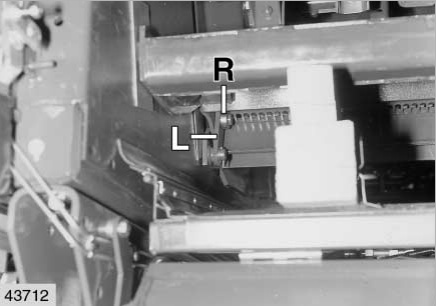
12. Detach the Preconcave Mounting
- Pull out the split pins from the mounting plates (L) of the main concave.
- Loosen the set collars (R) and remove the mounting plates (L).
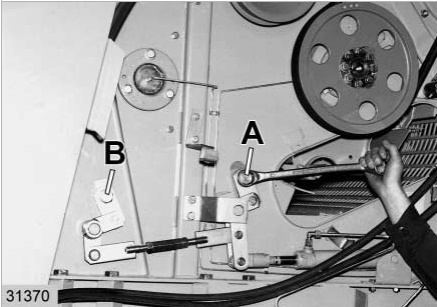
13. Remove Suspension Bolts
- Remove bolts (A and B) from the center and front concave suspension on both sides.
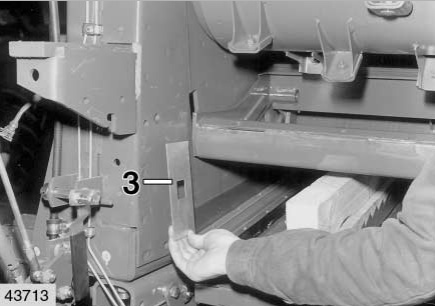
14. Remove Sealing Plates and Wear Strips
- Pull out sealing plates (3 and 7).
- Remove wear strips (4) from the front sealing plates (3).
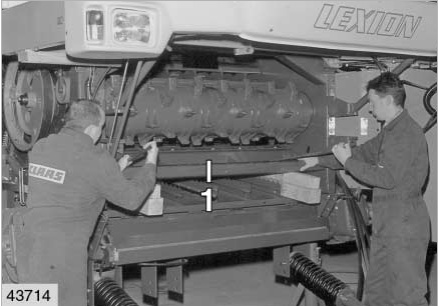
15. Remove the Preconcave
- Raise the rear of the preconcave (1) and slide it over the edge of the main concave.
- Slowly pull the preconcave out towards the front using the squared timber as a guide.
More repair case for CLAAS,please refer to CLAAS Trouble Repair
Leave a Reply