
Introduction
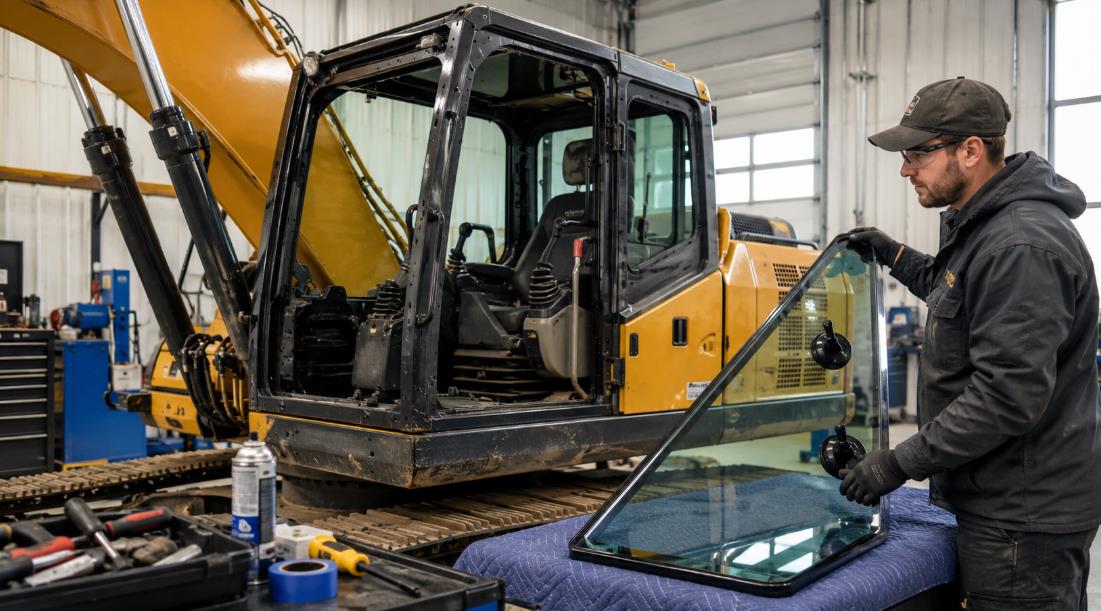
This guide explains how to properly remove and install panes of glass that are directly bonded to the opening of a JCB excavator cab frame. These procedures are commonly required when replacing cracked, broken, or damaged cab glass on JCB construction equipment.
Because cab glass is bonded directly to the frame using polyurethane adhesive, the job must be carried out carefully. Incorrect removal or installation can damage the cab frame, cause sealing problems, or create a serious safety risk for the technician.
For best results, this work should be performed by trained technicians using the correct glass handling tools, personal protective equipment, and approved bonding materials.
Important Safety Precautions Before Starting
Before removing or installing JCB excavator cab glass, always follow the proper safety precautions.
1. Wear Safety Glasses
Safety glasses must be worn during both glass removal and installation. Broken glass, sealant fragments, and cutting tools can create flying debris.
2. Use the Correct Gloves
Different gloves should be used depending on the task:
- Heavy-duty leather gauntlet gloves when cutting out broken glass
- Non-slip gloves when handling or moving glass panels
- Surgical-type gloves when using polyurethane adhesives, primers, or activators
3. Wear Protective Overalls
Protective clothing helps prevent injury from glass fragments, sealant, adhesive, and cleaning chemicals.
4. Do Not Smoke
The activators and primers used during bonded glass installation are highly flammable. Do not smoke near the work area, and keep all ignition sources away.
5. Use Glass Lifters
Do not attempt to handle or move large panes of cab glass by hand. Always use proper glass lifters or approved glass handling tools.
Working Environment Requirements
JCB cab glass replacement must only be carried out in a suitable working environment.
The work area should be:
- Dry
- Frost-free
- Protected from rain and moisture
- Free from dust and contamination
- Warm enough for adhesive bonding
Glass should not be replaced at temperatures below 5°C / 41°F. Low temperatures can affect the curing and bonding performance of polyurethane adhesive.
If the machine is outside in wet or cold conditions, move it to a sheltered workshop or use a protective canopy. In some cases, hinged doors or removable window frames may be taken off the machine and moved to a cleaner, drier working area.
Understand the Glass Type Before Removal
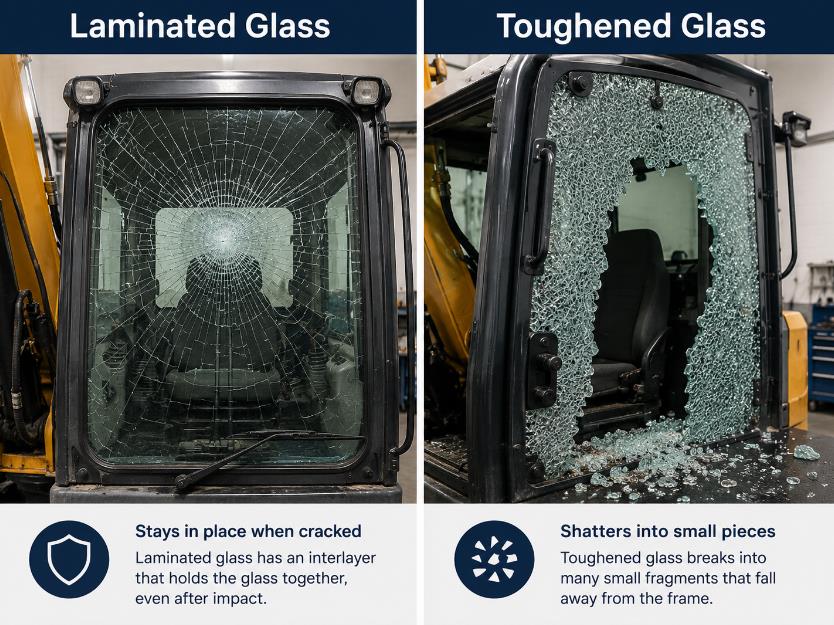
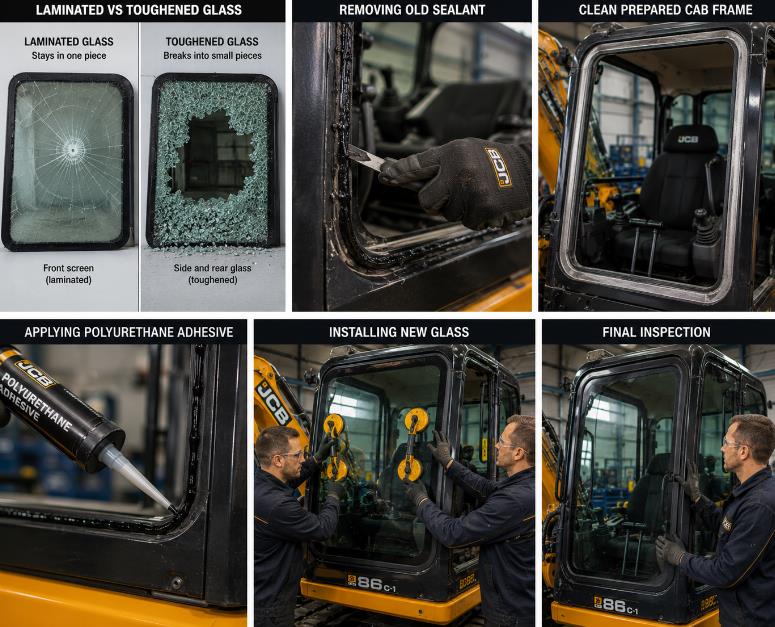
Before removing the damaged glass, confirm whether the pane is laminated or toughened glass.
Laminated Glass
The front screen glass is usually laminated. When laminated glass breaks, it normally remains in one piece even if cracked.
Toughened Glass
Other cab glass panels are usually toughened. When toughened glass breaks, it shatters into many small pieces and may fall apart.
This difference is important because the removal method depends on the glass type.
Critical Warning for Toughened Glass
Never use a power-operated knife when removing sealant around a toughened glass screen.
The vibration and cutting action of a powered knife can cause glass particles to be thrown with enough force to cause serious injury, even when safety glasses are worn.
When working with toughened glass, use only hand-operated tools.
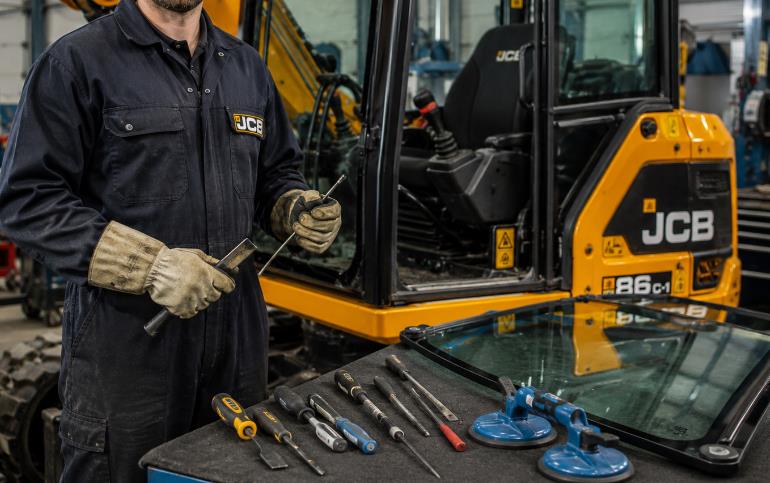
Tools and Materials Required
Several special tools may be required to remove and replace bonded JCB cab glass correctly. Some tools can be obtained locally, while others may need to be sourced from JCB service equipment suppliers.
Commonly required items include:
- Safety glasses
- Heavy-duty gloves
- Non-slip glass handling gloves
- Surgical-type gloves
- Protective overalls
- Glass lifters
- Hand cutting tools
- Sealant removal tools
- Cleaning materials
- Approved activator
- Approved primer
- Polyurethane glass adhesive
- Masking materials
- Protective covers for cab interior and paintwork
Always use tools and bonding products that are suitable for bonded vehicle glass installation.
Step-by-Step Guide: Removing Broken Glass and Old Sealant
Step 1: Prepare the Machine and Work Area
Park the JCB excavator on level ground in a dry and sheltered location. Make sure the cab area is clean and safe to work around.
Protect the cab interior, dashboard, seat, control panels, and painted surfaces before starting the glass removal process.
Step 2: Inspect the Damaged Glass
Check whether the damaged pane is laminated or toughened glass.
If the glass is laminated, it may remain in one piece. If it is toughened, it may already be shattered or may break apart during removal.
Step 3: Wear the Correct PPE
Before cutting or handling the glass, put on safety glasses, protective overalls, and the correct gloves for the task.
Step 4: Remove Loose or Broken Glass Safely
Carefully remove any loose glass pieces from the cab frame and surrounding area. Use heavy-duty gloves and avoid direct contact with sharp edges.
Do not rush this step. Small glass fragments can remain trapped in the sealant or cab frame aperture.
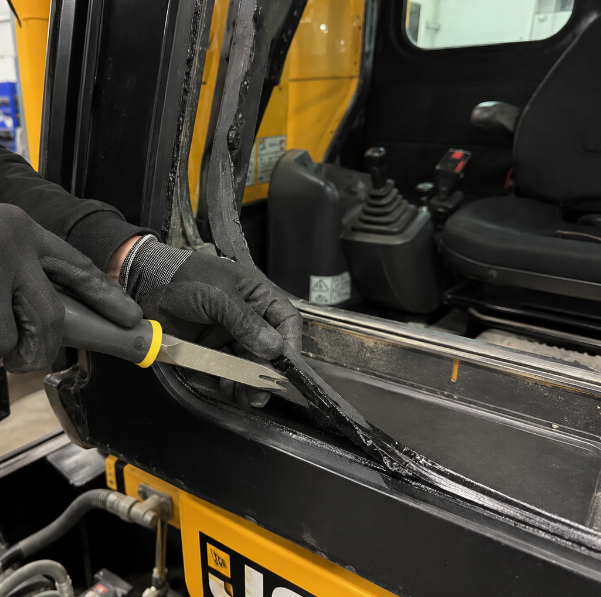
Step 5: Cut Through the Old Bonding Sealant
Use the appropriate hand-operated cutting tools to cut through the old polyurethane sealant.
When working with toughened glass, do not use a powered knife. Use hand tools only.
Take care not to damage the cab frame, paintwork, or surrounding trim.
Step 6: Remove the Glass Panel
Once the bond has been cut, use glass lifters to carefully remove the pane from the cab frame opening.
Do not attempt to lift large glass panels by hand. Move the glass to a safe disposal or storage area.
Step 7: Remove Old Sealant
After the glass is removed, carefully trim the remaining sealant from the cab frame aperture.
Do not remove too much material from the bonding surface unless required by the adhesive manufacturer’s instructions. The bonding surface must remain suitable for the new polyurethane adhesive.
Step 8: Clean and Inspect the Cab Frame
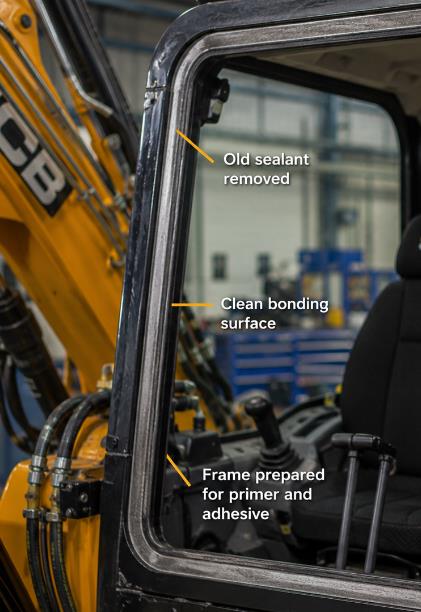
Inspect the cab frame for rust, damage, cracks, old adhesive contamination, or paint damage.
The frame surface must be clean, dry, and properly prepared before the new glass is installed.
Step-by-Step Guide: Installing New JCB Cab Glass
Step 1: Check the Replacement Glass
Before installation, confirm that the replacement glass is correct for the machine model and cab opening.
Check the glass for damage, incorrect shape, wrong curvature, or defects before applying adhesive.
Step 2: Dry-Fit the Glass
Position the new pane near the cab frame opening and check the fit before applying adhesive.
Make sure the glass aligns correctly with the frame aperture.
Step 3: Prepare the Bonding Surfaces
Clean the bonding surface according to the adhesive manufacturer’s instructions.
Apply the correct activator and primer where required. Because primers and activators are flammable, keep them away from sparks, flames, and cigarettes.
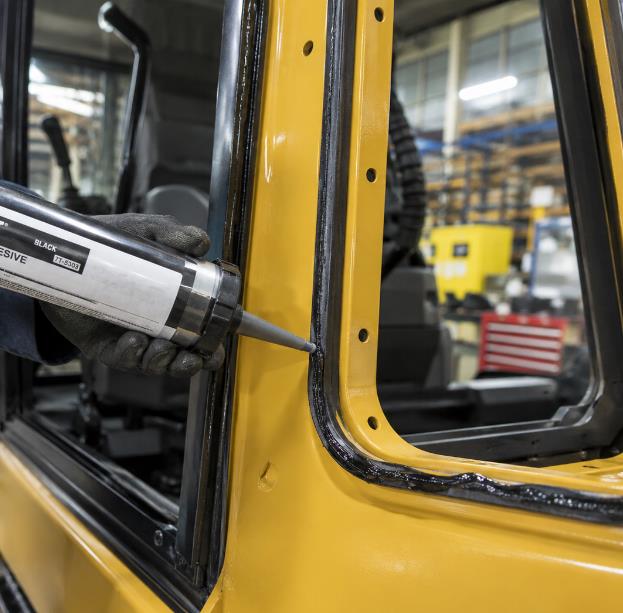
Step 4: Apply Polyurethane Adhesive
Apply a continuous bead of approved polyurethane adhesive to the prepared bonding area.
The adhesive bead should be even and unbroken to help prevent leaks, wind noise, and weak bonding.
Step 5: Install the Glass

Using glass lifters, carefully position the glass into the cab frame opening.
Press the glass into place evenly. Avoid excessive pressure that could damage the glass or squeeze out too much adhesive.
Step 6: Secure the Glass During Curing
Support or tape the glass if needed to prevent movement while the adhesive cures.
Follow the adhesive manufacturer’s recommended curing time before operating the machine or exposing the cab to heavy vibration.
Step 7: Final Inspection
After installation, check that:
- The glass is correctly aligned
- The adhesive bead is continuous
- There are no visible gaps
- The cab frame is clean
- The glass is secure
- No tools or glass fragments remain inside the cab
If needed, perform a water leak check after the adhesive has cured.
Common Mistakes to Avoid
Avoid these common errors when replacing JCB excavator cab glass:
- Replacing glass in wet, damp, or freezing conditions
- Installing glass below 5°C / 41°F
- Handling glass without proper glass lifters
- Using a powered knife on toughened glass
- Smoking near flammable primers or activators
- Applying adhesive to dirty or wet surfaces
- Moving the machine before the adhesive has cured
- Ignoring damaged paint or rust around the cab frame
When Is a JCB Diagnostic Tool Useful After Cab Glass Replacement?
Cab glass replacement does not normally require diagnostic software for the physical bonding process. However, a JCB diagnostic tool can be useful after the repair if any cab electrical components were removed, unplugged, or affected during the job.
For example, technicians may need to check:
- Wiper and washer operation
- Cab switches and control panels
- Warning lights or fault codes
- Harness connectors around the cab frame
- Door or window-related electrical components
- Machine system communication after repair
If the machine shows warning lights, communication faults, or abnormal electrical behavior after the cab repair, using JCB ServiceMaster or a compatible JCB Electronic Service Tool can help identify the issue more quickly.
Need JCB Diagnostic Support?
If you service JCB excavators, backhoe loaders, telehandlers, or other construction machines, a JCB diagnostic kit can help with fault code reading, troubleshooting, maintenance, and post-repair system checks.
Conclusion
Replacing bonded glass on a JCB excavator cab frame requires careful preparation, the correct safety equipment, and proper handling procedures. The work should be done in a dry, frost-free environment and never below 5°C / 41°F.
The most important safety point is to identify the glass type before removal. Laminated glass and toughened glass behave differently when broken, and toughened glass must only be removed using hand-operated tools.
By using proper PPE, glass lifters, correct sealant removal tools, and approved polyurethane adhesive, technicians can safely remove damaged glass and install a new pane securely on the JCB excavator cab frame.
FAQ
Can I replace JCB excavator cab glass outdoors?
It is not recommended to replace bonded cab glass outdoors in wet, cold, or dusty conditions. The work should be done in a dry, frost-free, sheltered environment.
What is the minimum temperature for JCB cab glass replacement?
Glass should not be replaced at temperatures below 5°C / 41°F because low temperatures can affect adhesive bonding and curing.
Why should I not use a power knife on toughened glass?
A power-operated knife can cause toughened glass particles to be thrown at high speed, creating a serious injury risk. Use hand-operated tools only.
Do I need glass lifters to install JCB cab glass?
Yes. Large glass panels should not be moved or installed by hand. Proper glass lifters help prevent injury and glass damage.
Is the front screen glass laminated or toughened?
The front screen glass is typically laminated. Other cab glass panels are usually toughened, but always confirm before removal.
Can JCB ServiceMaster help with cab glass replacement?
JCB ServiceMaster is mainly used for diagnostic and electronic system checks. It is not required for the physical glass bonding process, but it may be useful if cab electrical systems need to be checked after repair.
For information about jcb, Please refer to JCB Trouble Repair
Leave a Reply