
The Cummins QSKTA50-CE and QSK60 engines may use multiple ECMs depending on the engine configuration. When updating or replacing ECM calibration files, it is important to select the correct ECM codes and follow the INSITE calibration process carefully.
This guide explains how to check the latest ECM code, download calibrations, and perform a multiple ECM download for 3 ECMs using Cummins INSITE.
Important Notice:
ECM calibration should be performed by a qualified technician using authorized Cummins INSITE software and correct calibration files. Incorrect ECM programming may cause engine performance issues, communication faults, or equipment downtime.
Tools and Software Required
Before starting, make sure the following items are ready:
- Cummins INSITE diagnostic software
- Compatible datalink adapter
- Stable laptop power supply
- Stable machine or engine battery voltage
- Correct engine information and ECM codes
- Internet access if using ECM/PDD Code Search Web/Online
- Authorized calibration access
Related Product:
Cummins INSITE diagnostic software and compatible heavy-duty diagnostic adapters can be used for engine diagnosis, parameter checking, and ECM calibration operations.
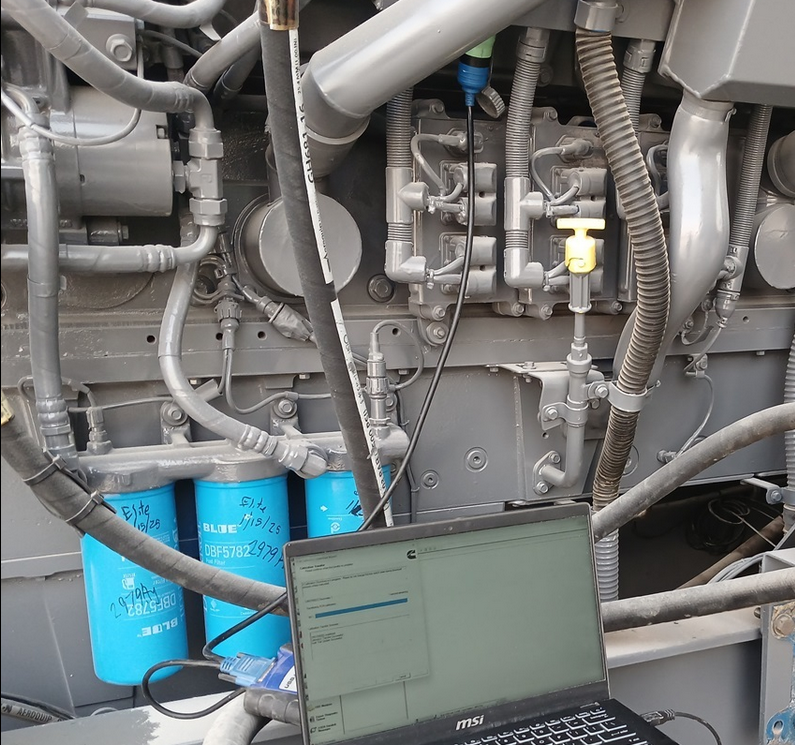
Step 1: Connect to the ECM with Cummins INSITE
Connect the diagnostic adapter to the engine diagnostic port and launch Cummins INSITE.
After communication with the ECM is established:
- Open Cummins INSITE.
- Connect to the engine ECM.
- Click Calibration Selection on the Viewbar.
- Use this menu to select, view, and transfer calibration files.
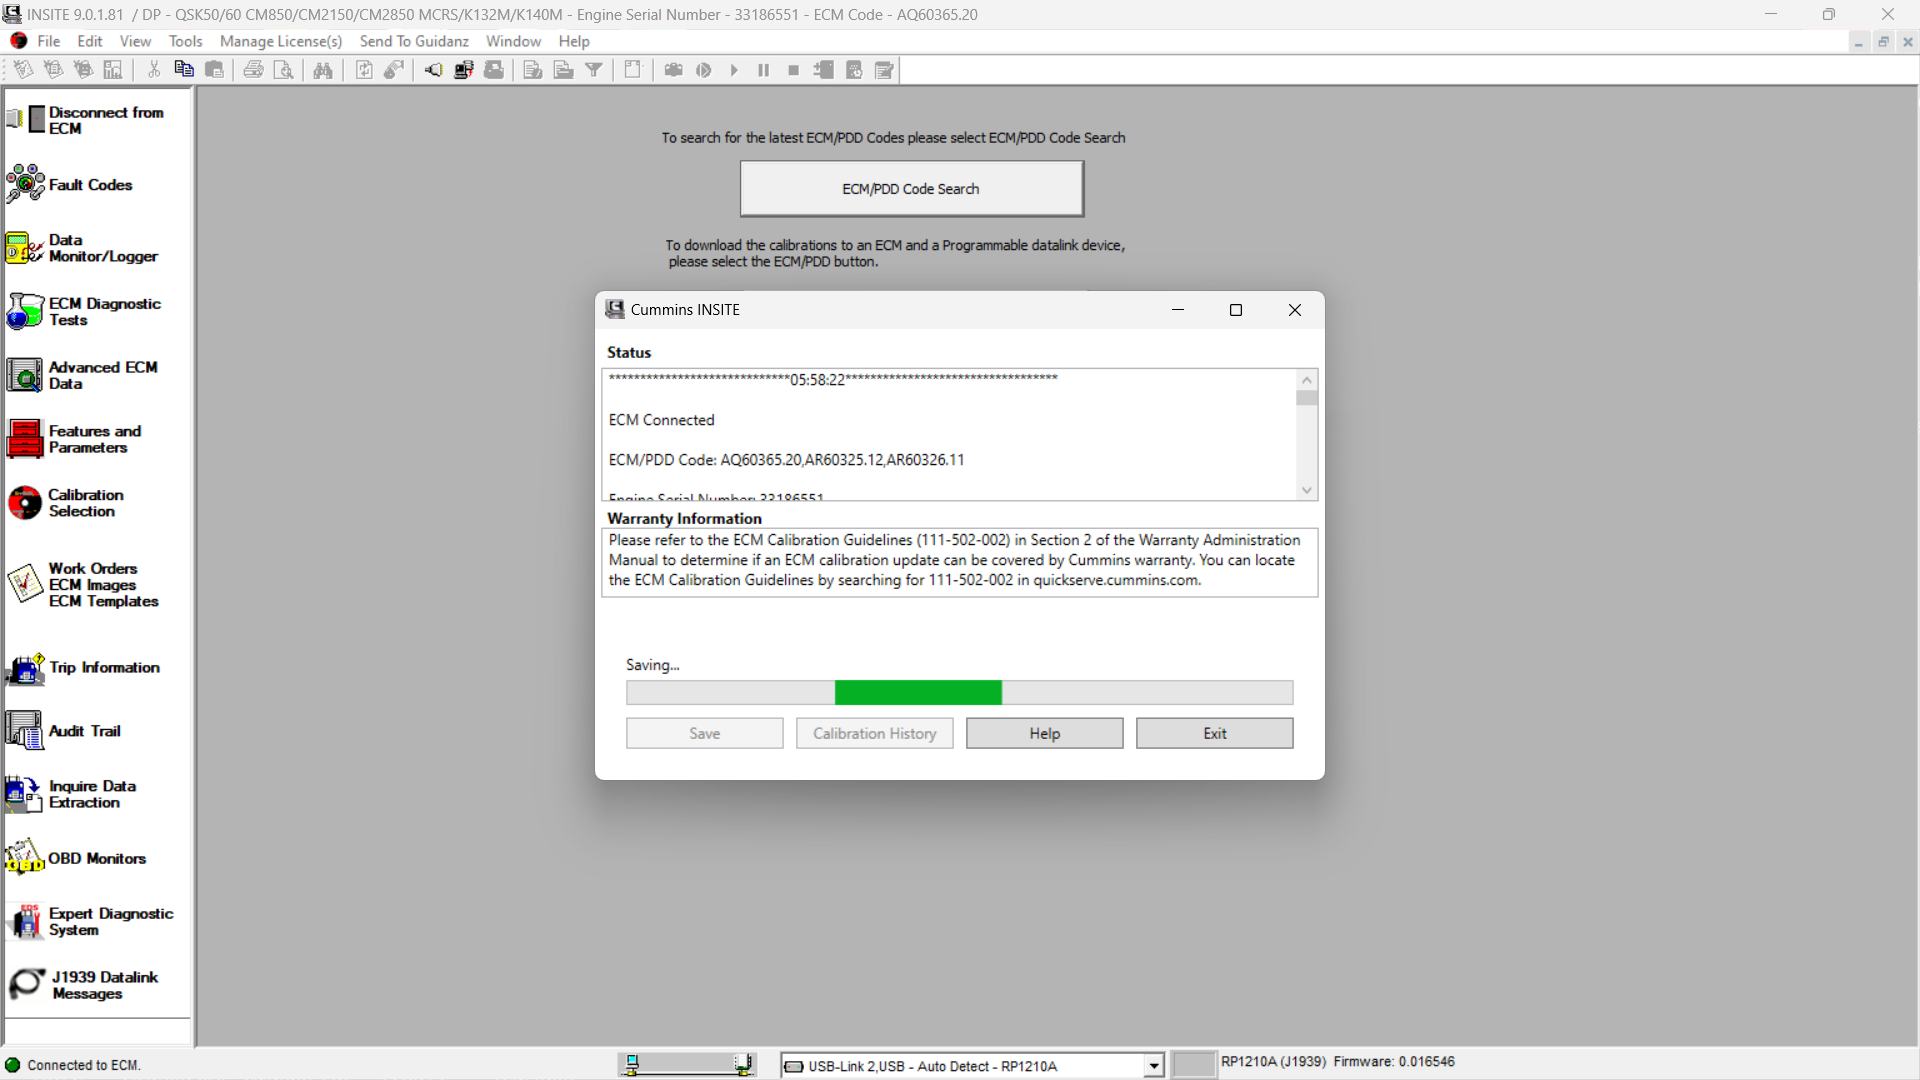
Step 2: Check for the Latest ECM Code
To confirm the correct calibration file, use the ECM/PDD code search function.
- Click ECM/PDD Code Search (Web/Online).
- Wait for the search process to complete.
- Click Save after the ECM/PDD search is finished.
This step helps confirm whether the ECM code currently selected is suitable for the engine application.
Step 3: Select the Calibration File
After the ECM/PDD code search is complete:
- Click ECM/PDD.
- Navigate to the desired calibration.
- Highlight the required calibration file.
- Double-click the highlighted calibration or right-click it and select Transfer to ECM.
Example ECM code used in this procedure:
- Primary ECM Code: AQ60365.20
![]()
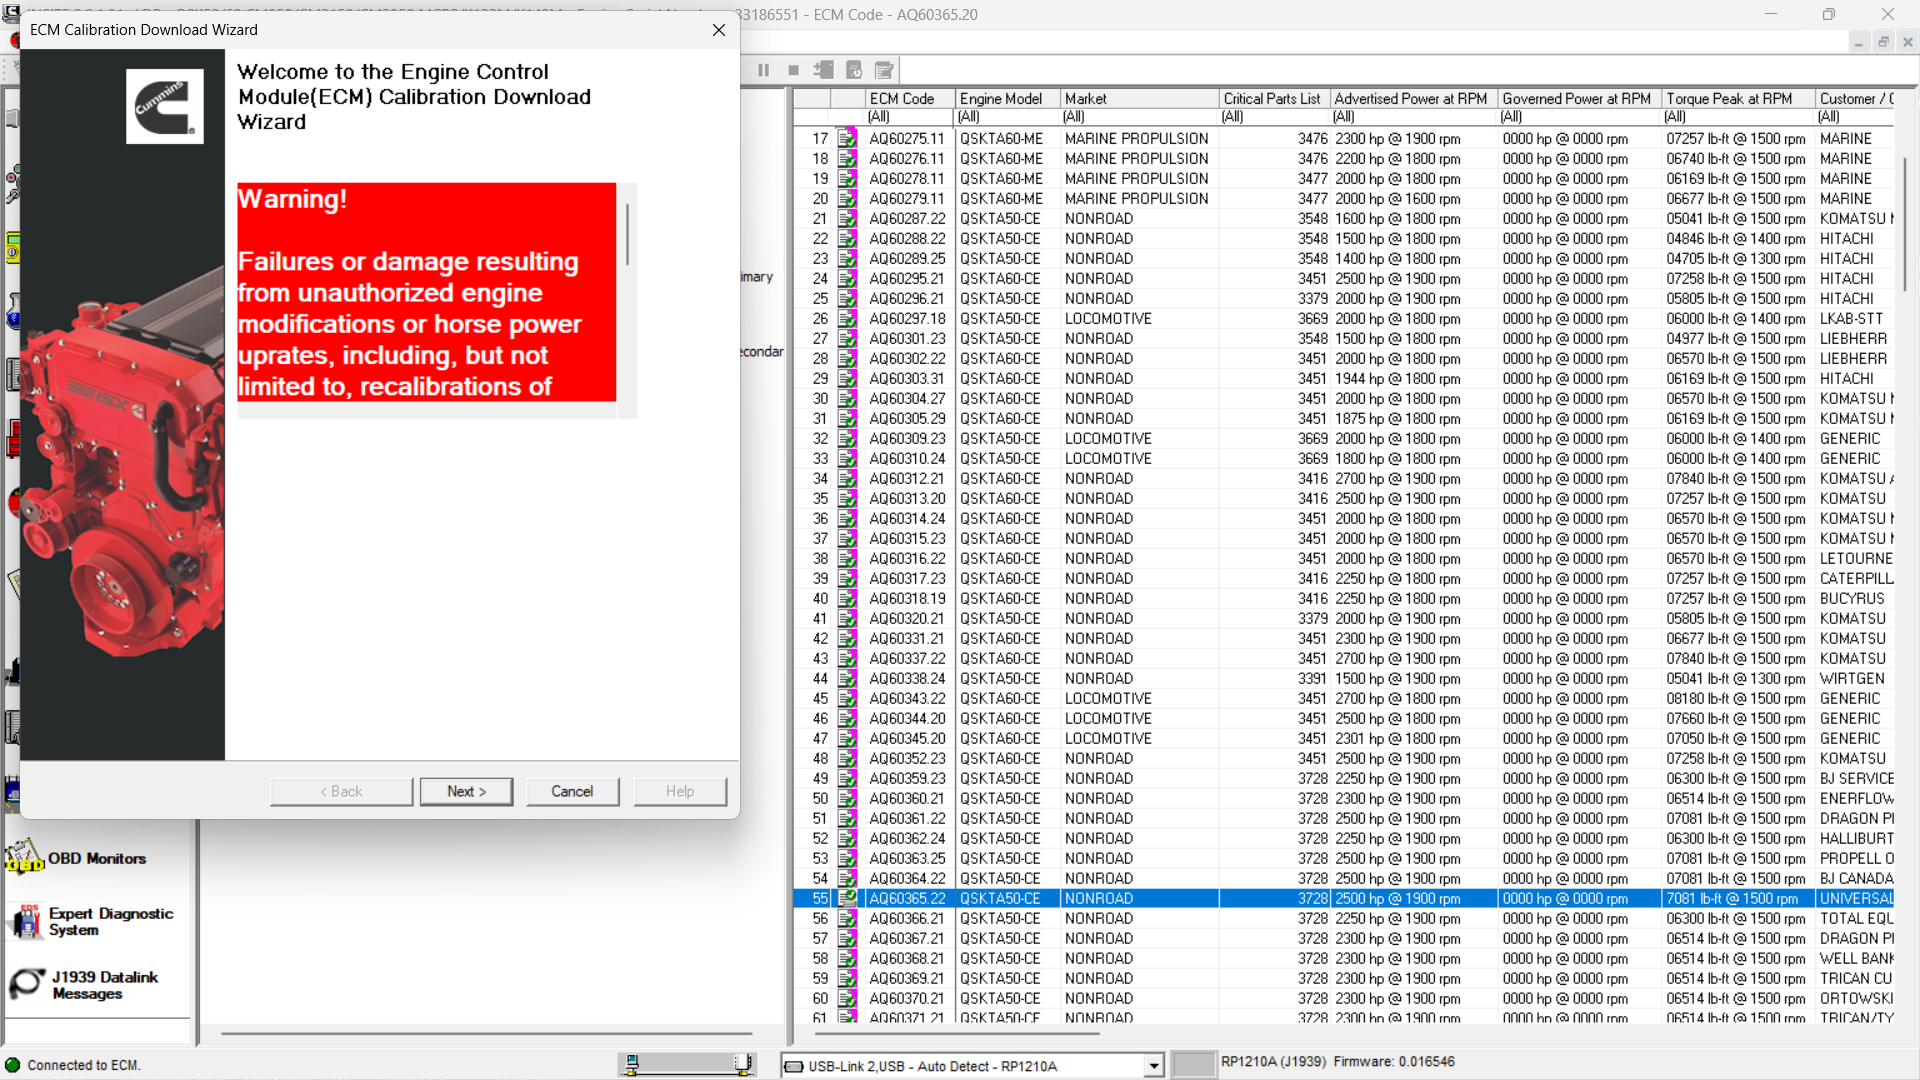
Step 4: Read the Warning Message
INSITE will display a warning message before starting the calibration download.
Read the message carefully before continuing.
Then click Next.
This warning page is important because ECM calibration may change engine control data, adjustable parameters, and module programming information.
Multiple ECM Download for QSKTA50-CE / QSK60
For some Cummins QSKTA50-CE and QSK60 applications, more than one ECM must be calibrated. In this case, the process may involve:
- Primary ECM
- Secondary ECM 1
- Secondary ECM 2
This guide uses a 3 ECM calibration download as an example.
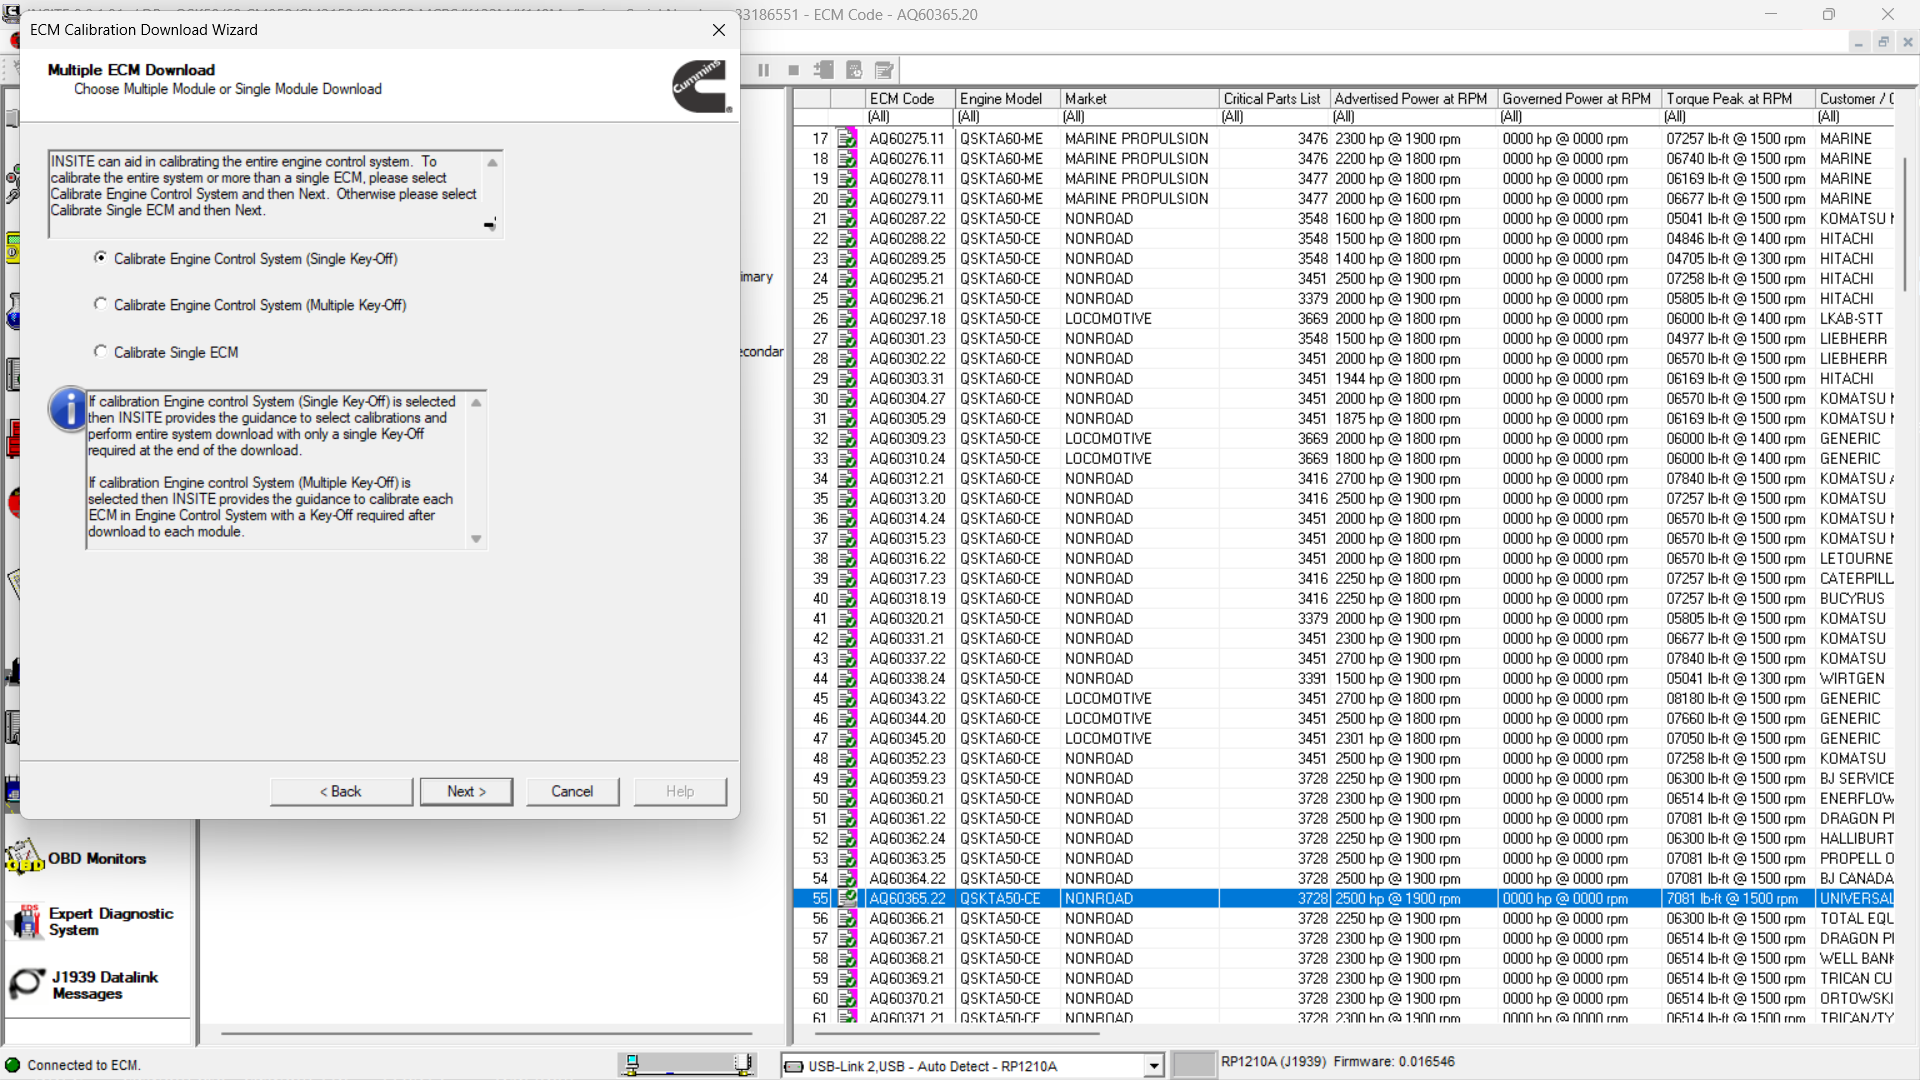
Step 5: Choose Multiple Module Calibration
When the Calibration Download Wizard opens, select:
Calibrate Engine Control System (Single Key-Off)
Choose this option when you need to calibrate the whole engine control system or more than one ECM.
This is the correct selection for a multiple ECM download.
Step 6: Review Adjustable Parameter Recovery
Click Next to open the Adjustable Parameter Recovery File window.
This section allows INSITE to save and restore adjustable parameters if the connected ECM supports this function.
Important Note About Adjustable Parameters
The Save/Restore Adjustable Parameters option may help retain existing adjustable settings after calibration.
However:
- For industrial applications, this option is usually unchecked by default.
- For automotive applications, this option is usually checked by default.
- If this option is not selected, or if the ECM does not support it, adjustable parameters may return to the default values of the new calibration.
If parameters cannot be restored after calibration, INSITE will display a Parameters Not Restored window. These parameters can be saved, printed, and manually adjusted later through Features and Parameters on the Viewbar.
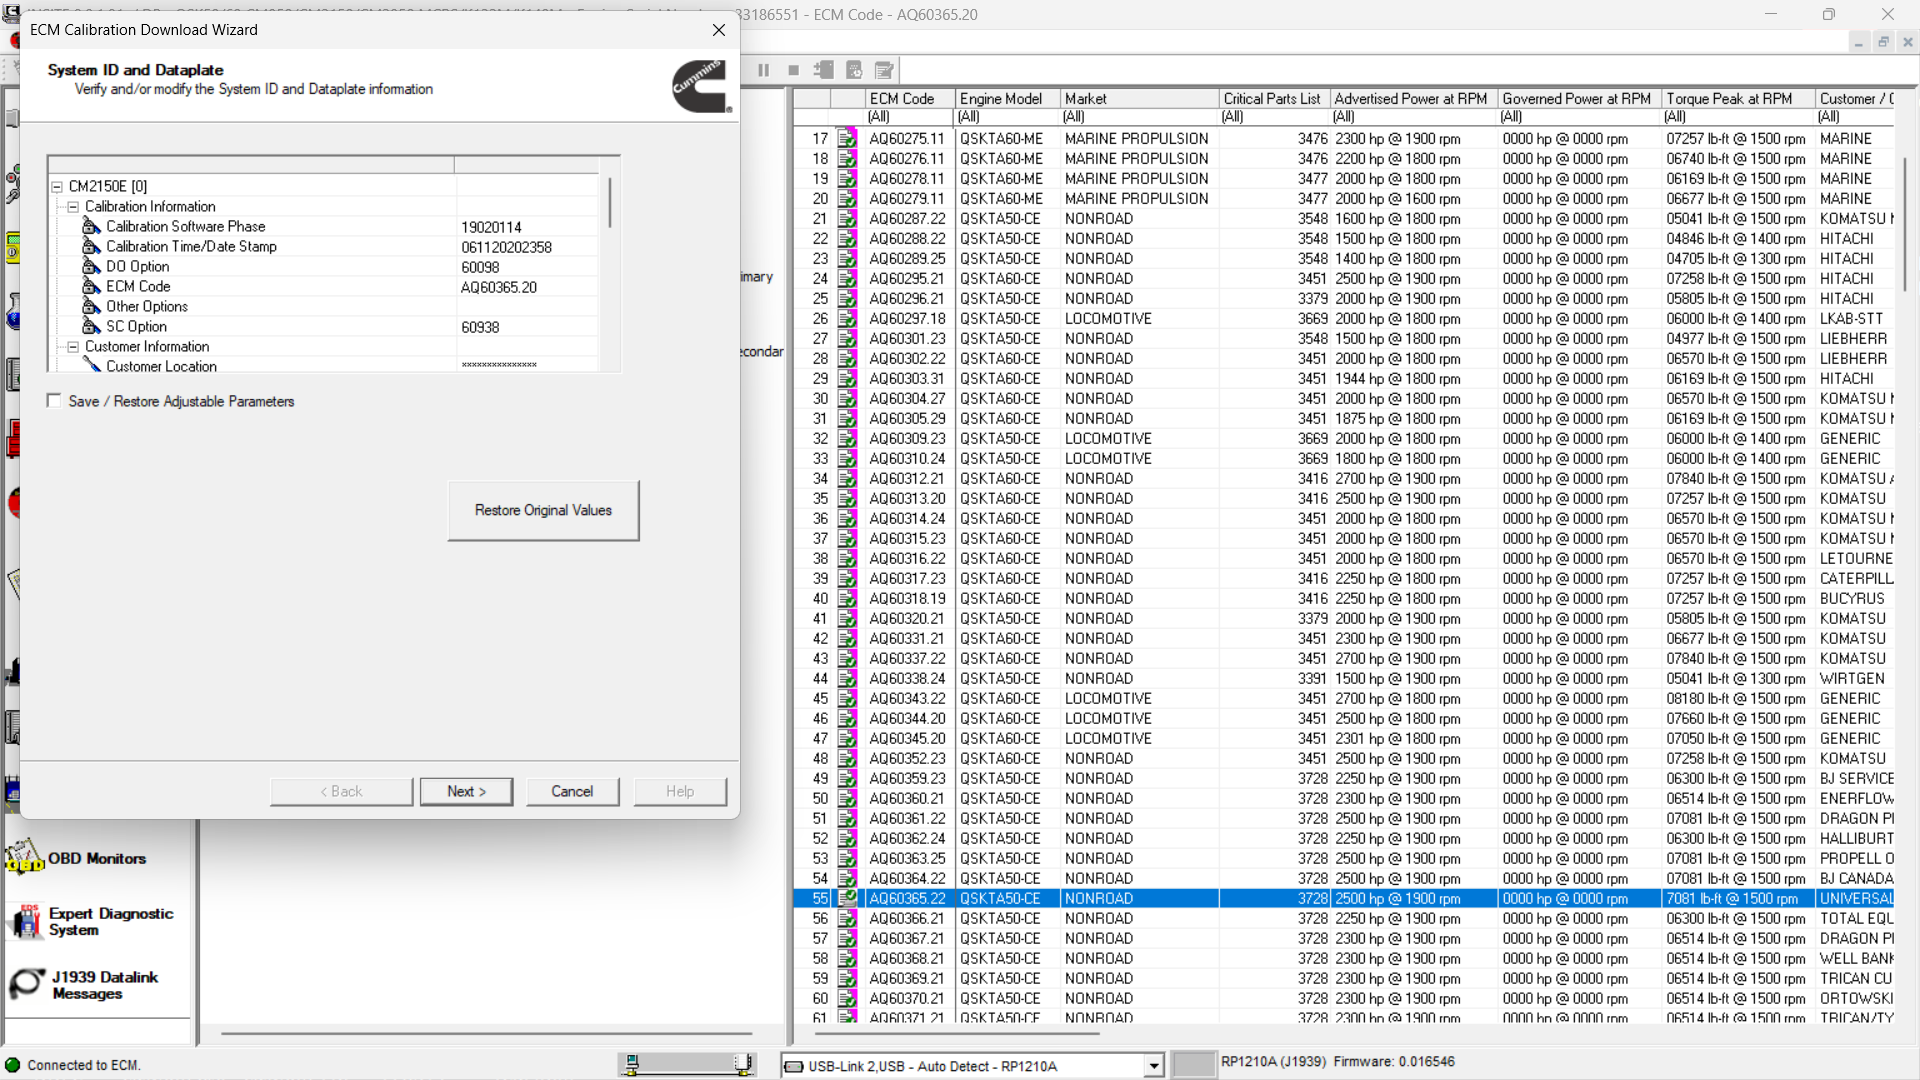
Step 7: Verify Primary ECM System ID and Dataplate Information
A System ID and Dataplate Information window will open.
For the Primary ECM, verify or modify the System ID and Dataplate information.
Example:
- Primary ECM: AQ60365.20
Values that are not locked can be changed by double-clicking in the right-hand column and entering the correct value.
You may also select:
- Save/Restore Adjustable Parameters
- Restore Original Values
- Next
Click Next when all information is correct.
Step 8: Select Calibration for Secondary ECM 1
Next, select the calibration code for Secondary ECM 1.
Example:
- Secondary ECM 1 Calibration: AR60325.15
After selecting the correct ECM code, click Next.
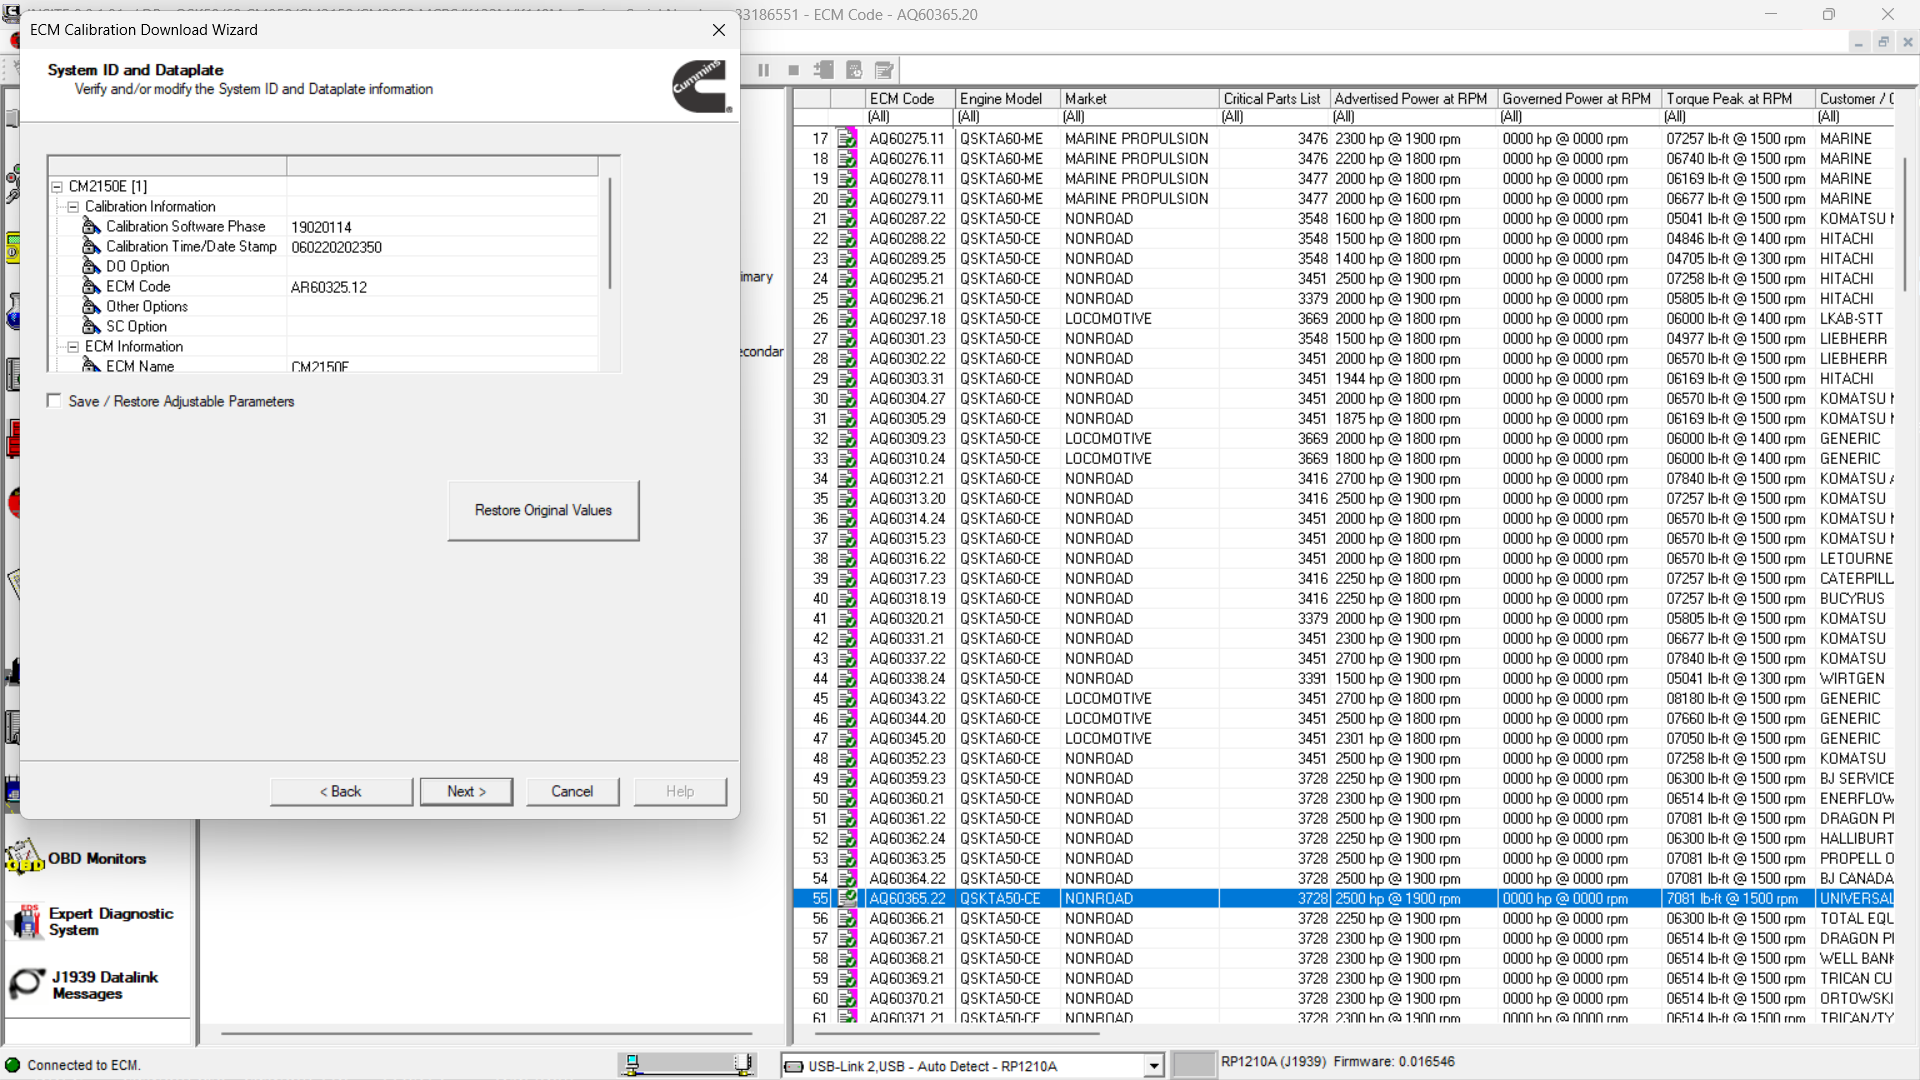
Then verify or modify the System ID and Dataplate information for Secondary ECM 1.
Example shown in the original process:
- Secondary ECM 1: AR60325.12
Click Next to continue.
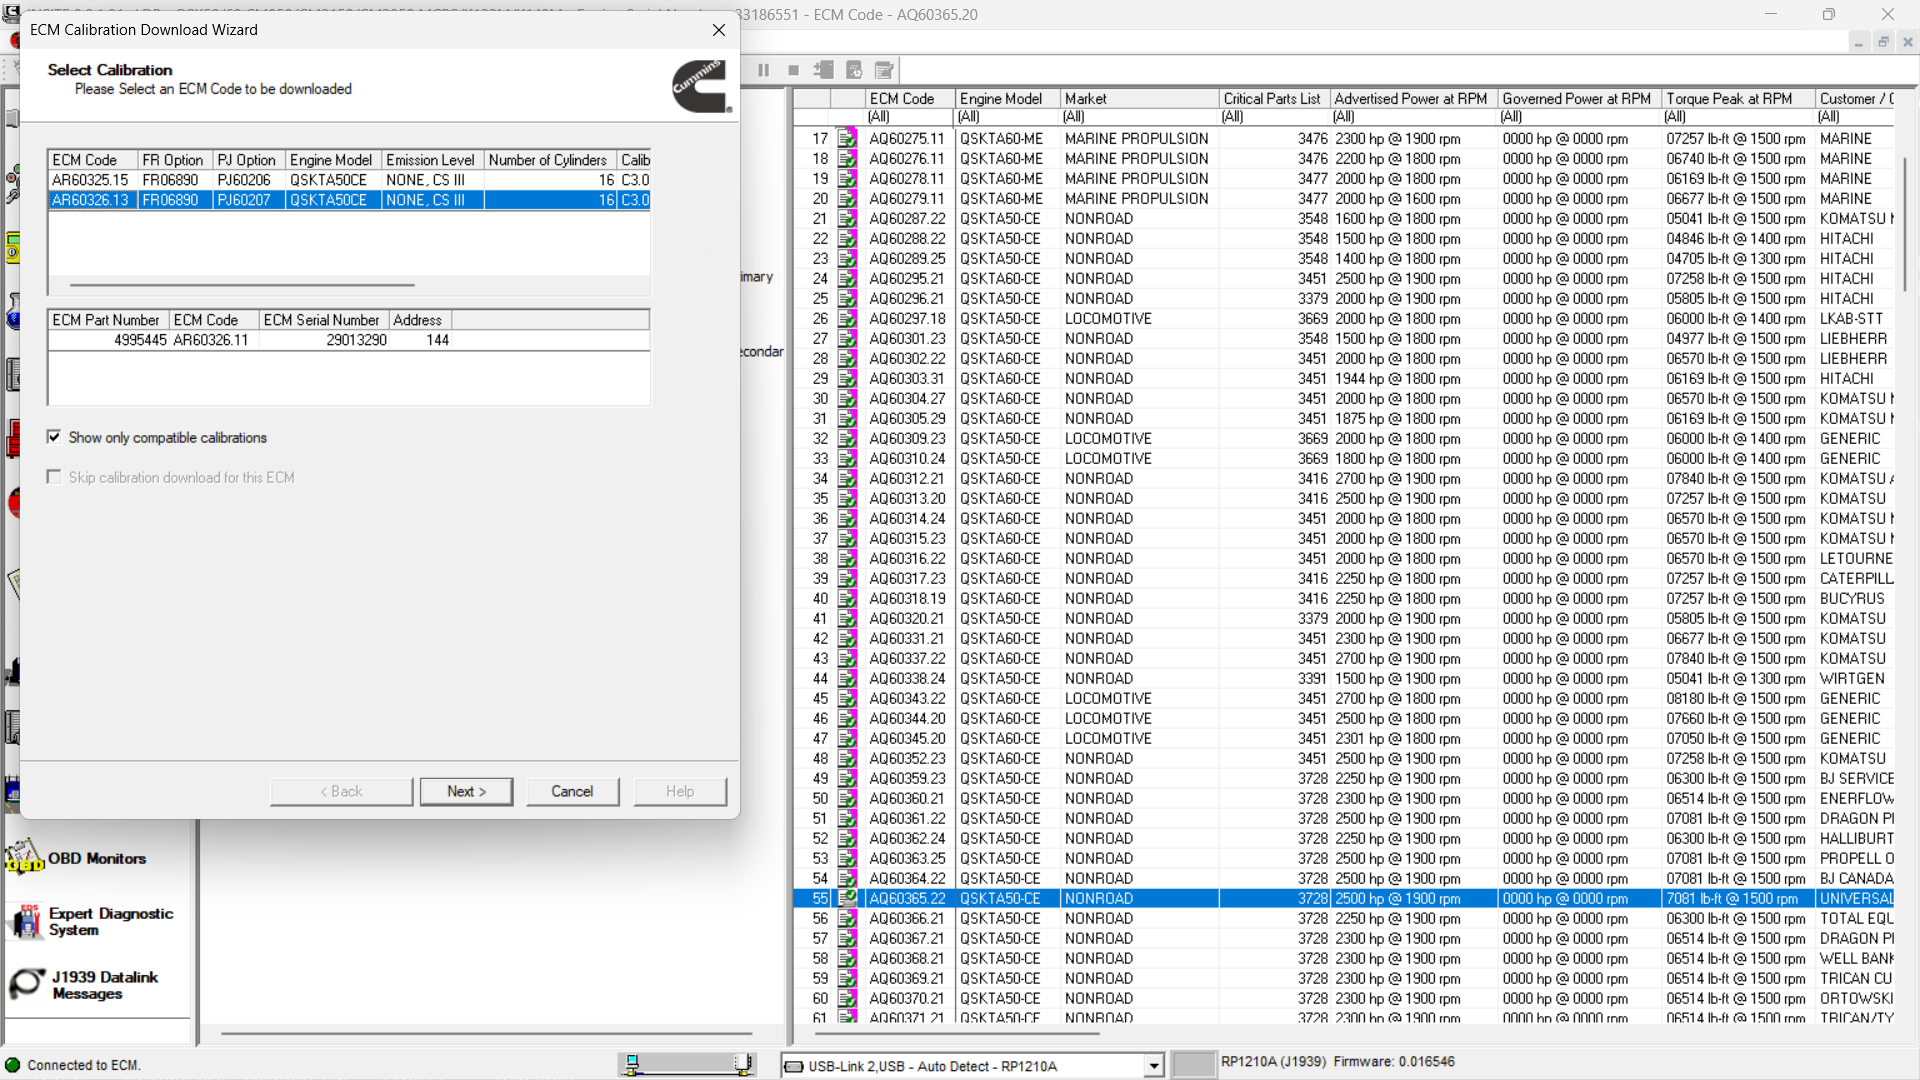
Step 9: Select Calibration for Secondary ECM 2
Now select the calibration code for Secondary ECM 2.
Example:
- Secondary ECM 2 Calibration: AR60326.13
Click Next.
Then verify or modify the System ID and Dataplate information for Secondary ECM 2.
Example shown in the original process:
- Secondary ECM 2: AR60326.11
Click Next to continue.
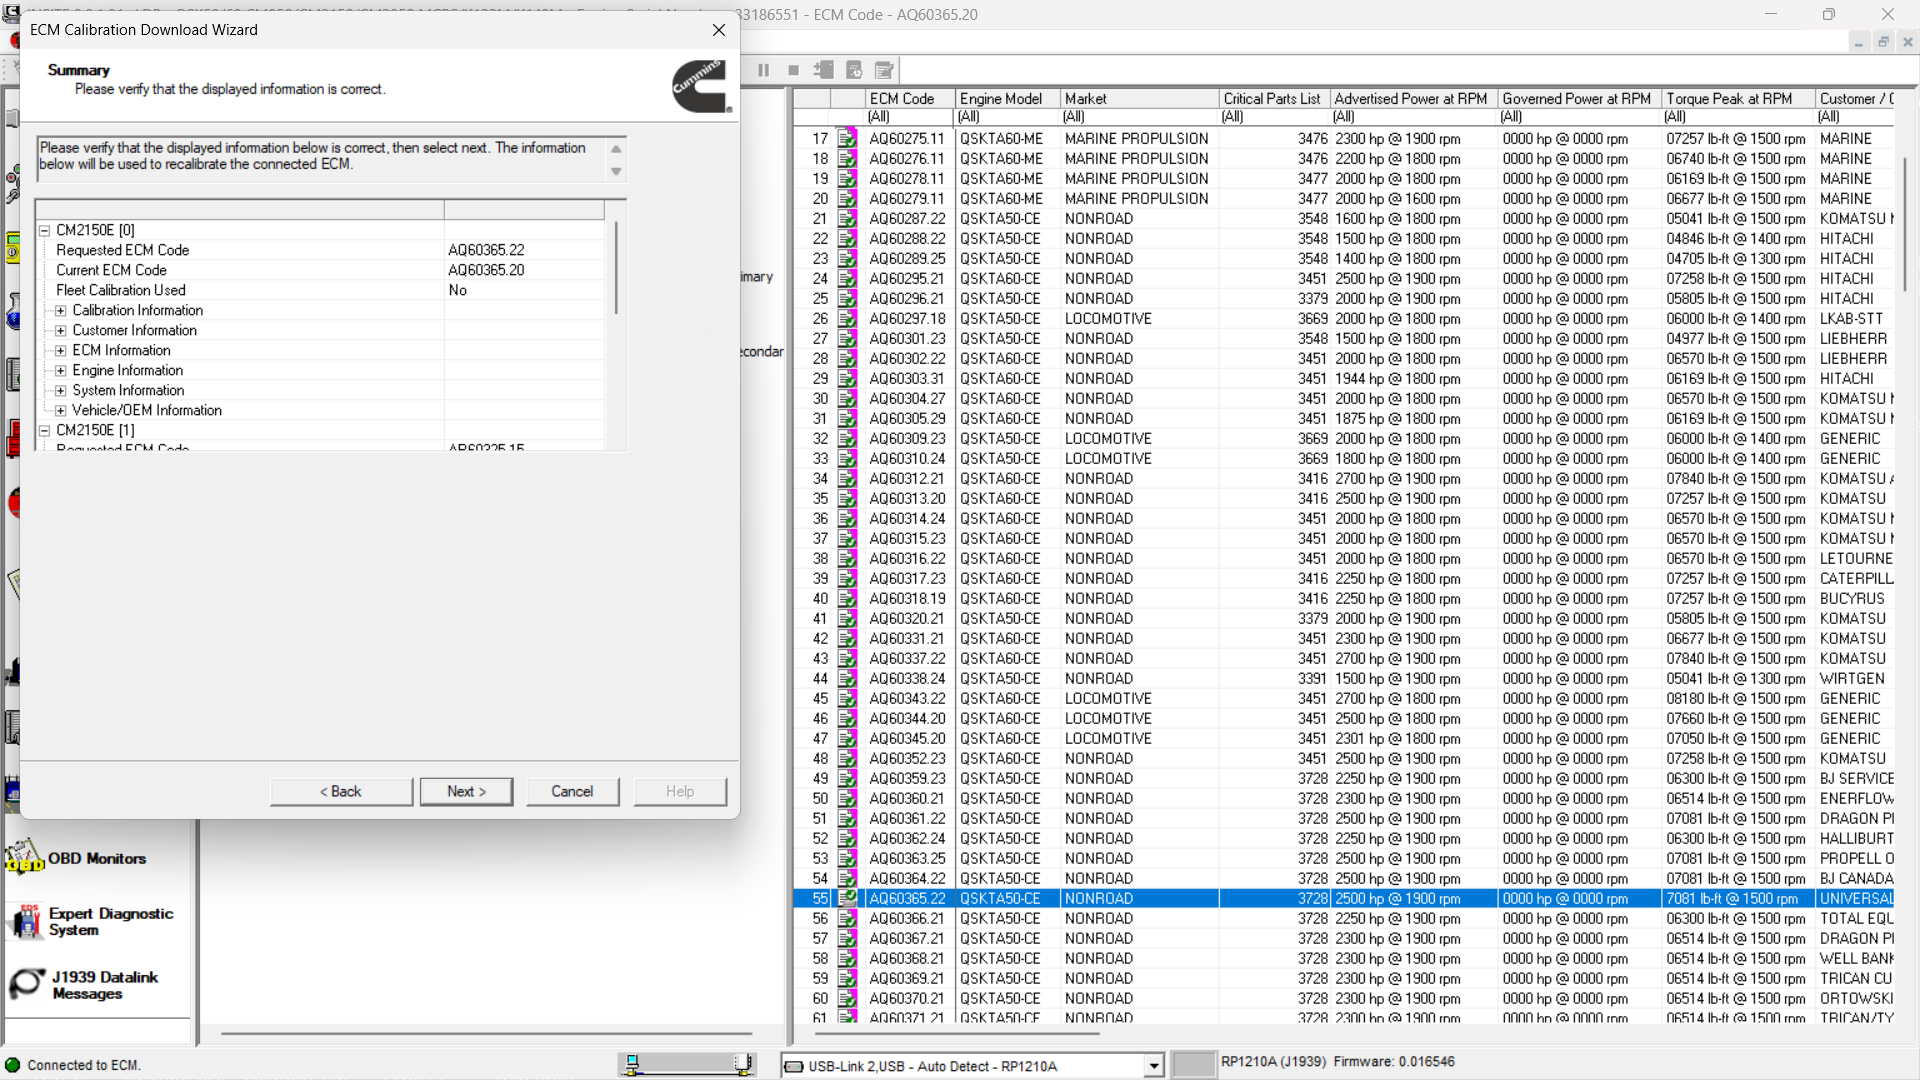
Step 10: Verify the Calibration Summary
INSITE will display a summary of the calibration transfer.
Carefully check that all ECM information is correct, including:
| ECM Position | Example ECM Code |
|---|---|
| Primary ECM | AQ60365.20 |
| Secondary ECM 1 | AR60325.15 |
| Secondary ECM 2 | AR60326.13 |
If the summary is correct, click Next.
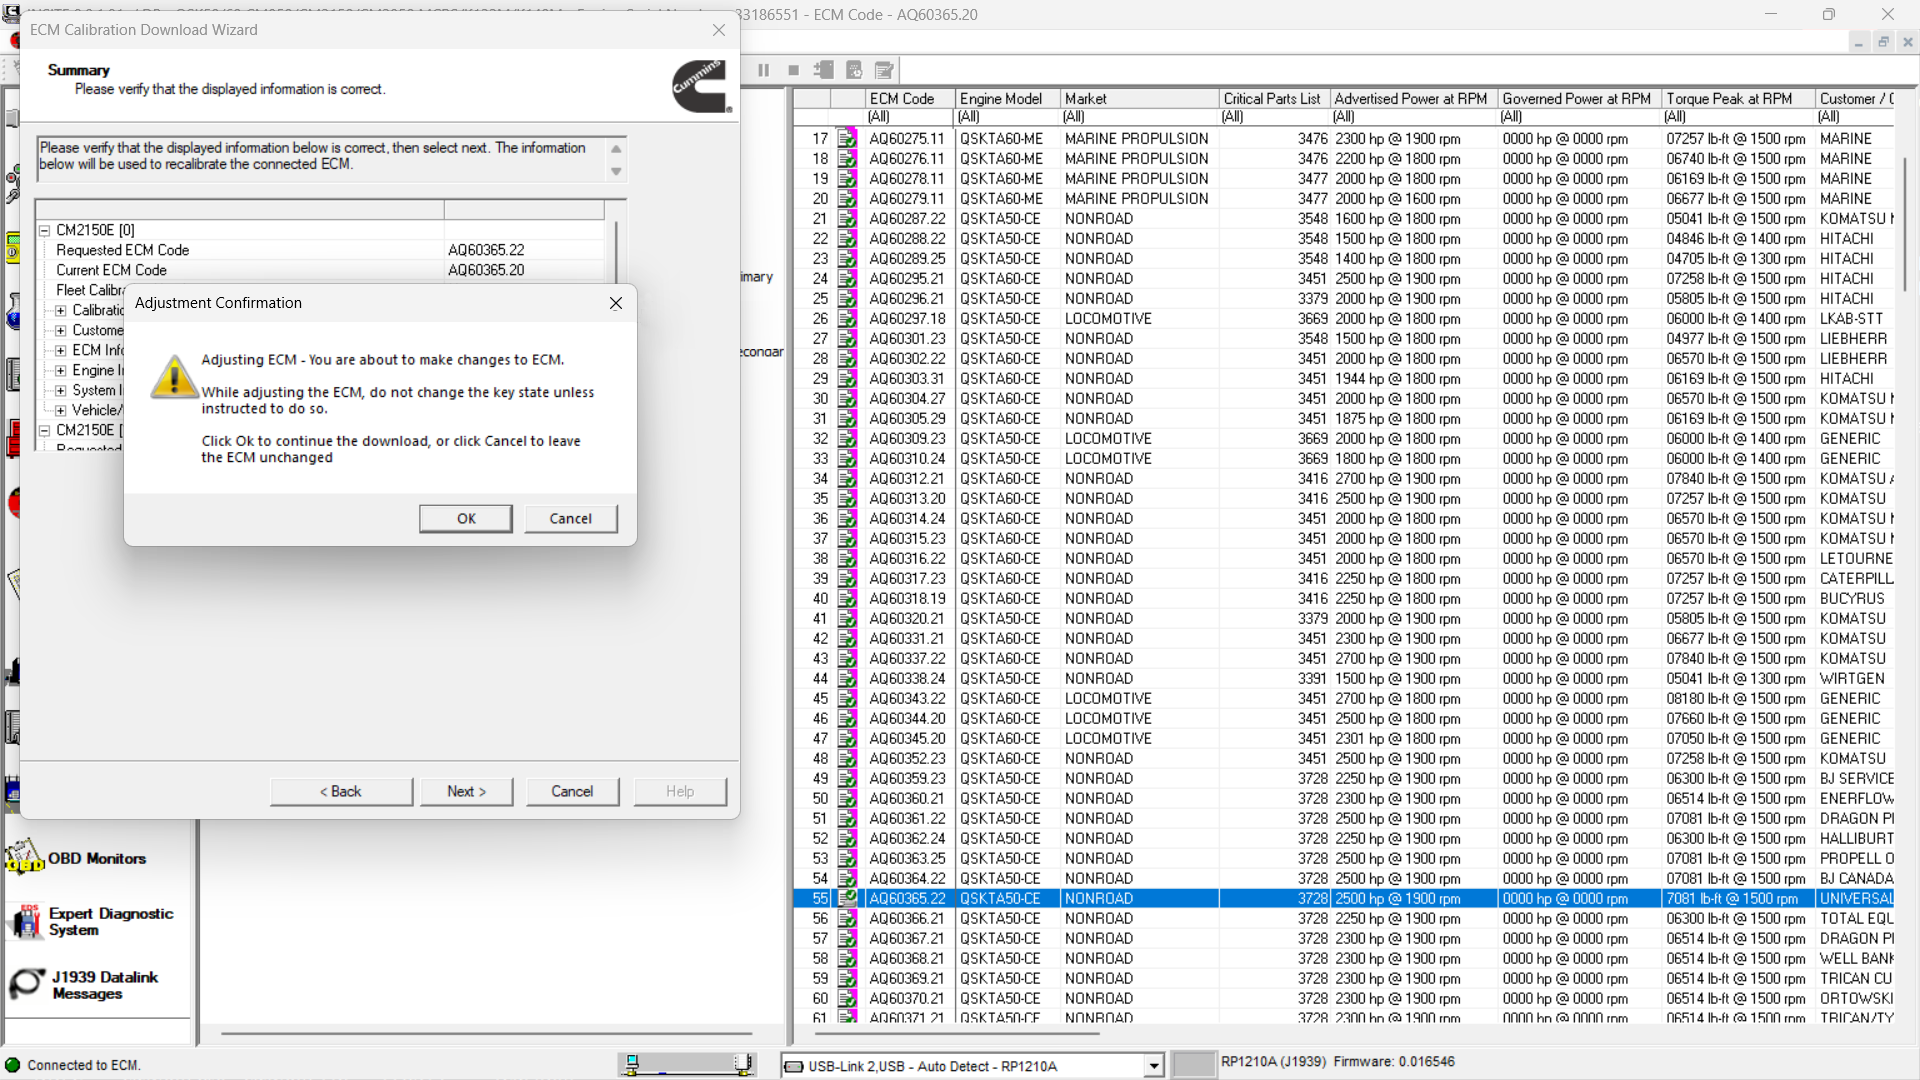
Step 11: Confirm the Adjustment Message
An Adjustment Confirmation message will appear.
Click OK to continue.
At this point, INSITE will begin the ECM calibration transfer process.
Important:
Do not turn off the key switch or disconnect the diagnostic adapter unless INSITE instructs you to do so.
Step 12: Start ECM Calibration Transfer
INSITE will begin downloading the calibration to the ECMs.
The process may include:
- Calibration transfer to the Primary ECM
- Calibration transfer to Secondary ECM 1
- Calibration transfer to Secondary ECM 2
Follow all INSITE prompts during the transfer.
Do not interrupt the process.

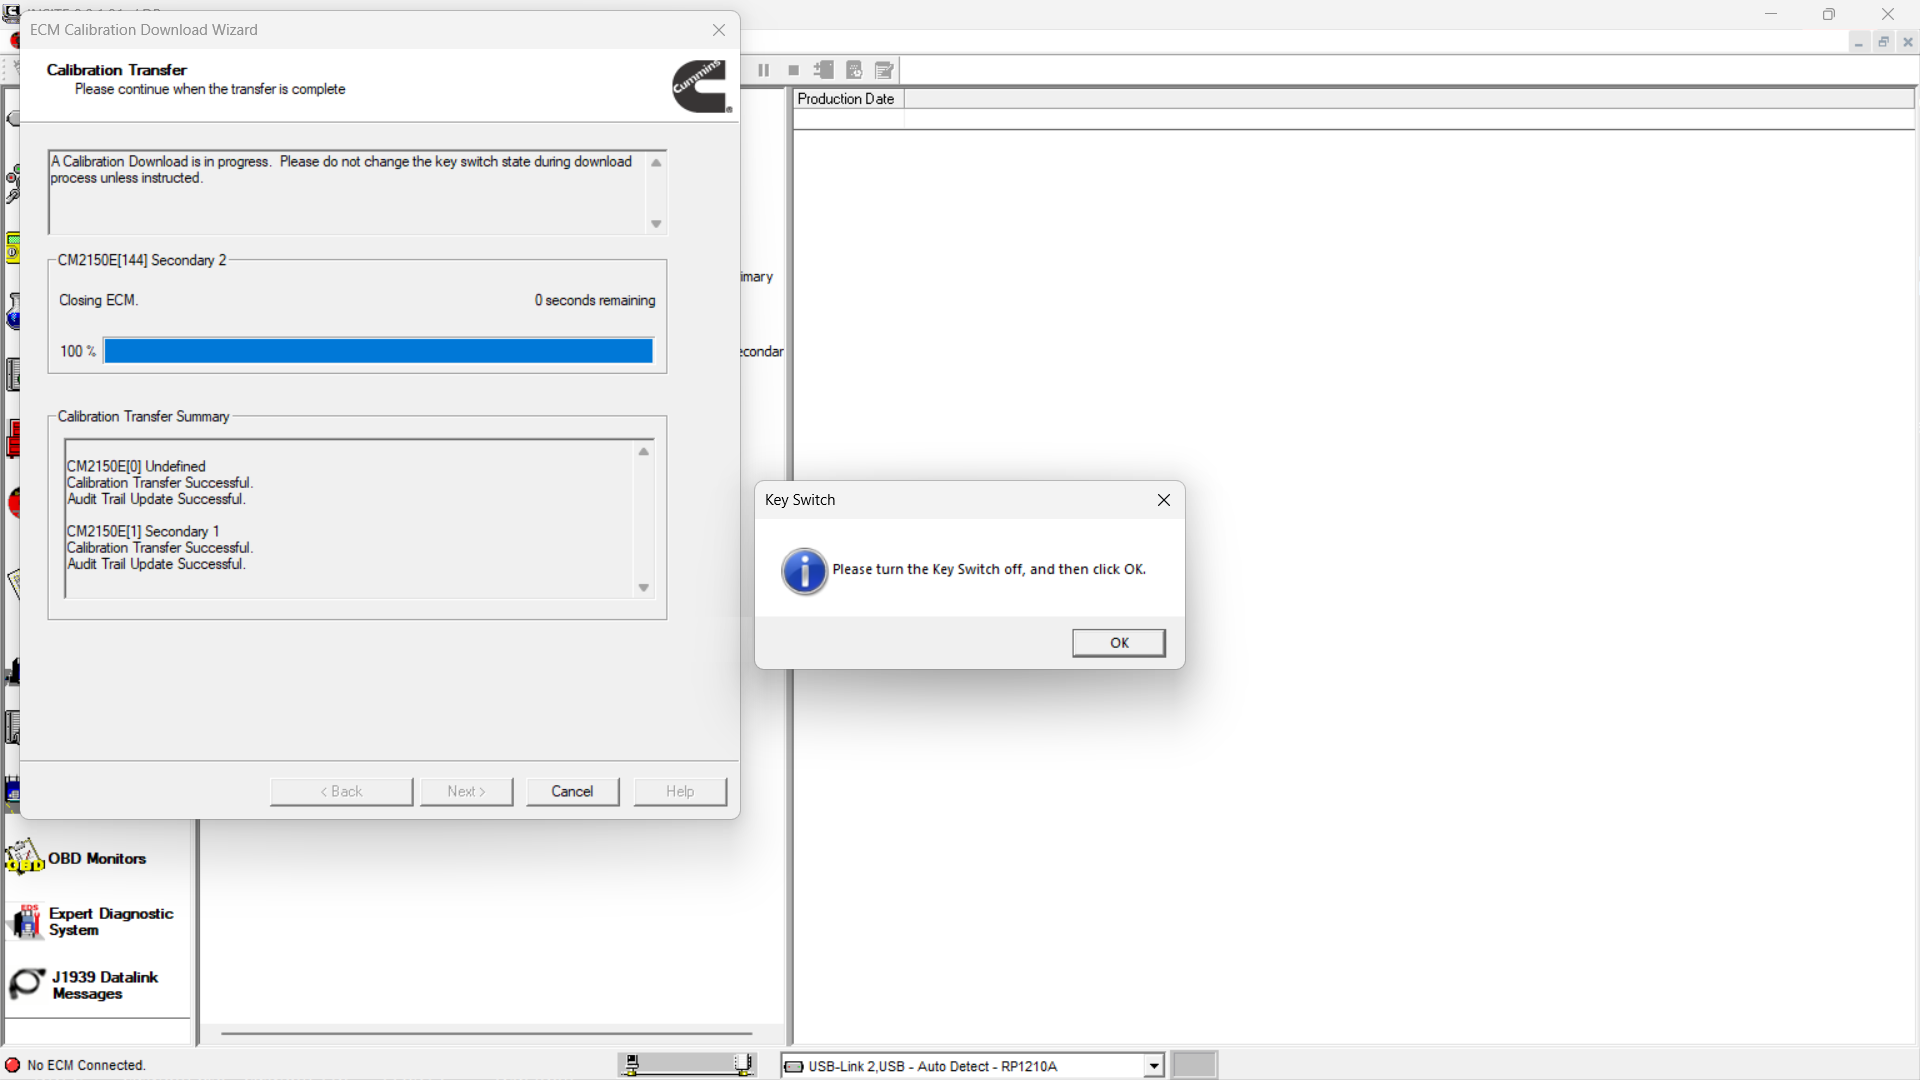
Step 13: Cycle the Key Switch When Prompted
At the end of the calibration download, INSITE may require a key switch cycle.
Follow the instructions displayed by INSITE:
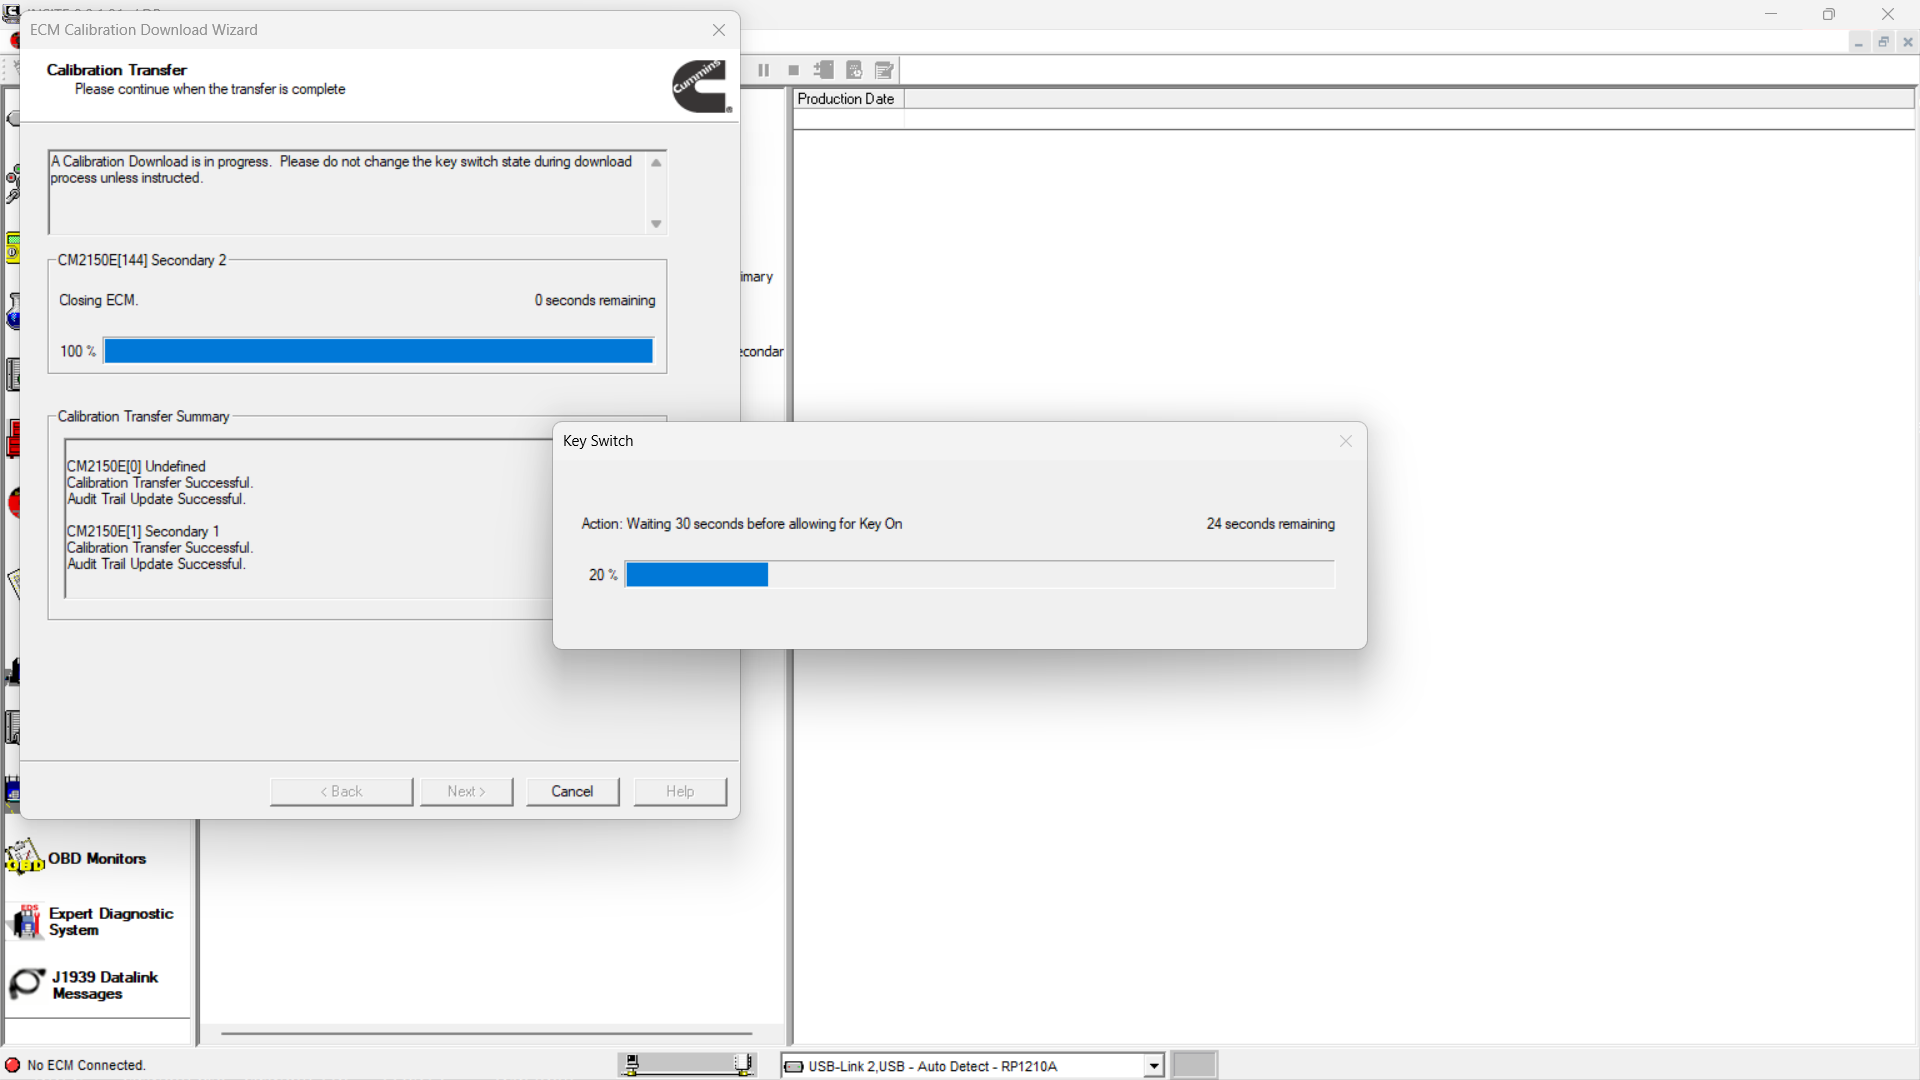
- Turn the key switch OFF when prompted.
- Wait about 30 seconds.
- Turn the key switch ON again.
- Click OK to continue.
Do not perform the key cycle too early. Wait until INSITE displays the instruction.
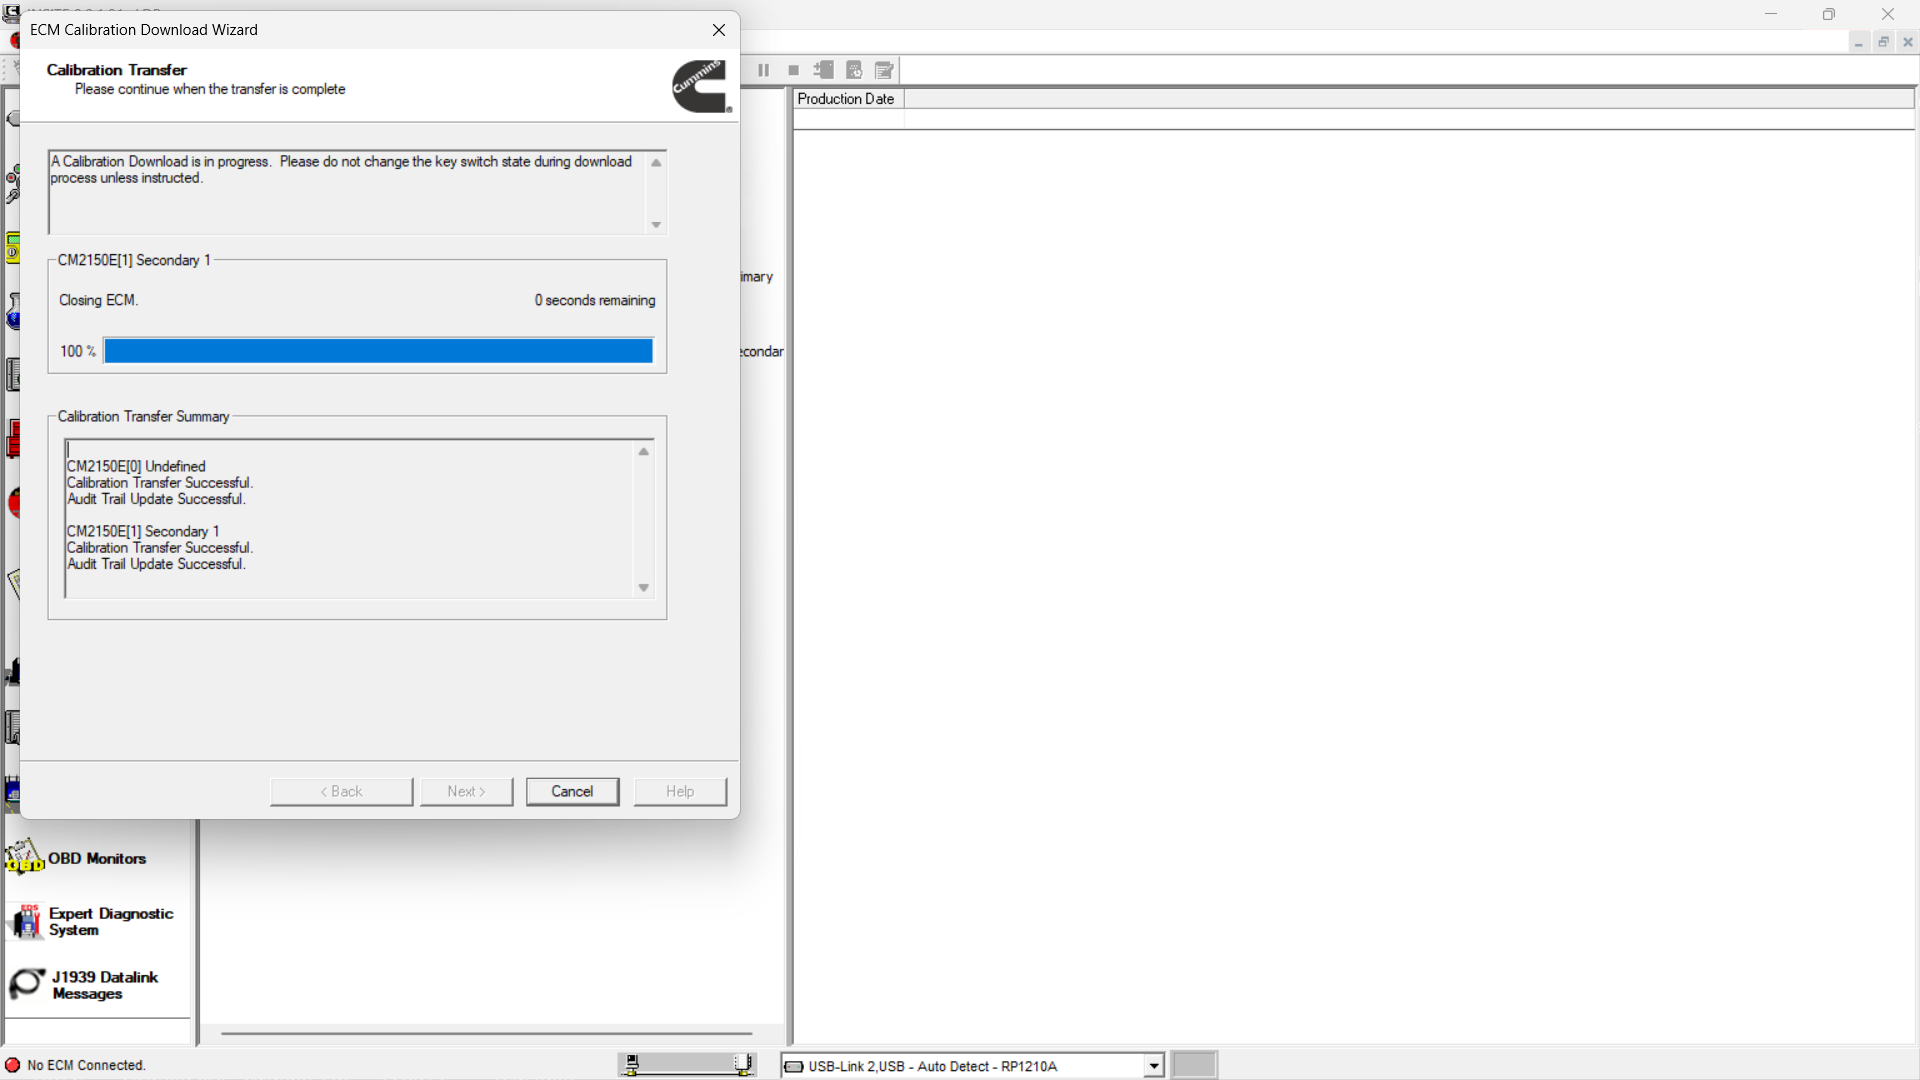
Step 14: Check Calibration Transfer Results
After the key switch cycle, INSITE will display the calibration transfer result.
If the process is completed correctly, the result should show:
Calibration Transfer Results = Successful
Click OK to continue.
If Save and Restore was selected, INSITE will also show the result of the parameter recovery process.
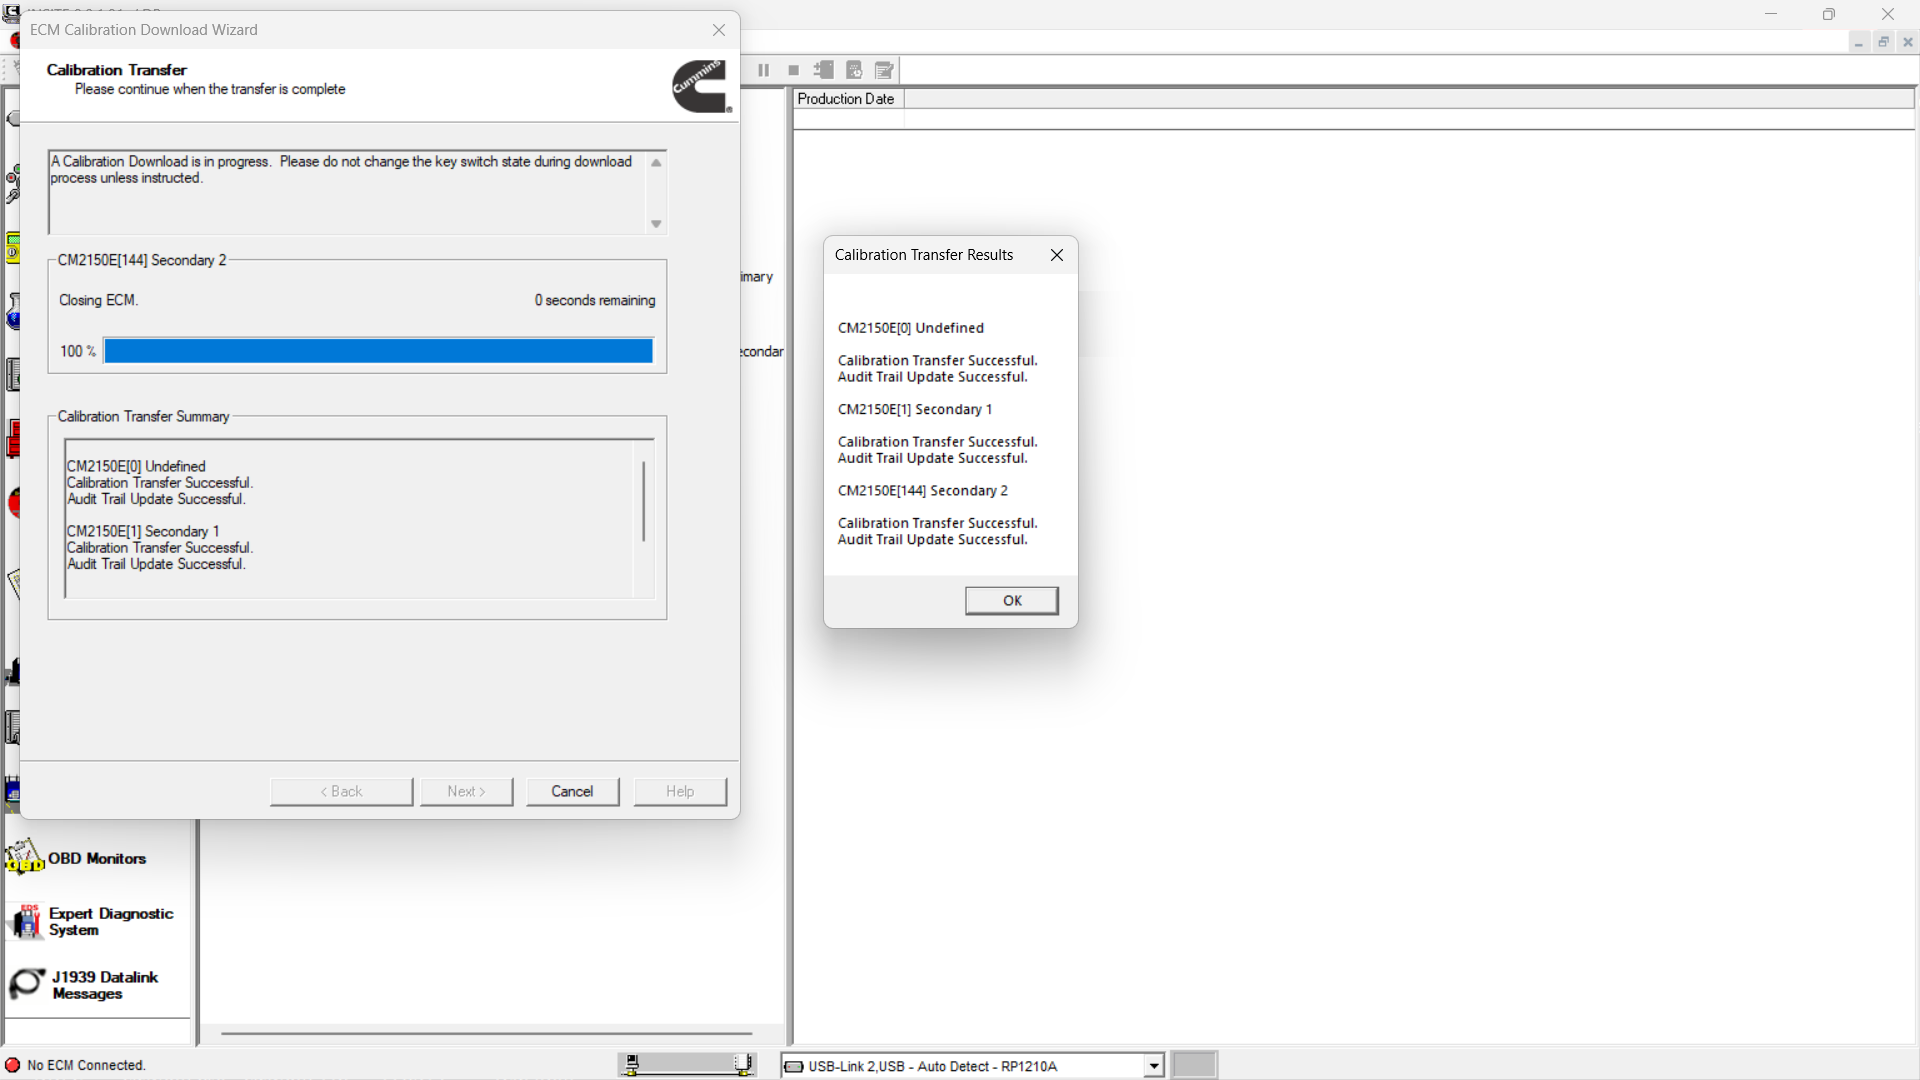
Step 15: Review the Calibration Transfer Summary
After the calibration transfer is complete, INSITE will display a summary window.
Review the results carefully.
If some adjustable parameters could not be restored, INSITE will list them in the Parameters Not Restored window. These parameters may need to be manually adjusted through:
Features and Parameters > Viewbar
Click Next to continue.

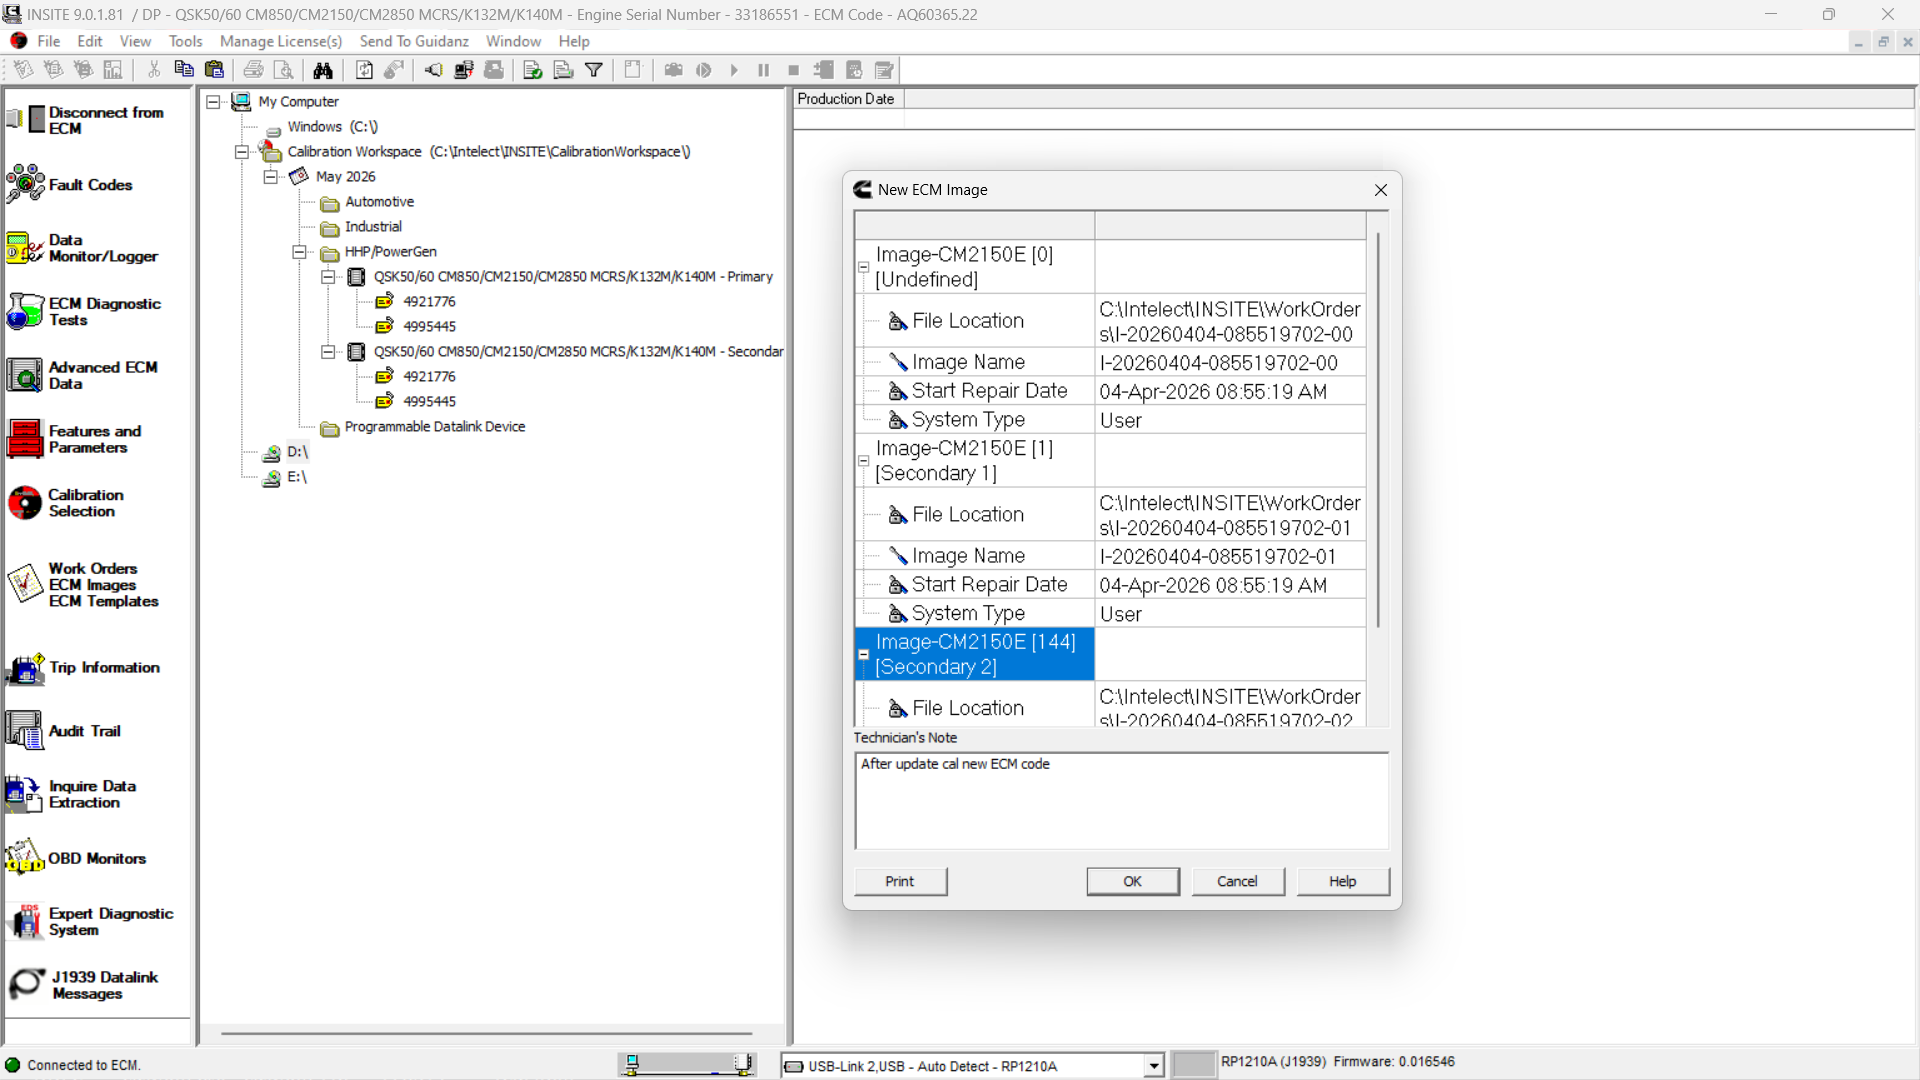
Step 16: Finish the ECM Calibration Download Wizard
Click Finish to close the ECM Calibration Download Wizard.
After the wizard closes, INSITE may create a new work order or ECM image.
Example:
Work Order / Image Creation: New ECM Image
This image can be useful for service records and future troubleshooting.
Common Tips for Cummins QSKTA50-CE / QSK60 ECM Calibration
To reduce the risk of calibration failure, follow these best practices:
- Confirm the correct engine model before calibration.
- Use the correct ECM code for each ECM position.
- Maintain stable battery voltage during programming.
- Do not disconnect the datalink adapter during calibration.
- Do not turn off the key switch unless INSITE instructs you to do so.
- Save the work order or ECM image after calibration.
- Check adjustable parameters after the calibration process.
- Record all ECM codes before and after programming.
Common Problems During Multiple ECM Download
1. Wrong ECM Code Selected
If the wrong ECM code is selected, the engine may not operate correctly after calibration. Always confirm the ECM code through ECM/PDD Code Search or authorized calibration information.
2. Parameters Not Restored
Some parameters may not restore automatically after calibration. If this happens, INSITE will list them in the Parameters Not Restored window. Save or print the list and manually adjust them later.
3. Calibration Transfer Interrupted
If laptop power, battery voltage, or communication is interrupted, calibration may fail. Use a stable power source and avoid moving the diagnostic cable during the process.
4. Key Switch Cycle Performed Too Early
Only cycle the key switch when INSITE prompts you. Turning the key off too early may interrupt the calibration process.
Conclusion
Using Cummins INSITE to download multiple ECM calibrations for QSKTA50-CE and QSK60 engines requires careful ECM code selection, correct module order, stable communication, and proper key switch operation.
For a 3 ECM system, make sure the Primary ECM, Secondary ECM 1, and Secondary ECM 2 calibration codes are selected correctly before starting the transfer. After calibration, always review the transfer result, check parameter recovery status, and save the new ECM image for future service reference.
FAQ
What software is used for Cummins QSK60 ECM calibration?
Cummins INSITE is commonly used to connect to the ECM, check calibration information, search ECM/PDD codes, and transfer calibration files to Cummins engine control modules.
What is Multiple ECM Download in Cummins INSITE?
Multiple ECM Download is used when the engine control system has more than one ECM. For QSKTA50-CE or QSK60 applications, this may include a Primary ECM, Secondary ECM 1, and Secondary ECM 2.
Should I choose Single Key-Off for multiple ECM calibration?
Yes. When calibrating the full engine control system or more than one ECM, select Calibrate Engine Control System (Single Key-Off) in the INSITE Calibration Download Wizard.
What does Save/Restore Adjustable Parameters do?
This option saves adjustable parameters before calibration and restores them after the calibration download is complete, if supported by the ECM. If it is not selected or not supported, parameters may return to default calibration values.
What should I do if some parameters are not restored?
INSITE will display the parameters that were not restored. You can save or print the list and manually adjust those parameters through Features and Parameters on the Viewbar.
Can I turn off the key switch during calibration?
Do not turn off the key switch unless INSITE instructs you to do so. The key switch cycle should only be performed when prompted during the calibration process.
Leave a Reply